Learning how to build furniture, and trying to become a better woodworker, has
been very rewarding! I’ve been able to learn so much to complete projects like
this one. And today, I’ll be learning how to chamfer the edges of the airy
bookshelf brackets and shelves!
I invested in a good router bit to reduce tear out and hopefully make a chamfer
that doesn’t need much sanding, improving the overall finished look of the
bookshelf. Let’s see how it goes! 
 Starting Point
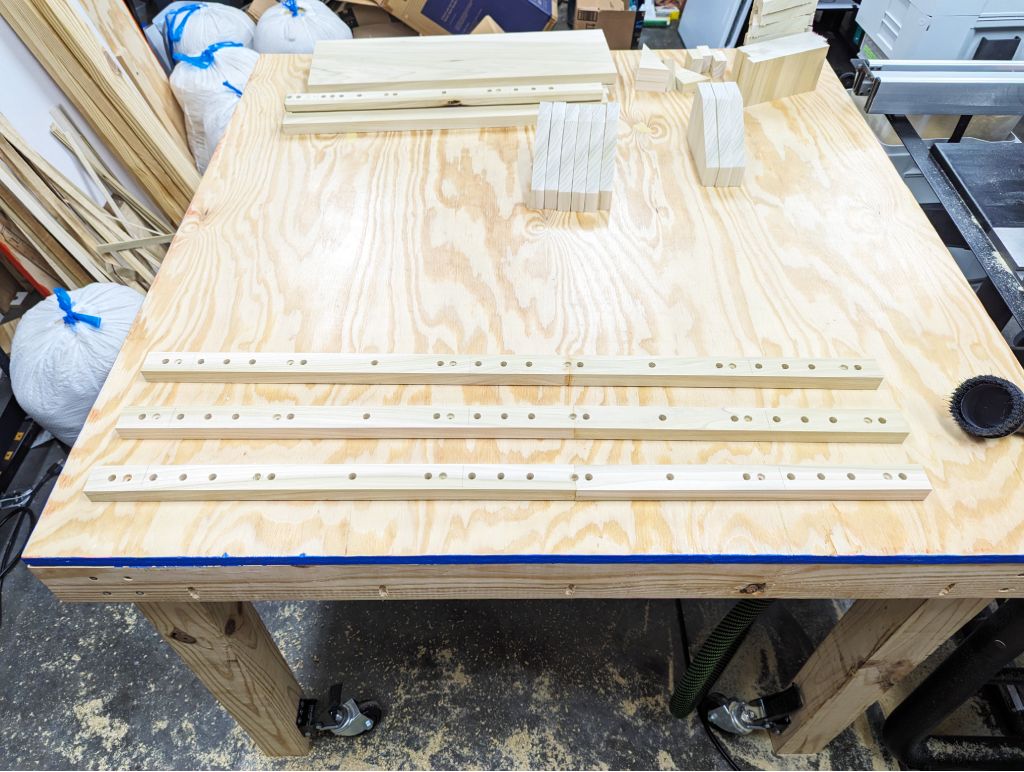 |
In the last article, we readied the wall brackets for routing and sanding! Ignore the many bags of sawdust in the background  |
 |
| And with the shelf brackets, all the precise dowel holes are complete, also ready for routing! They were already sanded in another article. |
 Routing the Brackets
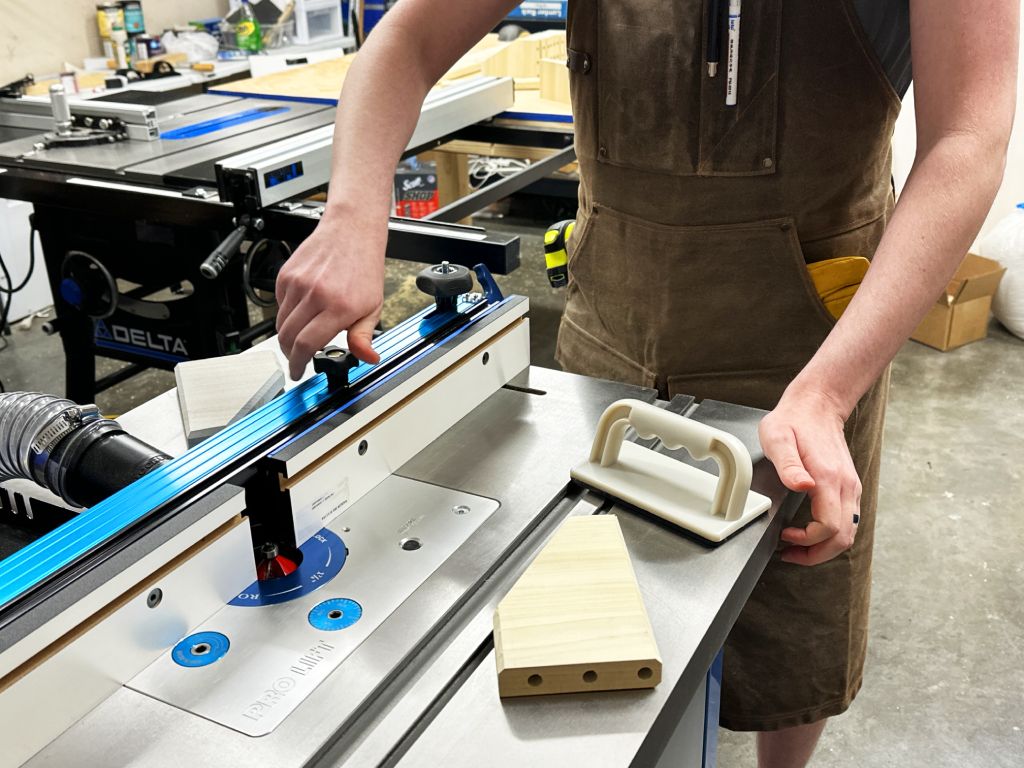 |
| I adjust my router table fence so that I can get the same chamfer depth as I did a few days ago on my “story bracket”—you can see it laying behind the fence. |
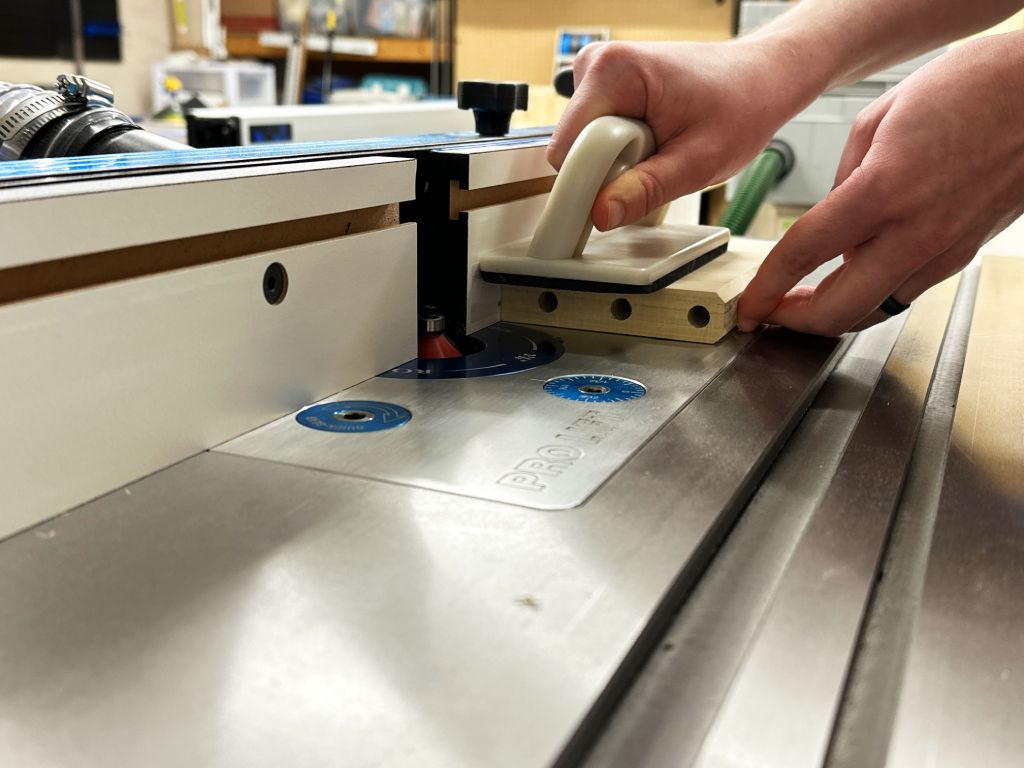 |
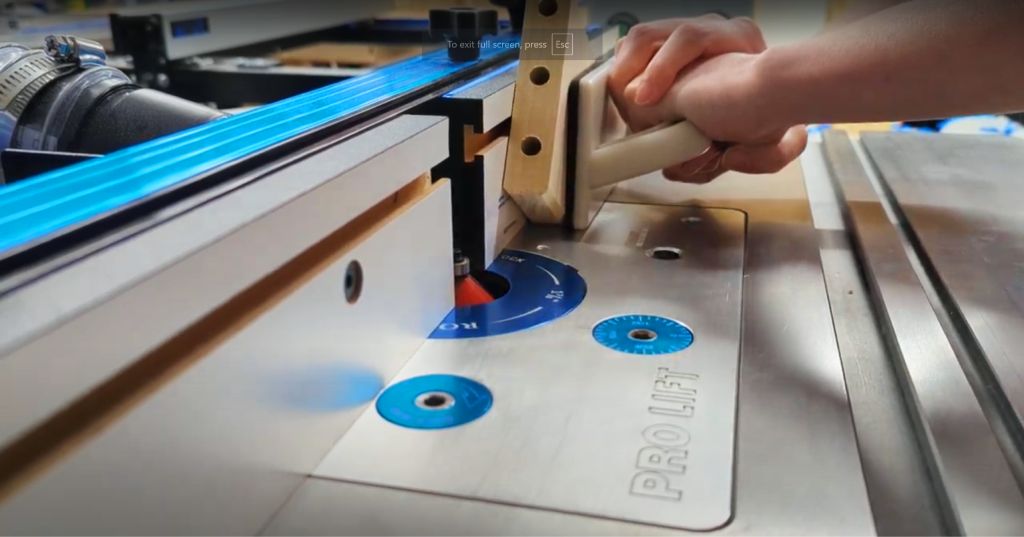
| Using my push block for safety, I can slowly and steadily slide the wood into the spinning bit, making my chamfer. Going at the perfect speed means no burn marks and a smooth cut, thus less sanding later. For extra safety, I remove my finger holding the wood before the wood makes contact with the bit. |
 |
| It is important to route any chamfers on end grain first since these areas are most likely to chip out, but only at the back of the cut as the bit exits the wood. Since I want any chip out to happen toward the long grain (will explain why shortly), sometimes I have to put the brackets through at weird angles! |
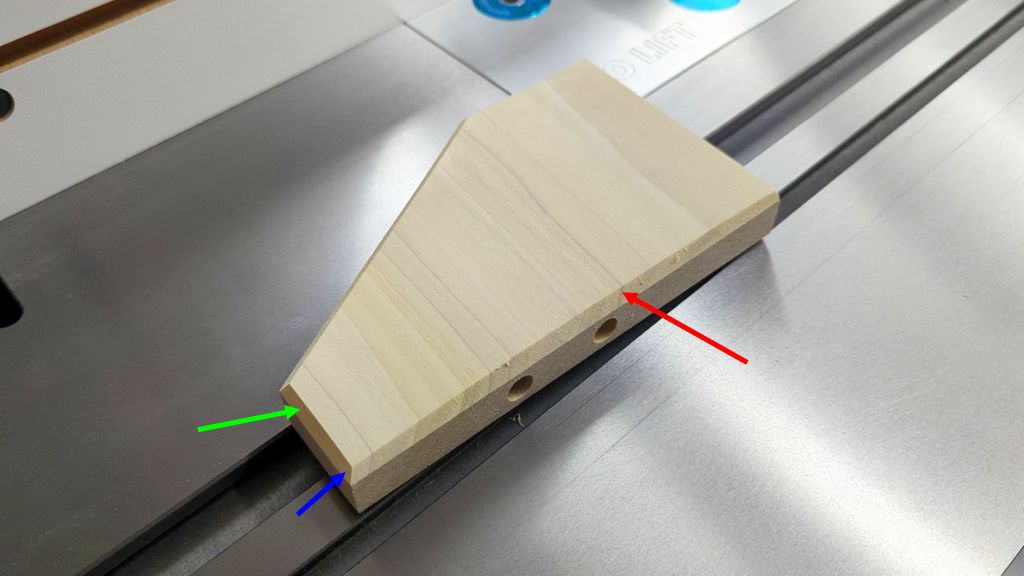 |
Any chip out on the end grain is likely to be minor since I have a good router bit and I’m controlling my feed speed. Because I route the long grain sides (green) after my end grain sides (red), the long grain chamfer will hide any of the chip out from routing the end grain sides! You can’t even tell there was any chip out here (blue), but there was  |
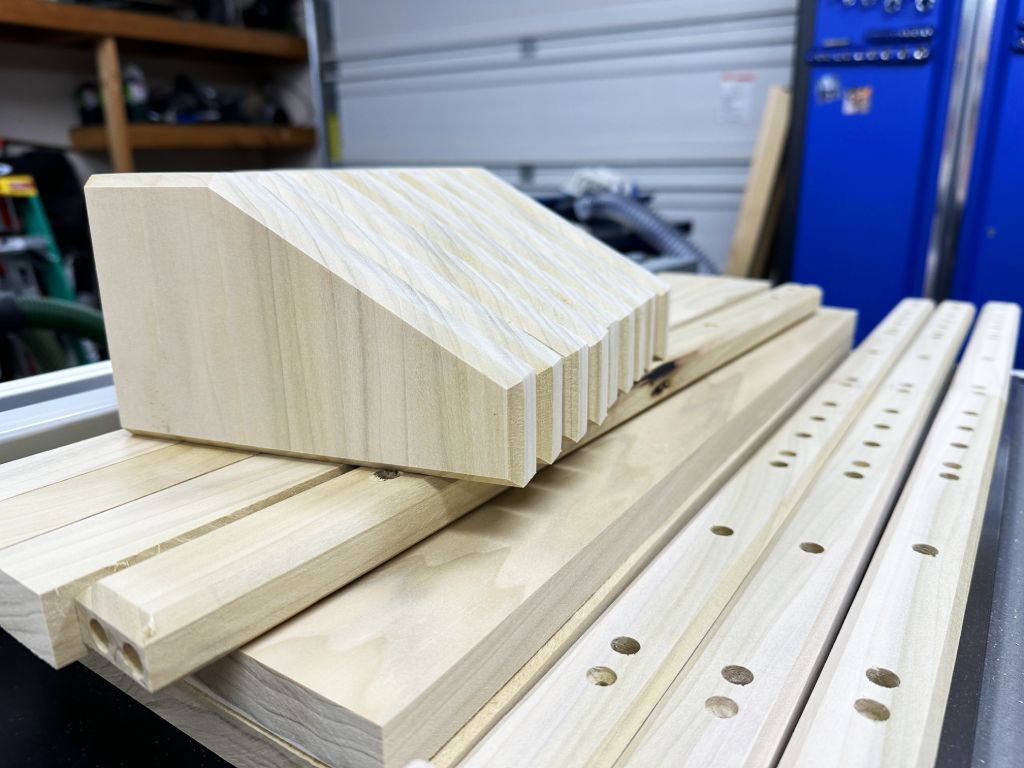 |
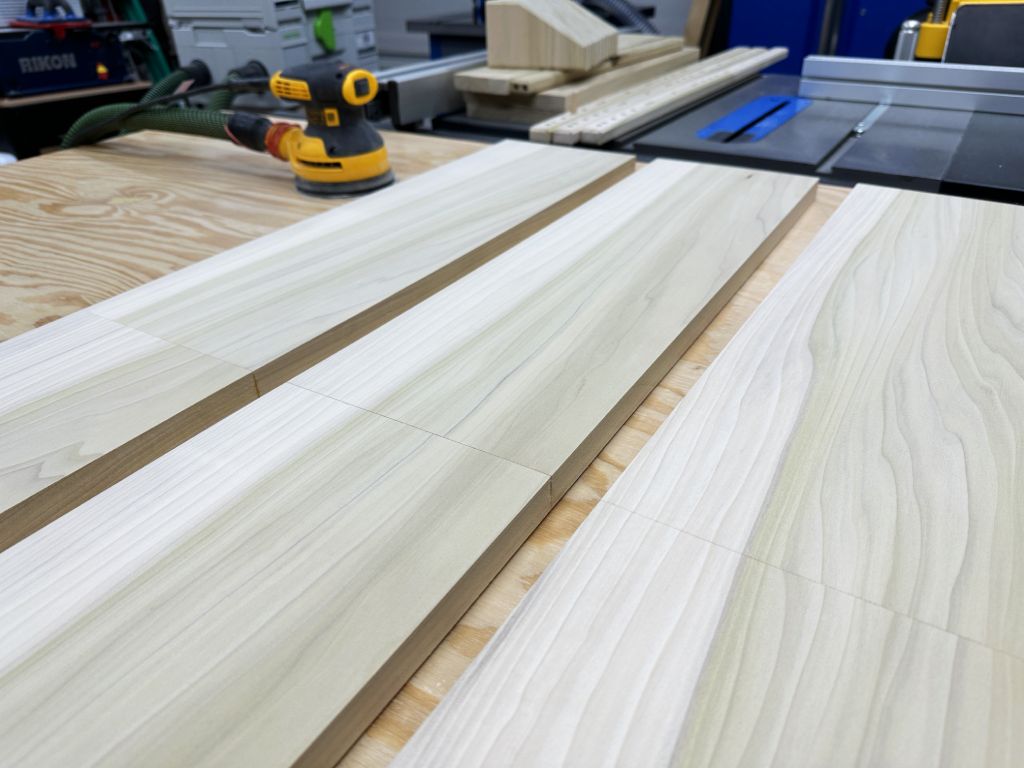
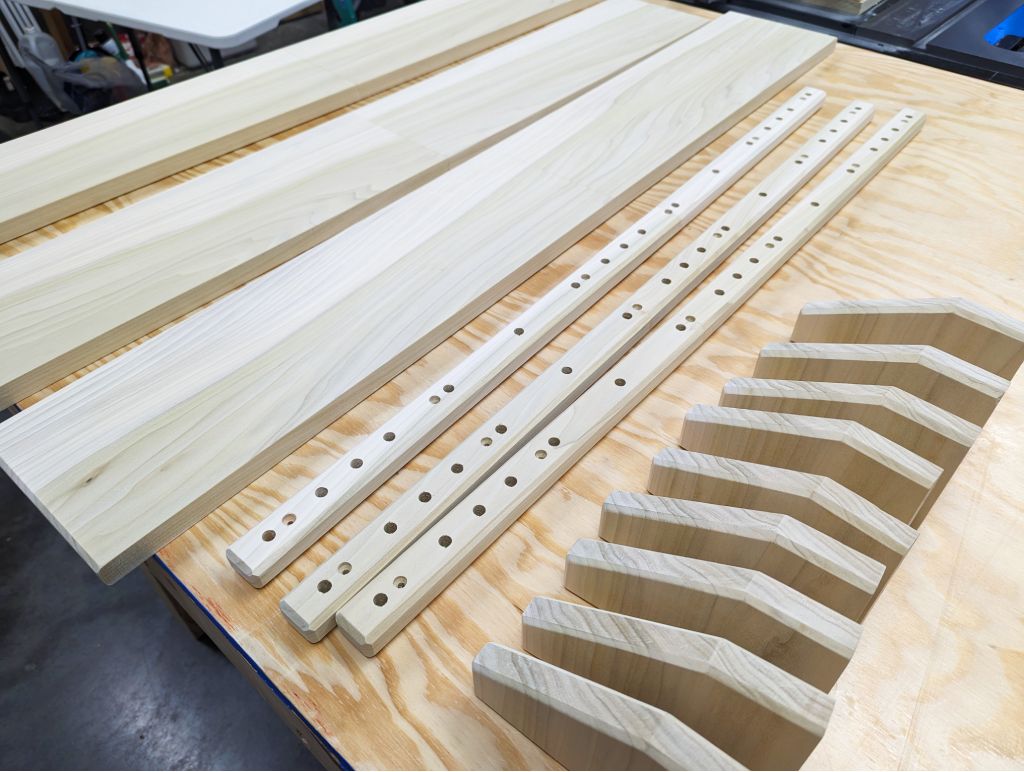
I chamfer the shelf and wall brackets with the help of my wife, Story  , in less than an hour. These are some good looking chamfers! The shelf brackets are sitting on my story stick, and the wall brackets are on the right. , in less than an hour. These are some good looking chamfers! The shelf brackets are sitting on my story stick, and the wall brackets are on the right. |
 |
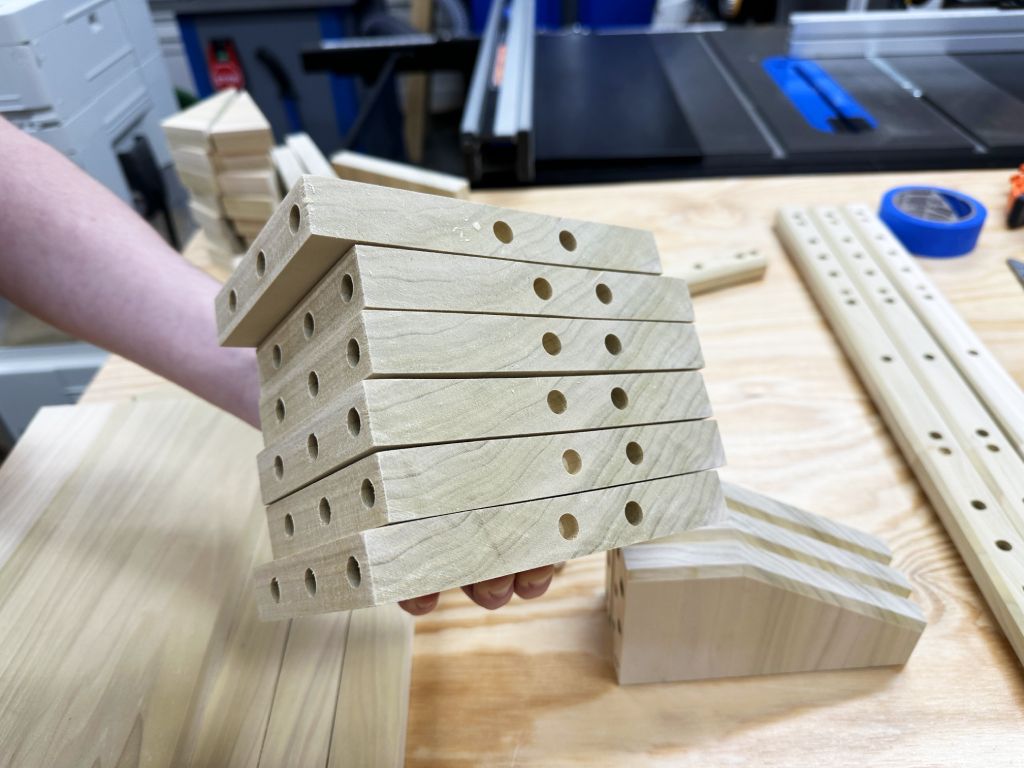
| Here is another view of the shelf bracket chamfers, also showing the holes that will be used to connect these shelf brackets to the wall brackets. |
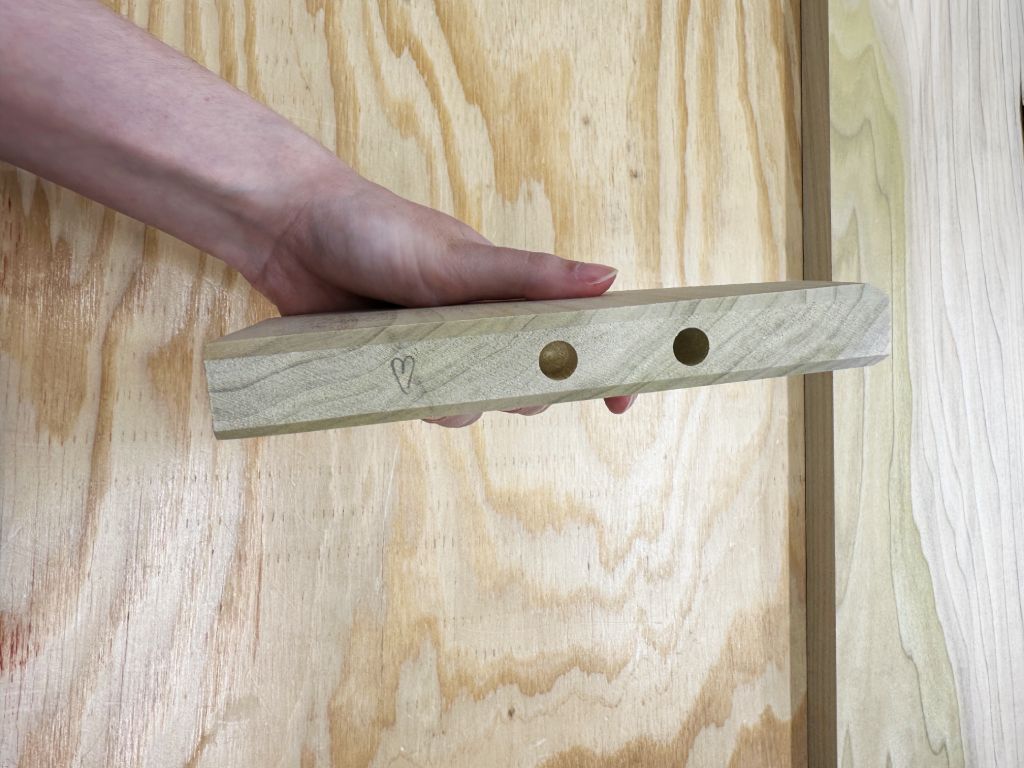 |
Fun fact: we’ve been keeping track of exactly which wood Story has helped process, even since the initial milling! One of the shelf brackets that she chamfered came from that wood, so she marked it with a heart  We’ll make sure to put this one somewhere special in the build! We’ll make sure to put this one somewhere special in the build! |
 +
+ ≠ + Chamfering the Shelves… WAIT!
Before we chamfer the shelves, we want to sand them. Why is it important to sand
the shelves before chamfering? Why does the order of operations matter here?
Because it’s really easy to accidentally sand down the crisp edges too much when
you’re sanding down the faces, just like I did before with the shelf
brackets.
I want this to happen before chamfering since the chamfer will hide this. If I
chamfered THEN sanded, I would likely accidentally sand down the chamfer, making
it look like a thinner and uneven chamfer 
 Sanding Shelves Before Chamfering
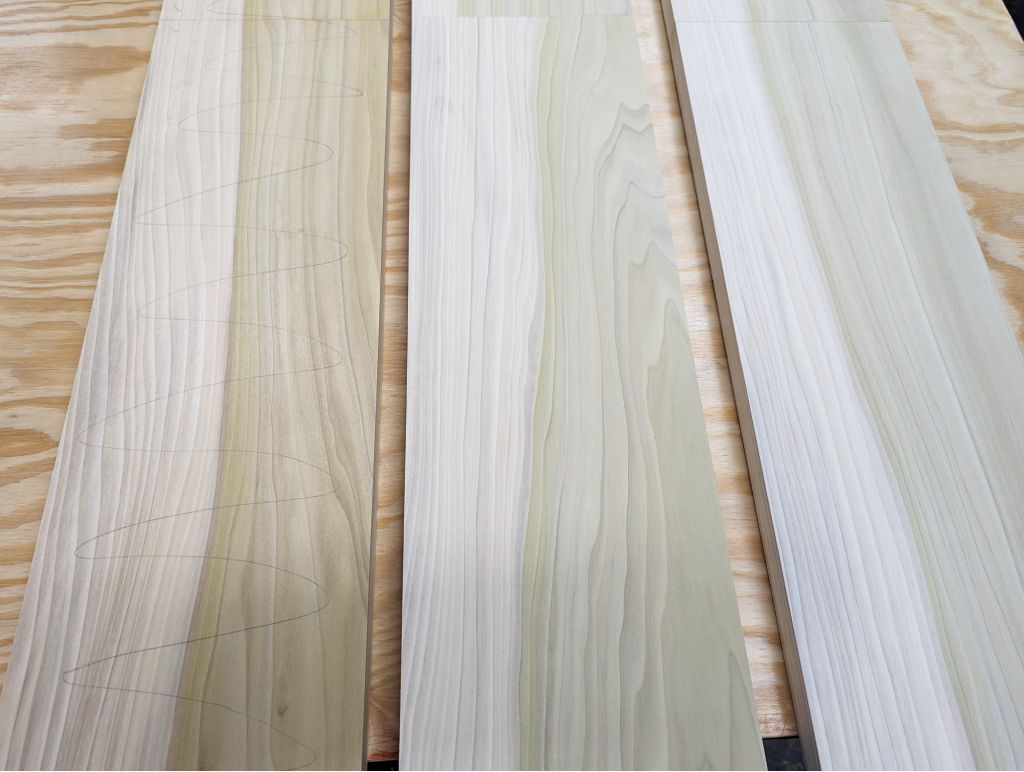 |
| Just like I did with the brackets, I’ll be working my way up to 220 grit. I draw some lines with my pencil before I start to ensure I evenly sand across the entire face. The two shelves on the right have already been sanded with 120 grit on their faces. |
 |
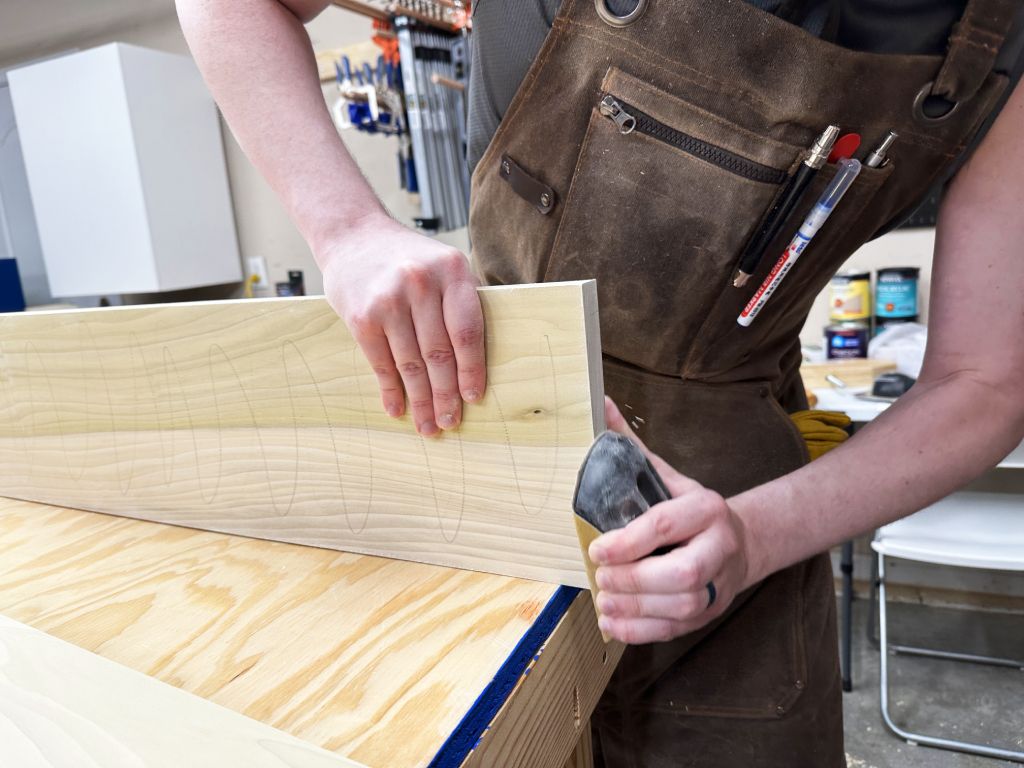
| The faces are done! I’ll have to do the sides by hand since they’re too thin for my sander. |
But what happened to the gap from the first
glue-up?
Before I started sanding, I applied some glue inside the gap, keeping it off the
face I would be sanding. Then, I just let my sanding dust fill the hole while I
sand, which matches the surrounding wood perfectly, and you can’t even tell
there was ever a gap
 |
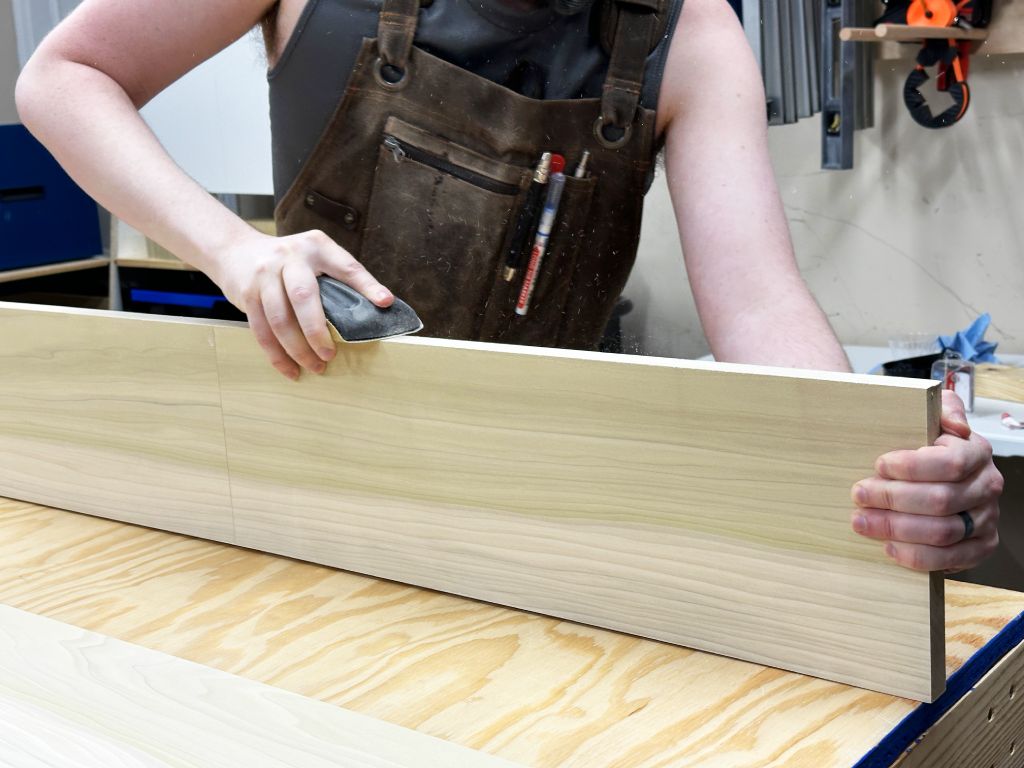
| I use the same grits, but by hand this time, on the end grain of the shelves. |
 |
And again on the long grain! Now, I understand the meaning of elbow grease: my elbows HURT, probably because I was pressing too hard to try and get it done faster  |
 Chamfering the Shelves
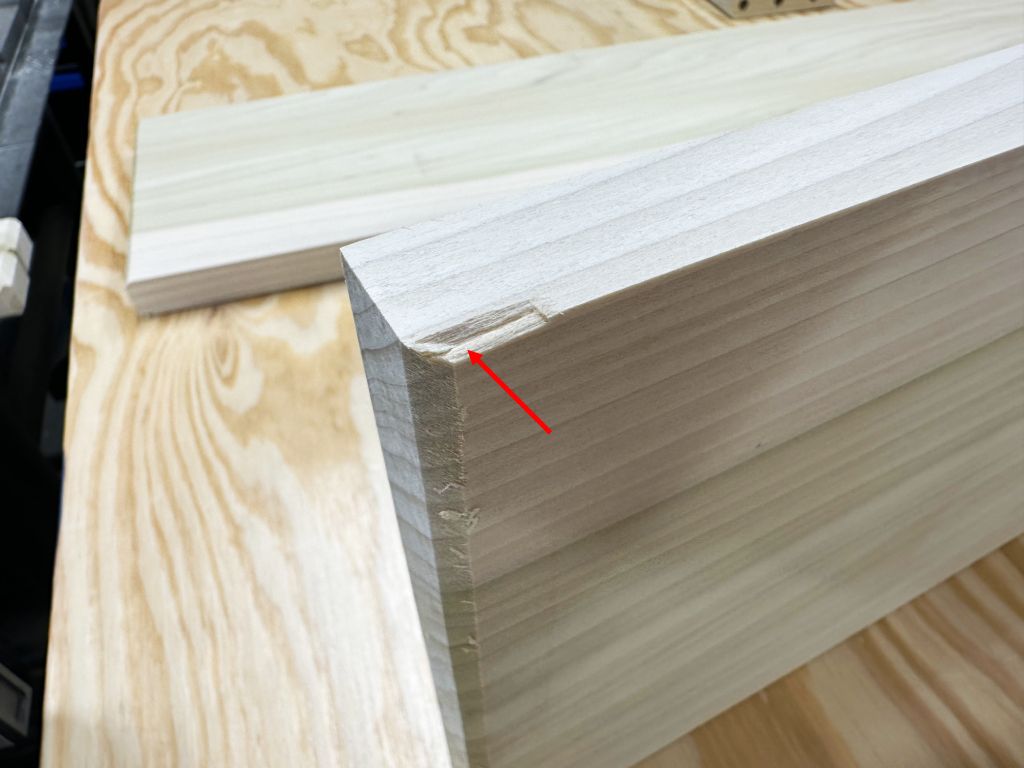 |
| Just like before, I start my chamfering on the long grain. BAM! That’s a pretty major chip out! (red) But, I still have yet to chamfer that edge that got chipped out. I’ll do that now. |
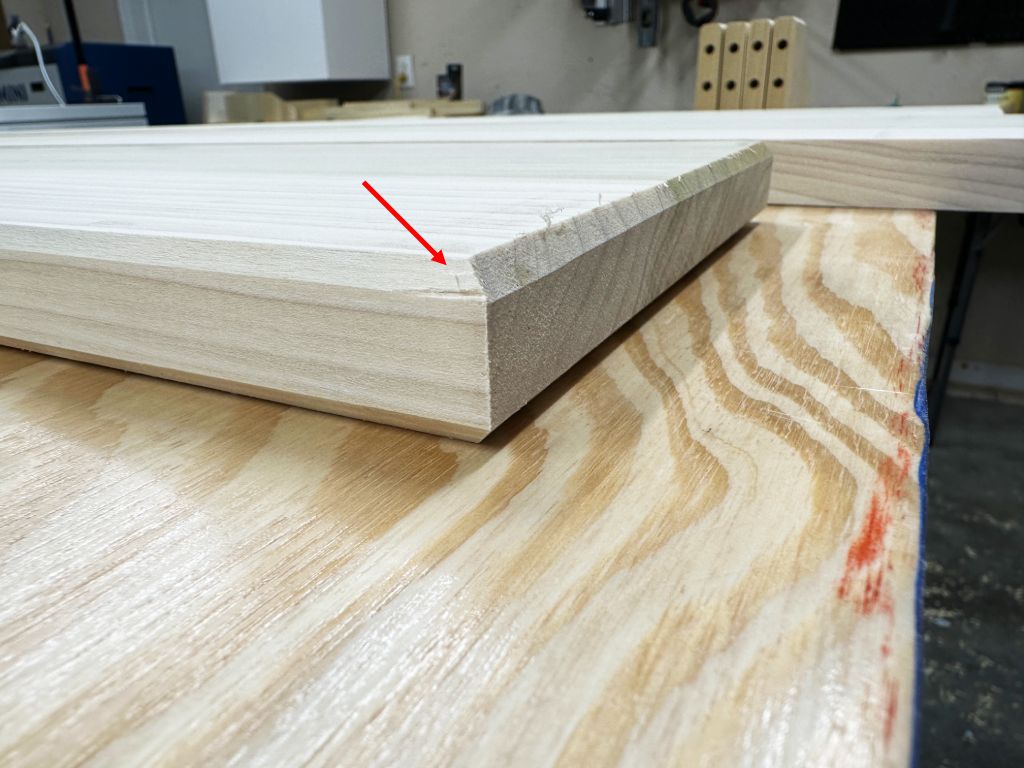 |
After chamfering that long grain edge, you can barely even tell there was ever any chip out (red)  This is a perfect example of why it’s important to route the long grain last! It may just save your project… or at least save you from rage-quitting the project This is a perfect example of why it’s important to route the long grain last! It may just save your project… or at least save you from rage-quitting the project  |
 Sanding the Chamfers
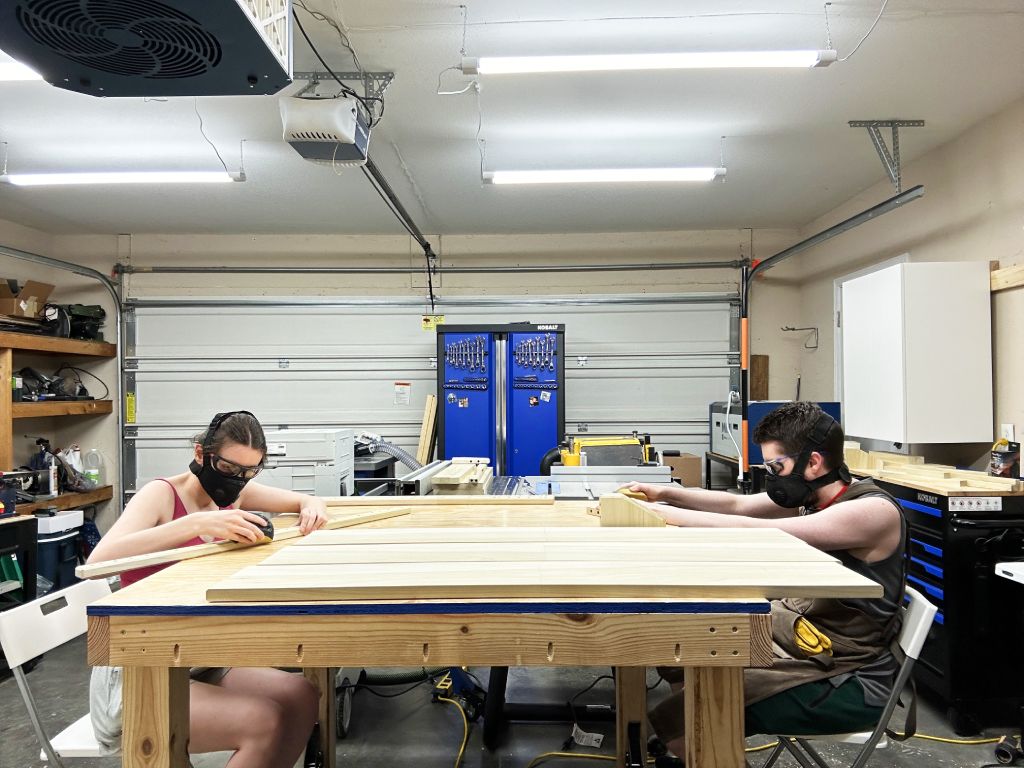 |
Now that everything is chamfered, we just need to sand all the chamfers… by hand… yay… But, even sanding can be fun when you do it together   |
We each use a sanding block so that we can keep the flatness of the chamfers. We
will only sand with 220 grit, since the cut quality of the chamfers were so
good. It helps to invest in one or two good router bits just for times like
these! After about an hour of chamfer sanding, we are done!
 Results
 |
Everything is chamfered, sanded, and the wood dust cleaned off with mineral spirits. We. Are. READY!  |
In the next article, we are getting these things PAINTED! That’s right! It’s
finally time to put the final touches on this thing!
But, will a wild, unforeseen issue cause all our plans to derail?! Of course!
Why wouldn’t there be?!!??! 

Until next time,
 Pixel
Pixel
 Next Time!