Time again to learn basic woodworking skills with some experimentation ![]() I’ll be using the new Dowelmax, applying whitewash to wood (but modern
looking!), taping off where the brackets will go on the wall, creating a scrap
bracket to experiment on, and figuring out if using wood filler will be worth
it. The results of some of these experiments will be in the next article after
they finish drying. Let’s get started!
I’ll be using the new Dowelmax, applying whitewash to wood (but modern
looking!), taping off where the brackets will go on the wall, creating a scrap
bracket to experiment on, and figuring out if using wood filler will be worth
it. The results of some of these experiments will be in the next article after
they finish drying. Let’s get started!
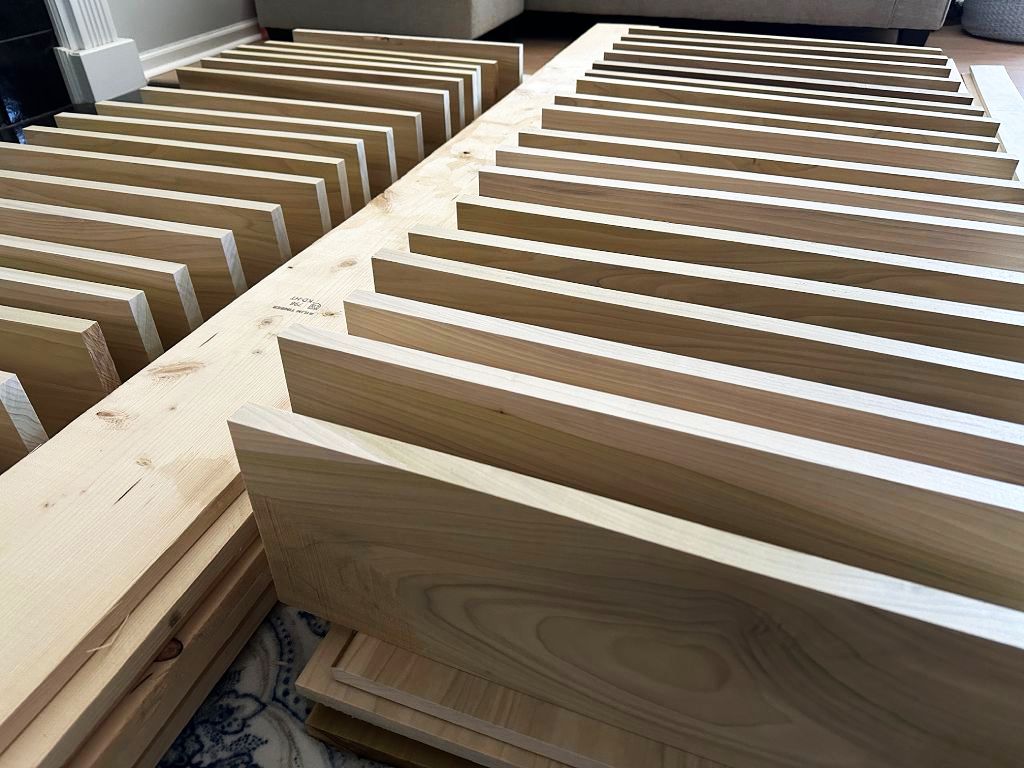
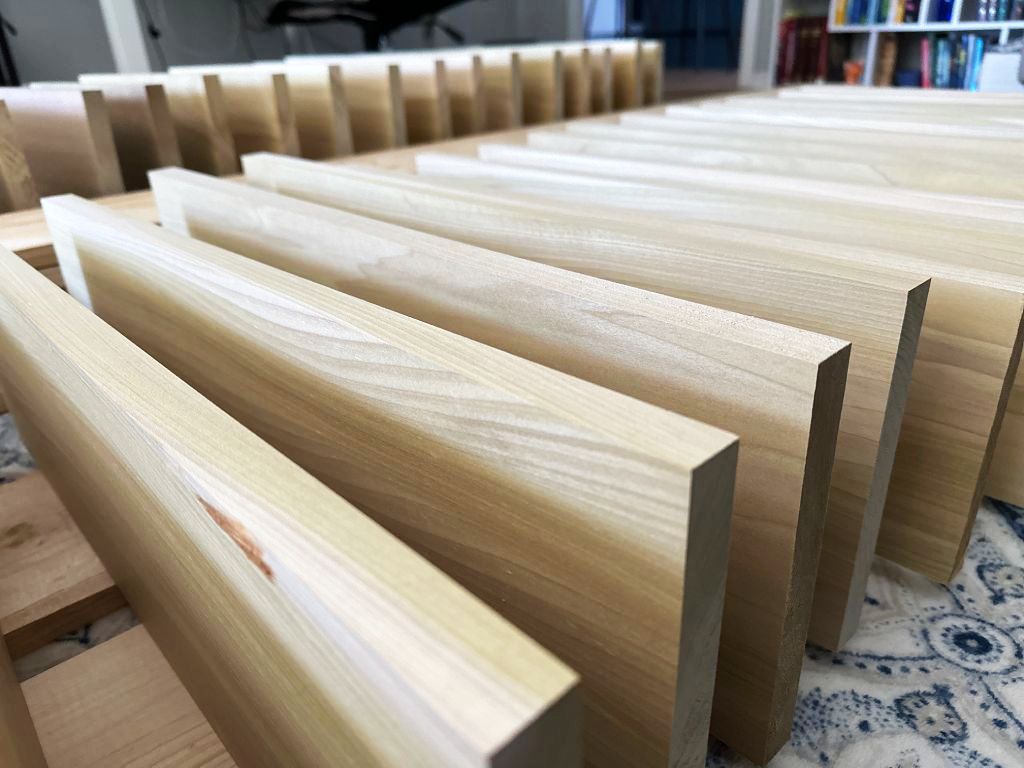
 Starting Point
 |
|---|
| Since I still don’t have any climate control in the shop, I carried them all into the office where I’ve been storing all the “good wood” so far. Thankfully, there has been no wood movement after the internal stresses relaxed |
 |
|---|
| It’s fun to look at all of it at different angles |
In the last post, all the wood was milled up, and the thickness was kept at 0.94”, much thicker than the last attempt!
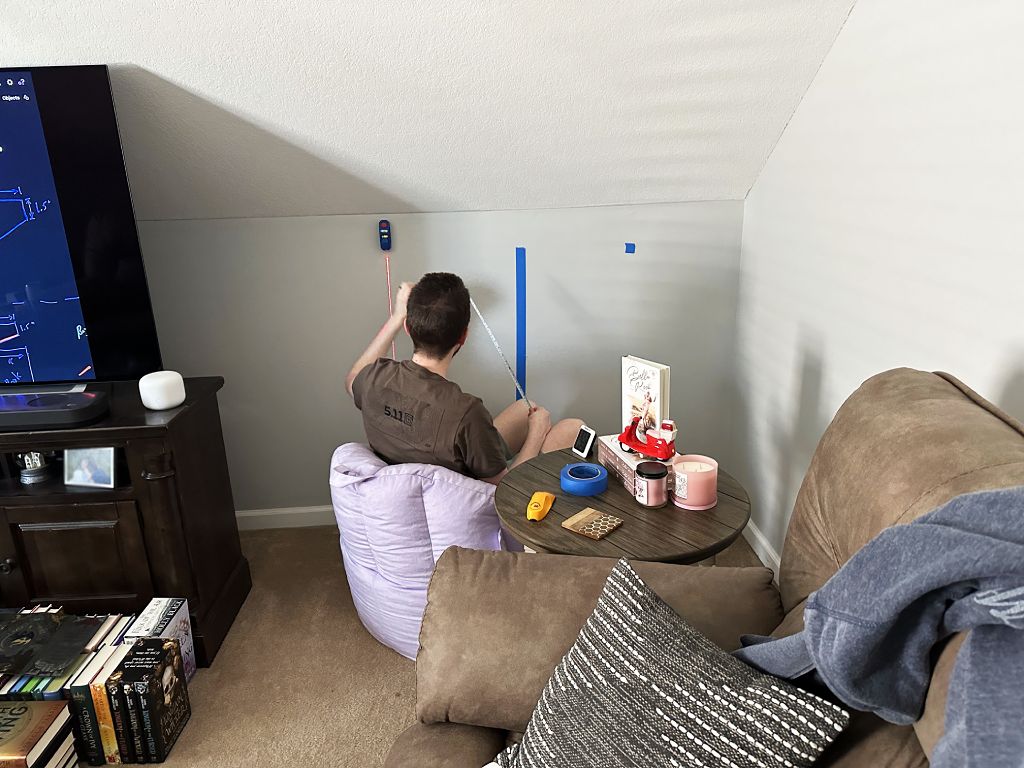
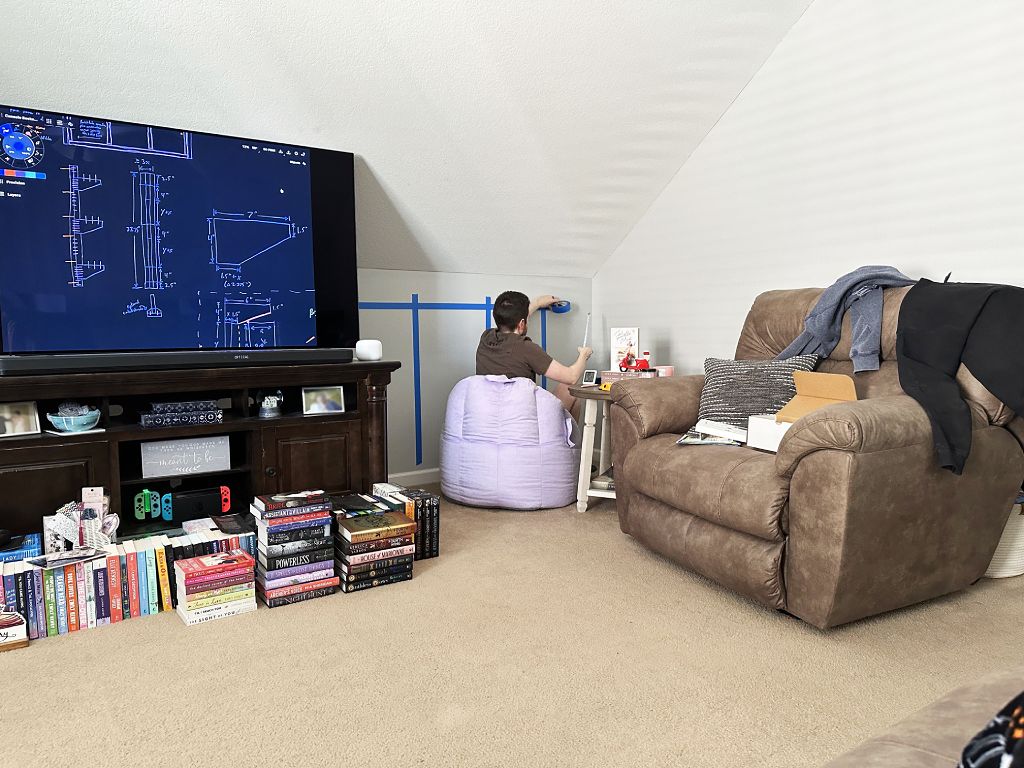
 Taping Off the Wall
 |
|---|
| I use my Kreg laser level to see exactly where my studs are on the wall. I verify the expected distance of 16 in (40.6 cm) from stud to stud with my tape measure. |
 |
|---|
| I blue tape where the brackets and shelves will go so that we can see not just the size of the bookshelf, but also get a better idea of how it will look on the wall. I’ve got our plans up on the TV so I can verify my blue tape lengths. |
This is going to be such a cool design! We quickly approve the design and move on to the next step.
 Dowelmax, First Time Use
The plan calls for 48 in (122 cm) long shelves, but I only have 24 in (61 cm) long wood. I’ll need to join 2 of these pieces to make the length I need, but this will be joining end grain to more end grain, the worst type of joint for glue… This sounds like a great test for the Dowelmax!
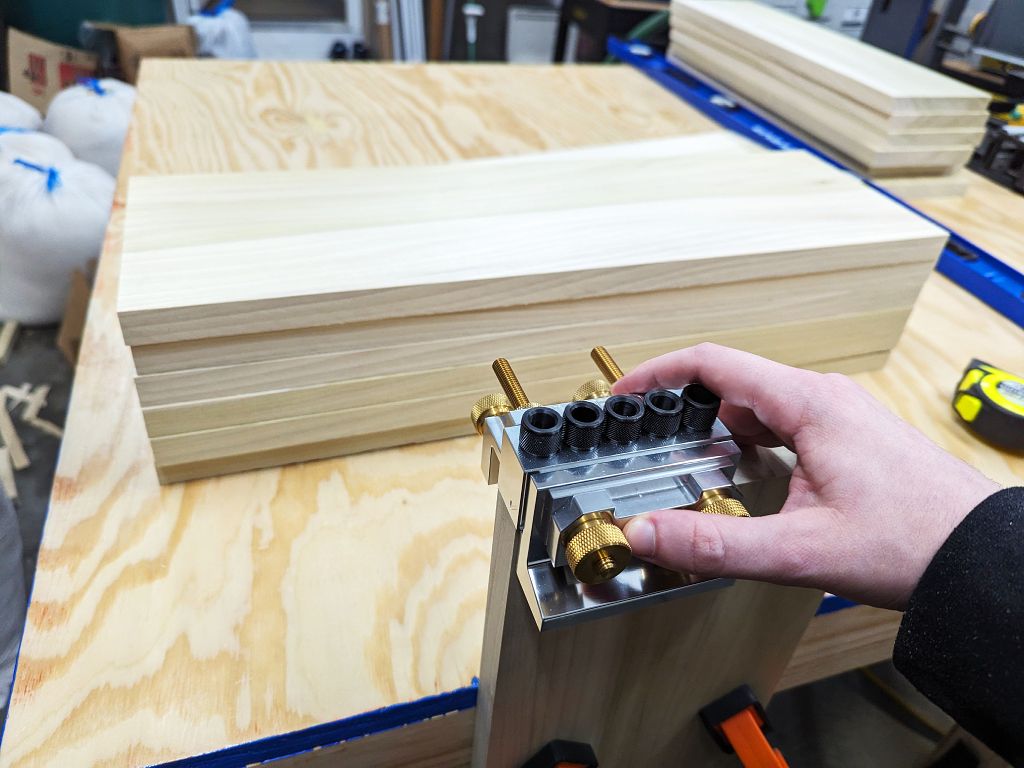 |
|---|
| I’m using the Dowelmax as-is right out of the box. After choosing my two pieces of wood I’ll be joining into a single shelf, I clamp the Dowelmax to each end and start drilling holes for the 3/8 in (0.95 cm) diameter dowels. |
 |
|---|
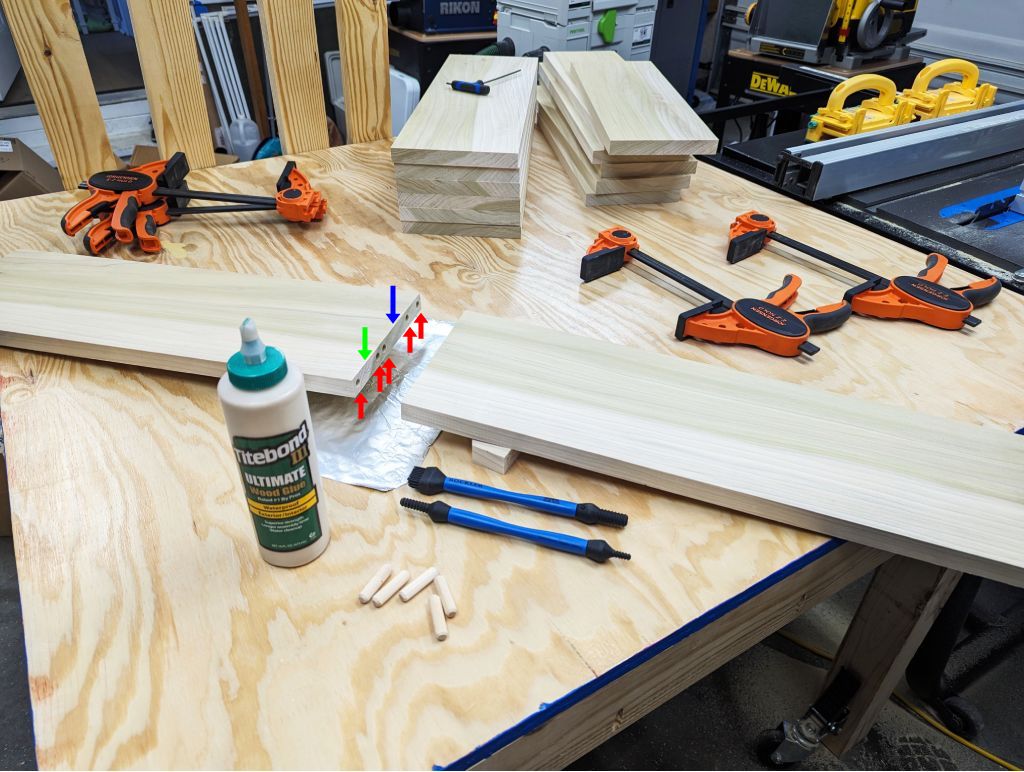
| I chose a dowel pattern (red) to do 3 things: 1) give adequate strength to the joint; 2) give space internally in case we end up deciding to embed an LED light strip in the shelf (green); 3) allow room for a single dowel to eventually bind underneath the shelf to the bracket (blue; this differs from the 3 called out in the plans). |
 |
|---|
| After gluing in the dowels and giving all my might to squeezing the boards together, including using a rubber mallet, this is the best I got. It’s okay, but there’s still a bit of a gap I’ll need to fill in later. |
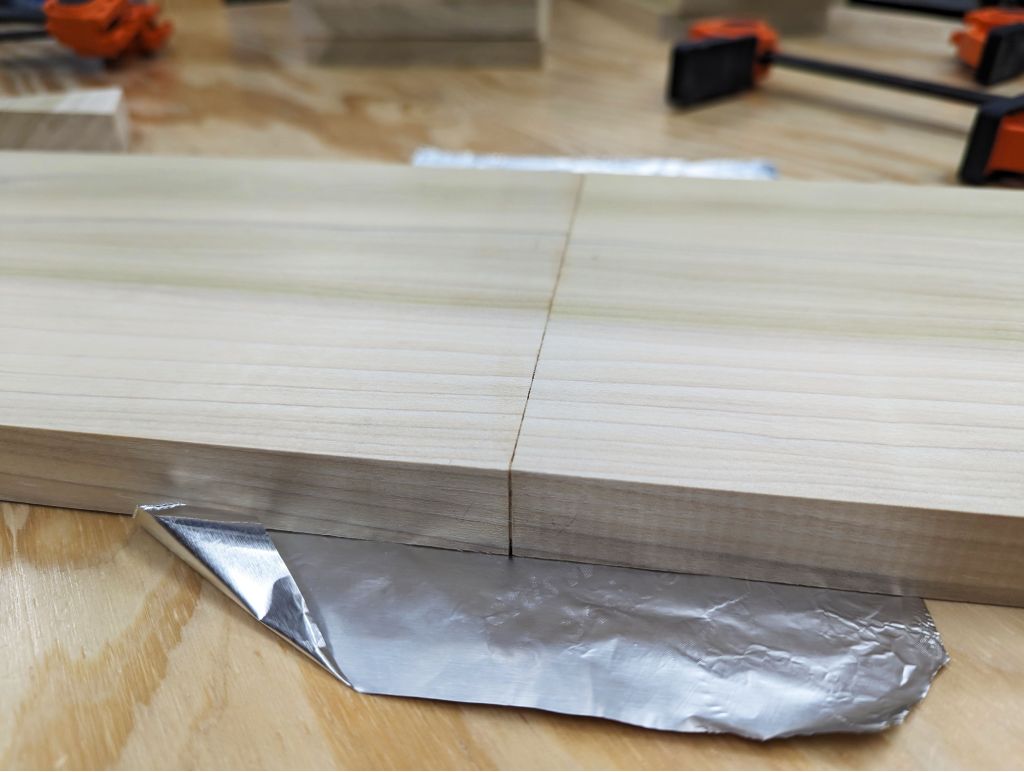
The rubber mallet was effective at first to help close the large gap between the
boards. But once the wood contacted, every swing of the mallet would actually
cause the two pieces of wood to bounce off each other, just like the steel balls
in a Newton’s Cradle. So for the last bit of gap, I just had to do my best to
manhandle it together ![]()
For future long board glue-ups, I’ll be purchasing a couple of long parallel clamps to make sure I can get the boards together as tightly as possible. Lesson learned!
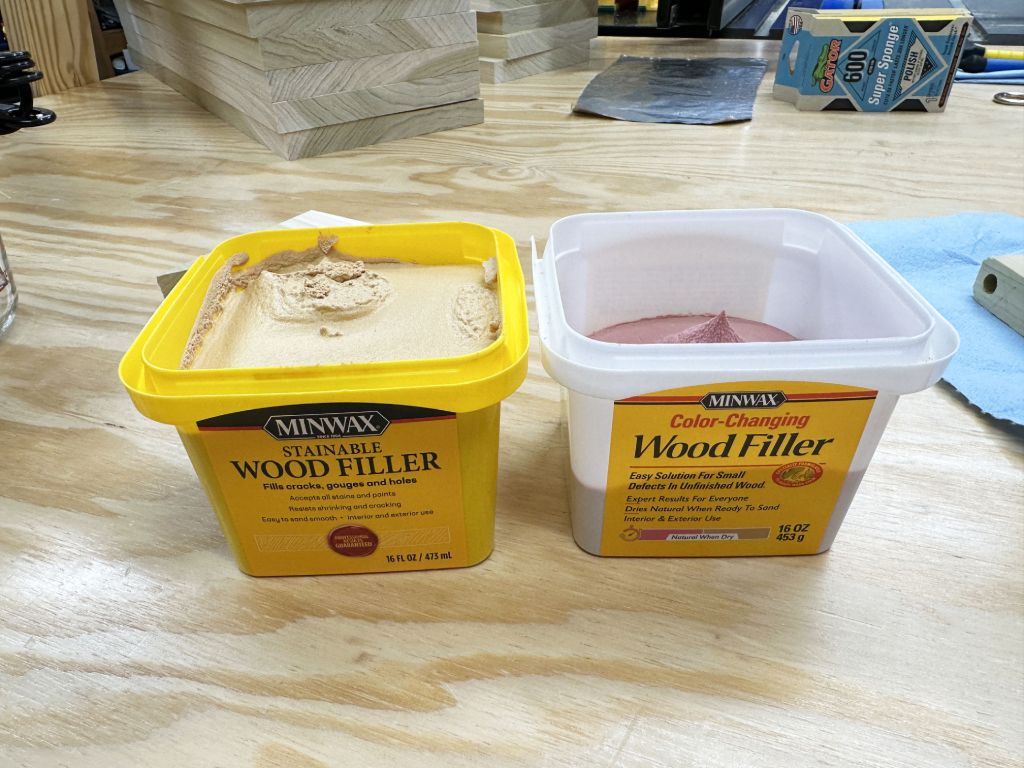
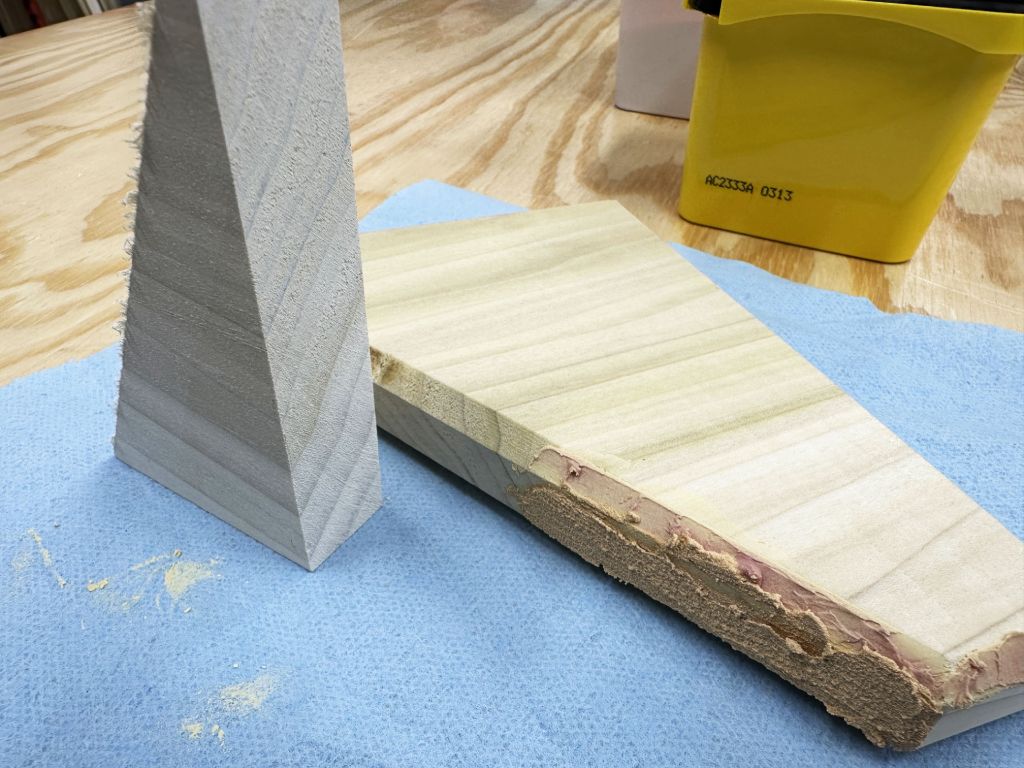
 Wood Filler on End Grain
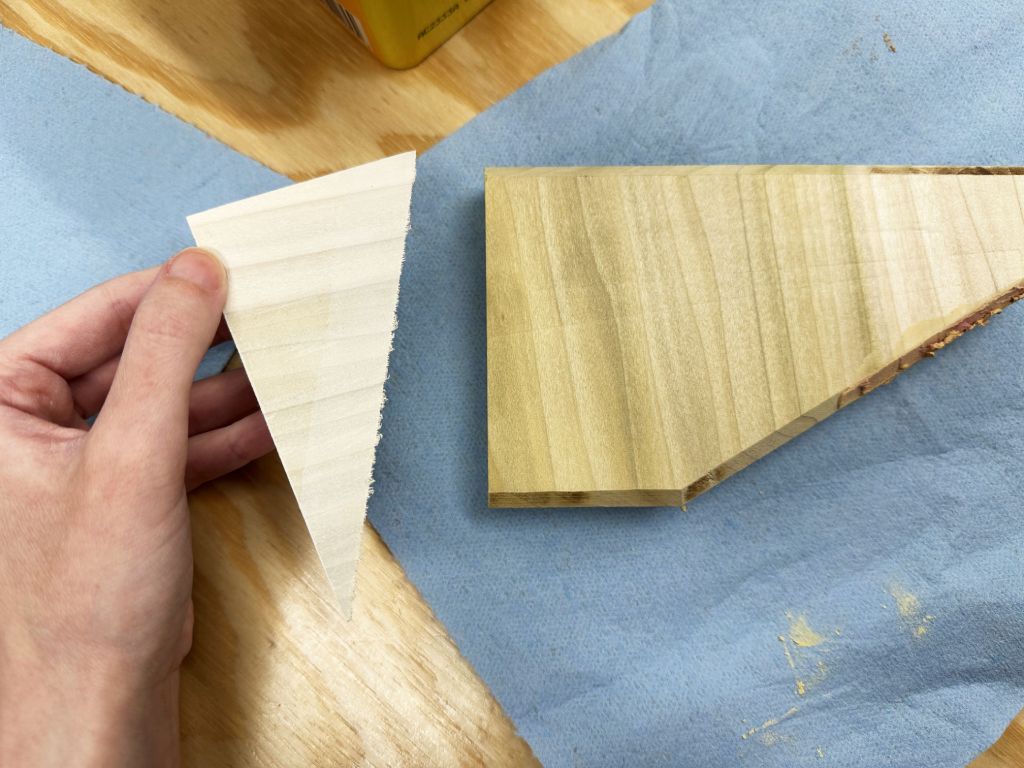
I’ve used wood filler a few times in the past, but only for things like nail holes. For this experiment, I want to know if I can fill in entire swaths of end grain with wood filler and then sand it down to a smooth finish. But to do this, I need to make a scrap version of a bracket I’ll be using for the bookshelf.
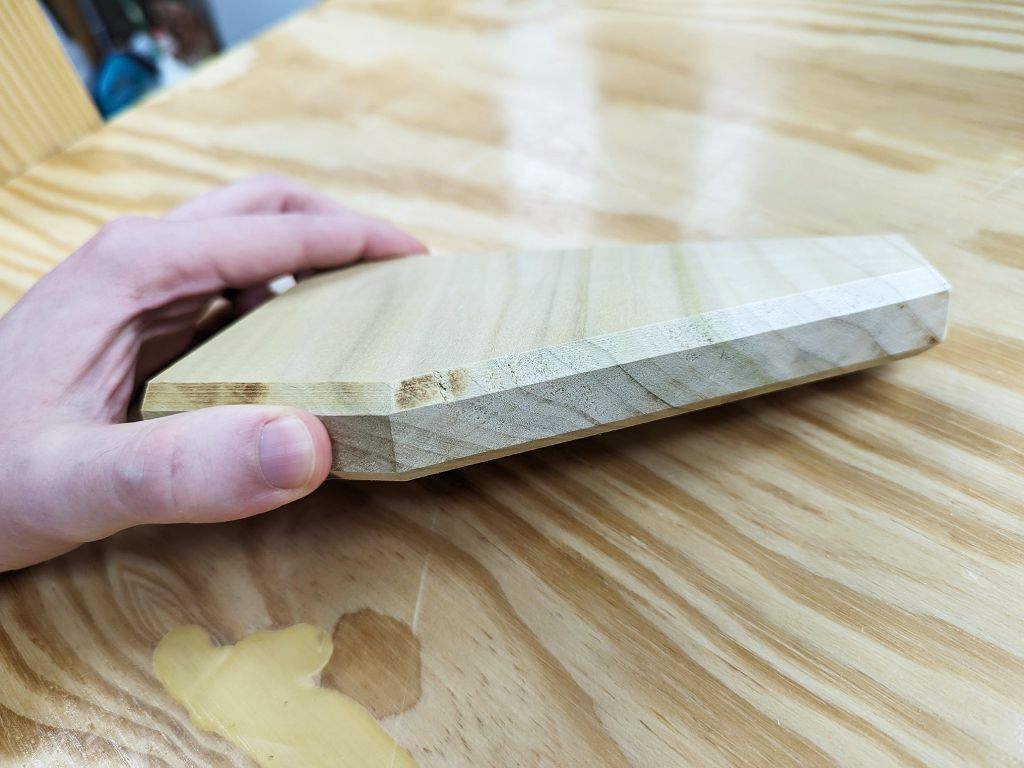 |
|---|
| I’ll show you in a later article how I actually made this scrap bracket when I make all the real brackets. For now, notice that the chamfered edges and end grain looks quite rough and “holey” compared to the large smooth side. This is what I want to wood fill so that it will also look and feel smooth. |
 |
|---|
| I’m going to try two different wood fillers. The “normal” filler (left) and the color-changing filler (right). They feel like they have very different viscosities, so I’m wondering if one will fill end grain better than the other. |
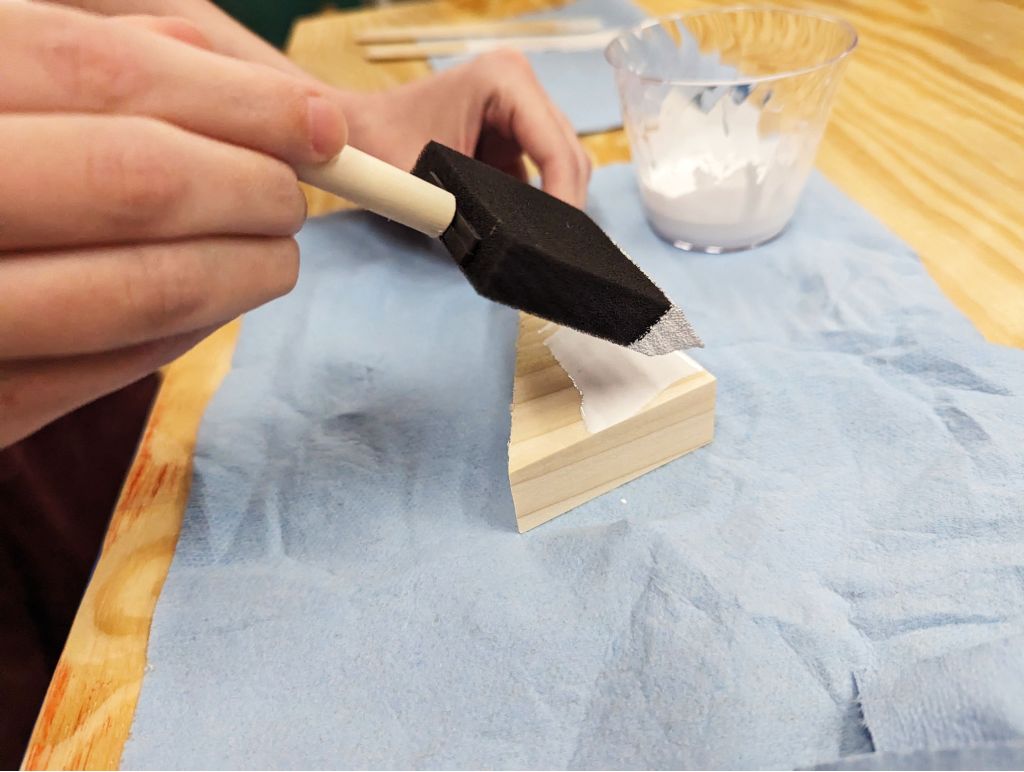
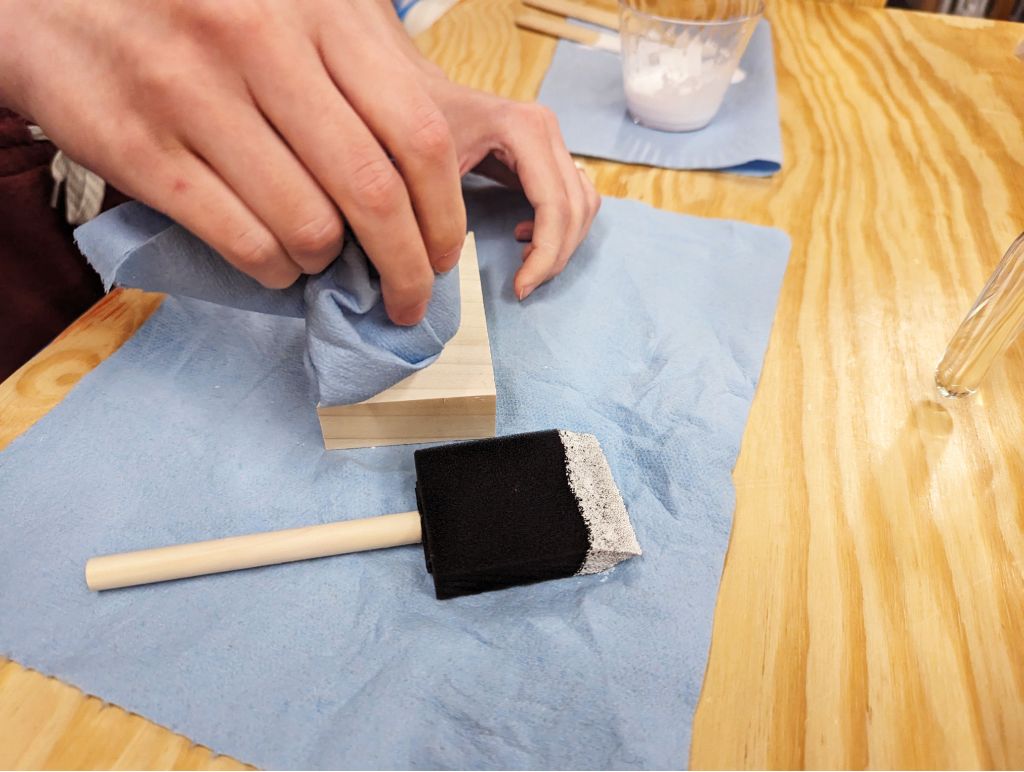
I smear on each wood filler to two different sections of the scrap bracket. It’s quite difficult to apply properly in these locations—I’ll make a note of that. I’ll let them dry for a bit, then sand them down to see how they look. Let’s come back to these later!
 Whitewash Finish
We want to show the wood grain, but we don’t like the green of some parts of the poplar. Originally, this wasn’t going to be a problem, because we thought we’d stain the wood. However, after we milled the wood, we realized we were REALLY proud of how we made the wood look, thus we wanted to preserve as much of the look as possible.
Plus, staining wood can always be a risk, since it can absorb differently in some places than others. Even with stain conditioner, it’s not a guarantee, especially with poplar.
Since bleaching the green out of the wood also seemed like a pain, my wife,
Story ![]() , suggested we try whitewashing the wood. But we could do it in a
way that would be more uniform and modern looking than the traditional whitewash
which looks more rustic. Is this possible to do reliably? Let’s find out!
, suggested we try whitewashing the wood. But we could do it in a
way that would be more uniform and modern looking than the traditional whitewash
which looks more rustic. Is this possible to do reliably? Let’s find out!
 |
|---|
| My wife |
 |
|---|
| After just a few seconds, she then wipes off the paint so that not too much of the white soaks in. She adds a second layer just along one of the edges so that we can see the difference between one and two layers. |
 |
|---|
| This stuff dries in only a couple minutes! That’s a big plus. You can see along the right edge of the white piece the second layer of paint. We definitely prefer the two layers, and WOW what a big contrast to the normal color of the wood! |
 |
|---|
| We apply a second coat to the whole piece of wood, including the end grain. What a difference! And so easy. Here it is next to the wood filler experiment we’re doing, which is almost dry. |
 Next Time!
After the glue, paint, and wood filler dry, I can get the results! There are some results that end up not working out, so I’ll be redoing those experiments. Check out the next article to see how that goes!
Until next time,
![]() Pixel
Pixel