To build a bookshelf with dowel joinery, or use dowels for joinery to make
furniture in general, it requires planning and precision to get the strongest
joint possible. In this article, I’ll be making a “story stick” to ensure
everything is done accurately, and then I’ll use that to drill all the dowel
holes in the wall brackets.
I’ll also drill the countersunk holes for the screws that will hold the wall
brackets to the wall. By the end, we should be ready to route all the edges with
the router table, which we’ll be doing in the next article 
 Starting Point
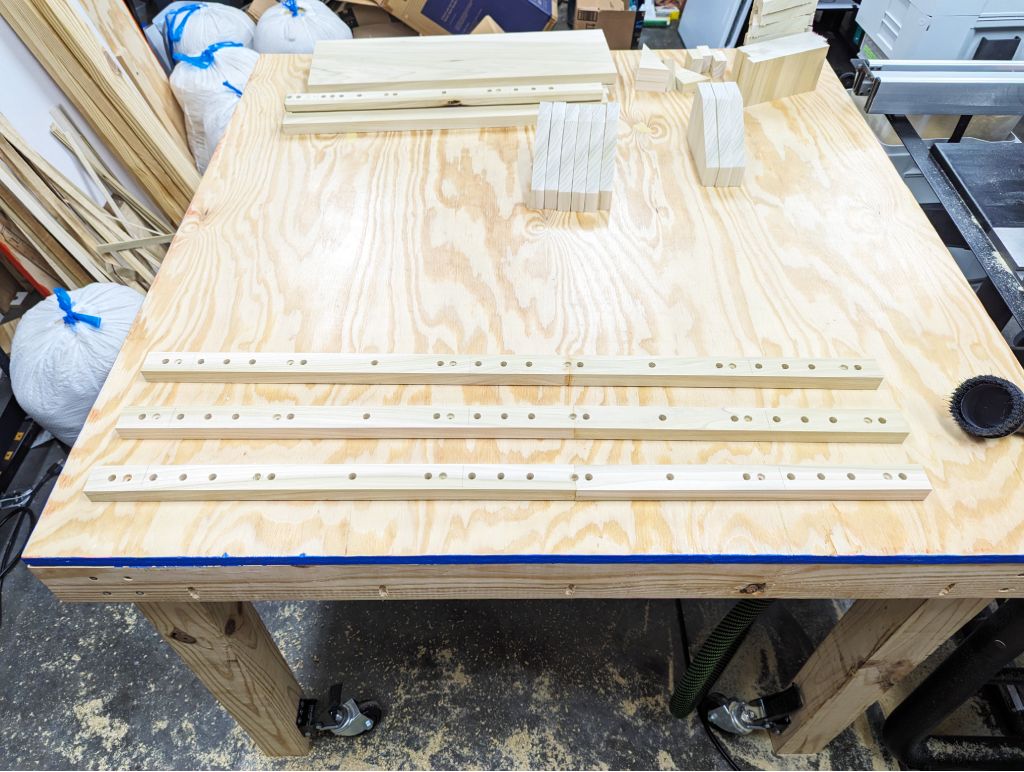
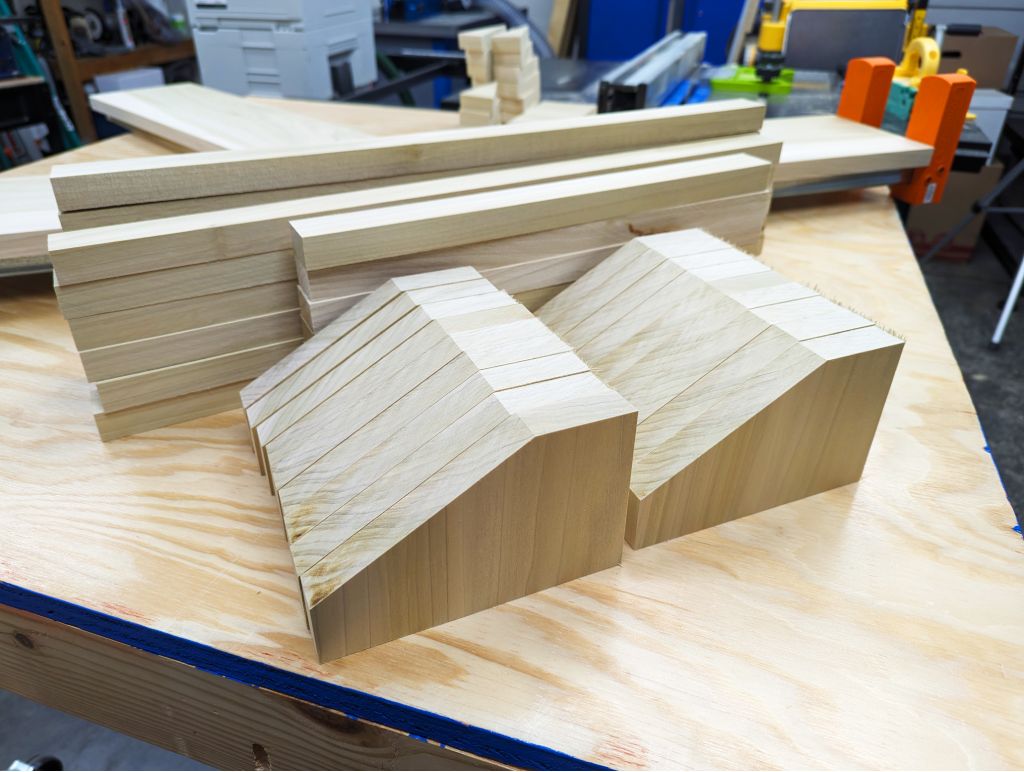 |
| Everything is cut, all 3 shelves are glued, and all 3 wall brackets are glued as well! |
 Story Stick
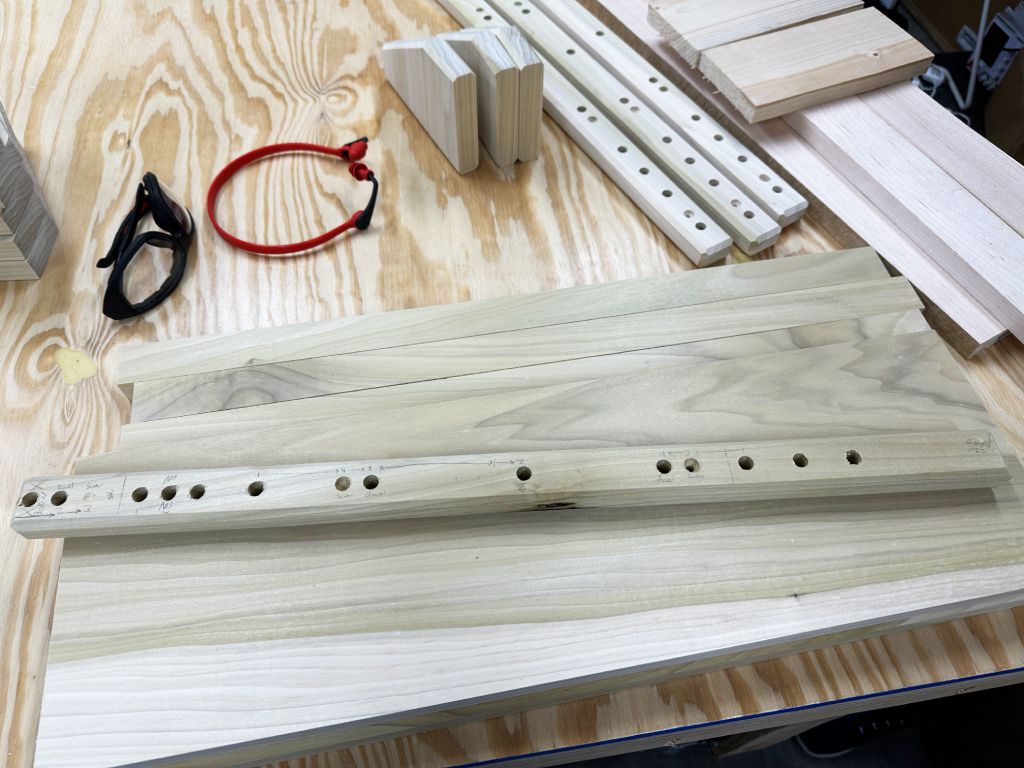 |
| The mighty story stick, laid upon finely milled wood, with various measurements marked in pencil. |
A story stick, sometimes called a story pole if it’s for larger constructions
like a house, is a stick that has all the measurements of a project marked on
it. It’s a great way to plan and ensure consistency across multiple pieces.
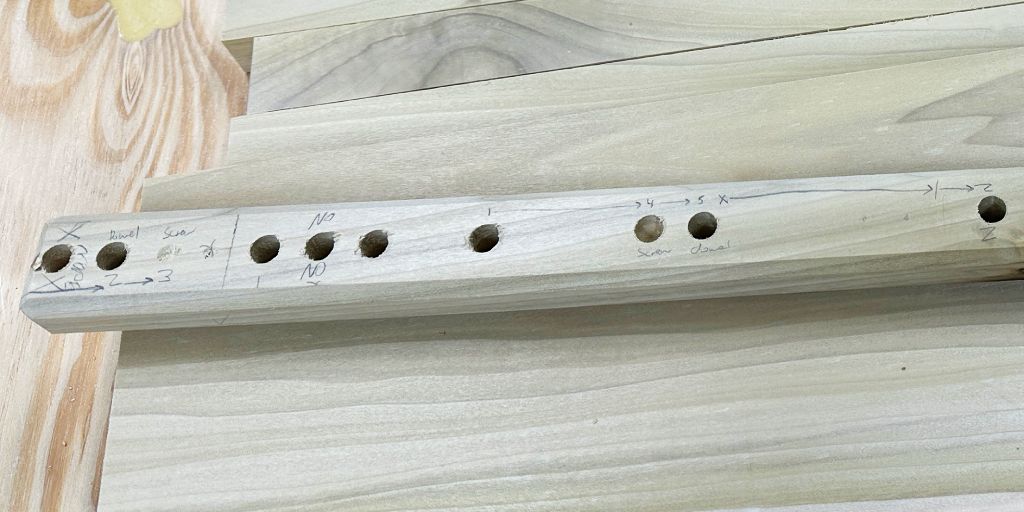 |
| In my case, I also drilled into the wood and did some sample chamfers, so it helped me see the overall look. You can see a few places where I messed up and drilled holes where I shouldn’t have, marked with a big “NO” so I don’t repeat this on the real thing. The numbers and arrows refer to which dowel holes in the Dowelmax I should use to drill the holes in the wall brackets. |
Wherever I go in the shop, if I’m working on the wall brackets, I will bring my
story stick with me as a guide. I highly recommend you make one for your
projects, especially if you’re making multiples of the same thing or if it’s a
more complex project.
 Wall Bracket Glue-Up Results
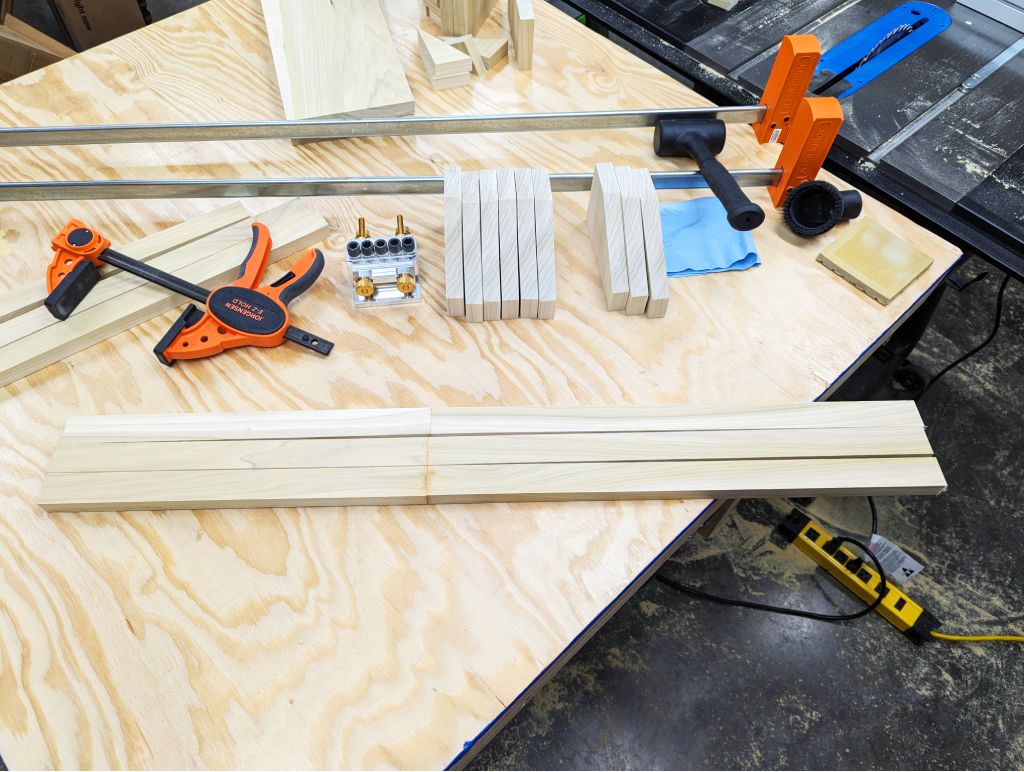 |
| The 3 glued wall brackets, near the bottom of the photo. They are firmly attached! But, is there something off about them? |
 |
Yep, they glued crooked  It’s because I didn’t have them in clamps, and the water based glue caused some wood movement. Thankfully, these wall brackets are thin enough to strong-arm It’s because I didn’t have them in clamps, and the water based glue caused some wood movement. Thankfully, these wall brackets are thin enough to strong-arm  the wood straight when we’re attaching them to the wall… hopefully! the wood straight when we’re attaching them to the wall… hopefully! |
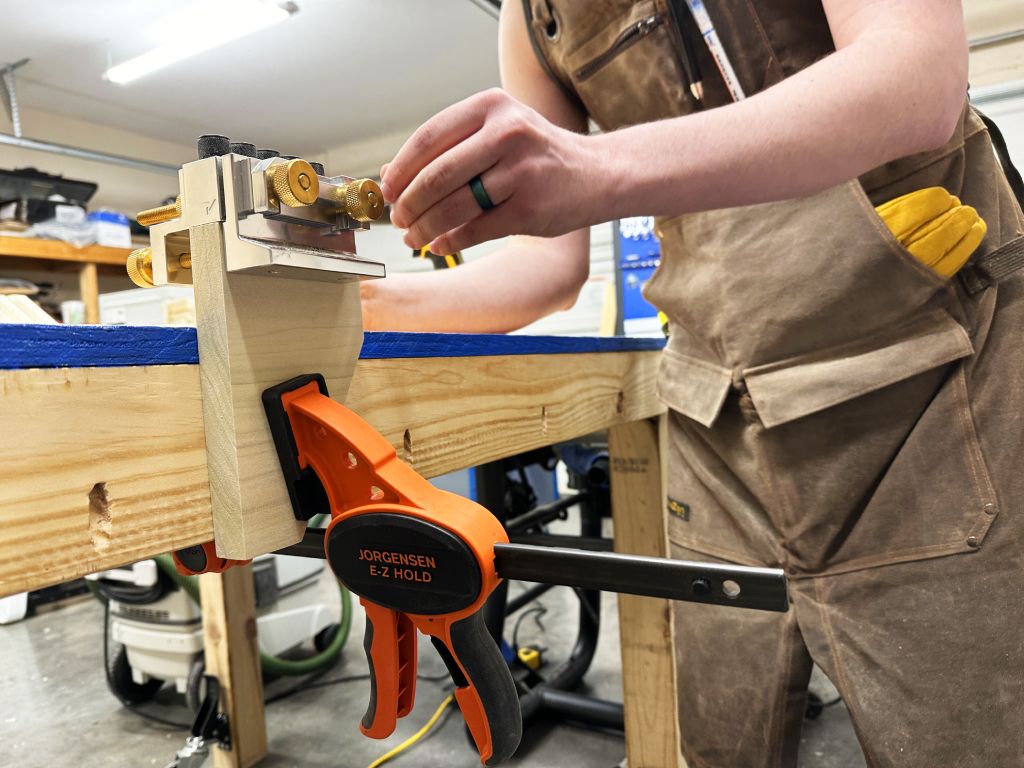
 Dowelmax + Wall Brackets
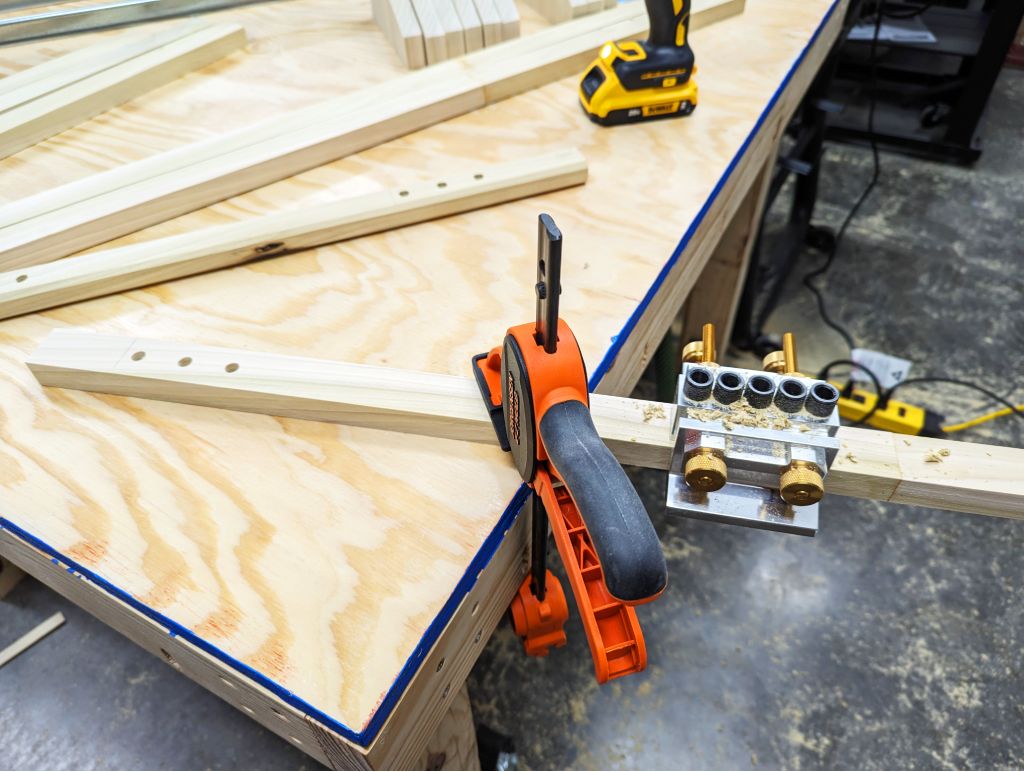 |
| I’ll use the story stick—which you can see in the background—to help me figure out where to drill the holes in the wall brackets. It’s just a matter of working my way down each one! |
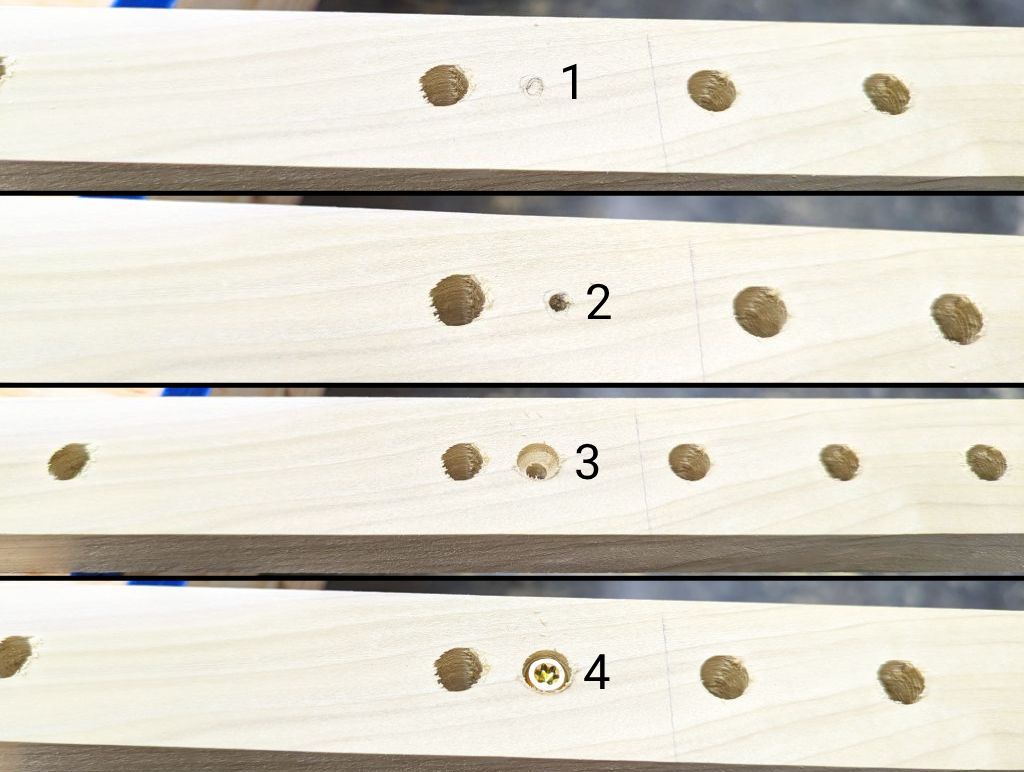 |
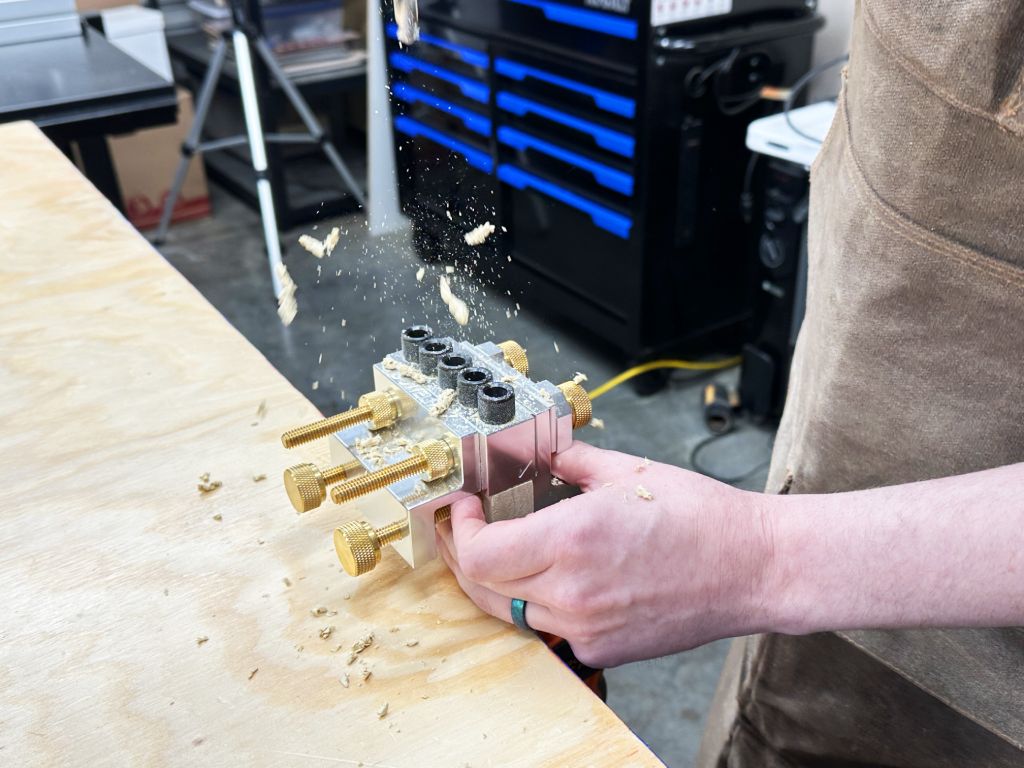
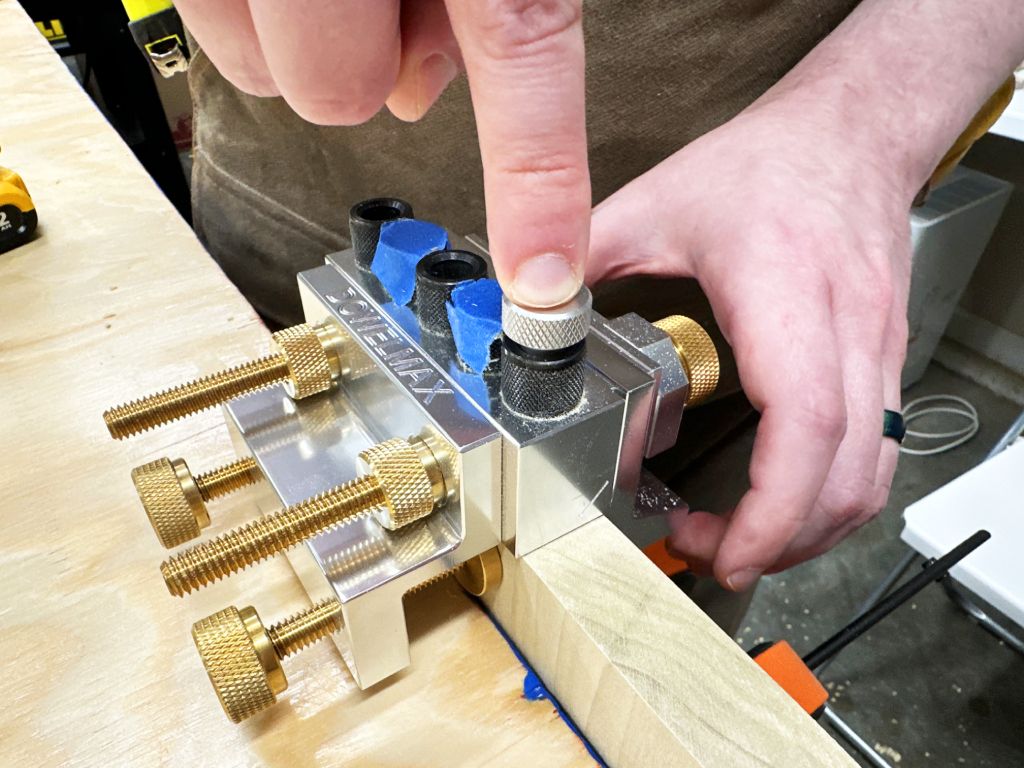
| While I’m drilling the dowel holes with the Dowelmax, I take the opportunity to barely nick the surface of the wood (1) where I want to place the hardware for attaching the wall brackets to the walls. I can then use that impression to drill the screw hole (2). I countersink the hole to bring the screw head below the surface (3). To test the depth of the countersink, I temporarily place a screw (4). Perfect! |
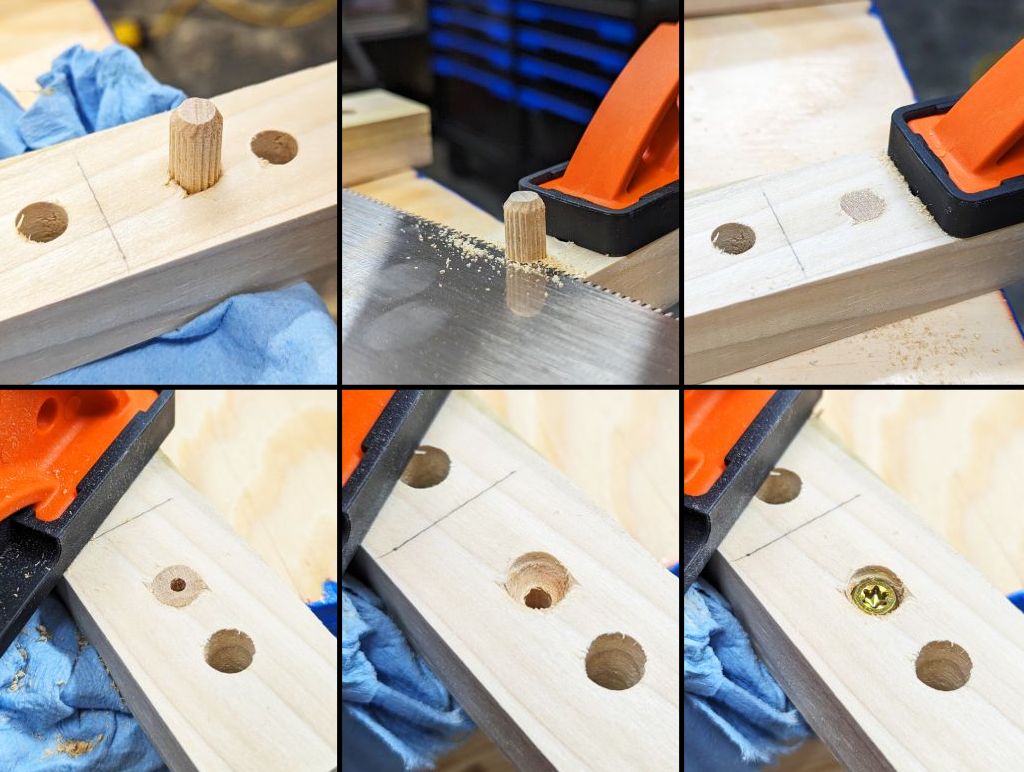 |
Ha! That’s never a good feeling to mess up as soon as you start  I accidentally drilled entirely through a hole when I was supposed to just nick the wood to mark where I wanted a screw. Easy fix! I glue in a dowel, completely filling the hole. I then saw it flush to the surface, and now I can drill it as normal! A quick check with a screw shows it fits just fine now I accidentally drilled entirely through a hole when I was supposed to just nick the wood to mark where I wanted a screw. Easy fix! I glue in a dowel, completely filling the hole. I then saw it flush to the surface, and now I can drill it as normal! A quick check with a screw shows it fits just fine now |
Results
 |
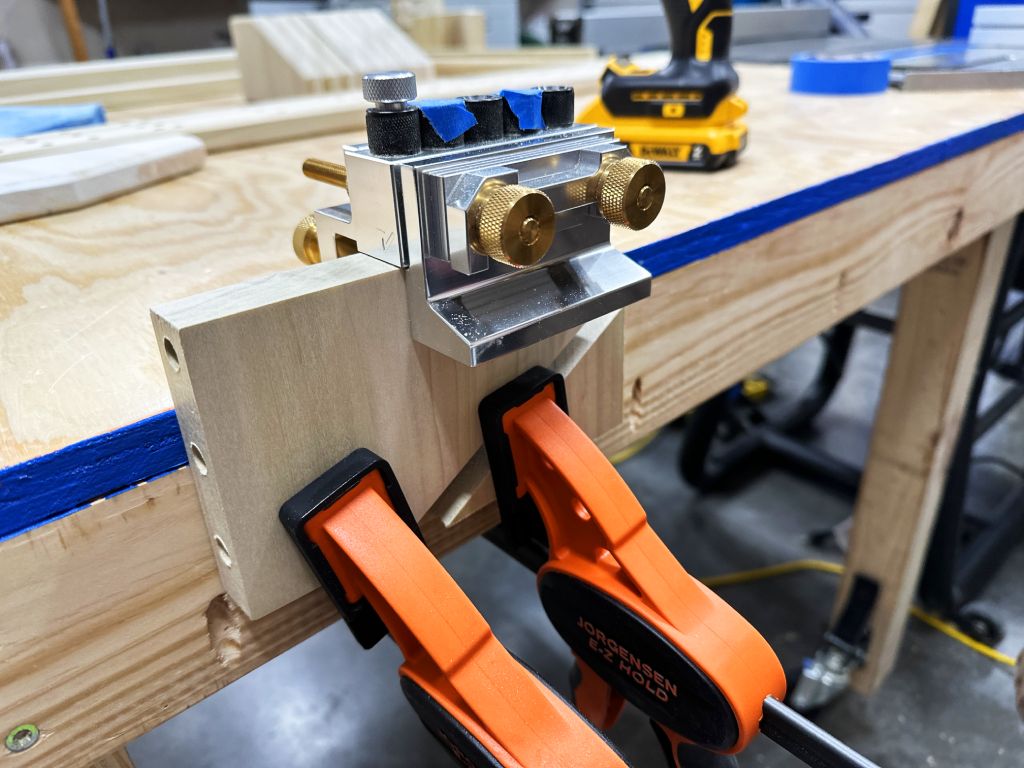
Thankfully, everything else went perfectly, and the 3 wall brackets have all their dowel holes drilled! Ignore the many bags of sawdust in the background  |
 Dowelmax + Shelf Brackets
There are two different sets of dowel holes for the shelf brackets.
- The dowel holes that will attach the shelf brackets to the wall brackets.
- The dowel hole that will attach the shelf brackets to its shelf.
 Shelf Brackets → Wall Brackets
 |
| I can simply align my Dowelmax to the left edge of the shelf bracket, and that lines up perfectly with where I put the dowel holes in my wall brackets. Easy! |
But first, I need to figure out which spacers I need to place next to my
Dowelmax’s drill guide block so that the holes will be drilled perfectly
centered in each shelf bracket. I did this step with the wall brackets, too, but
I didn’t show it.
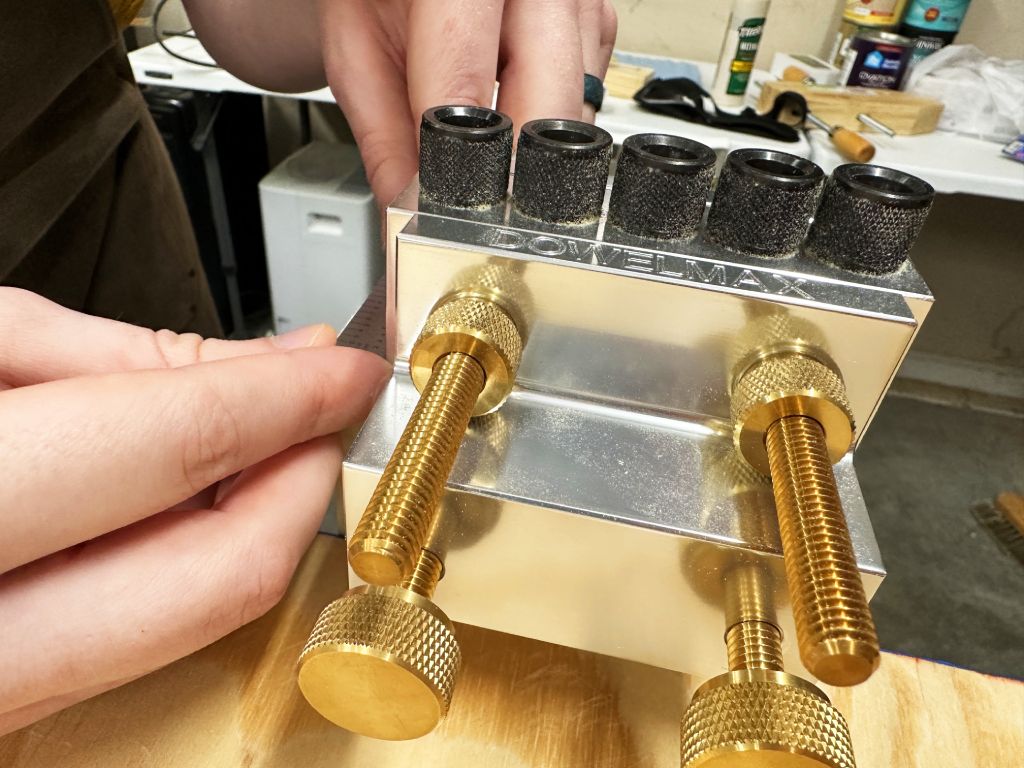
The drill guide block is the silver part of the Dowelmax that has the black
drill guides connected on top.
I could just keep trying various sized spacers until I get it right, but it’ll
be quicker and exact if I just math it out
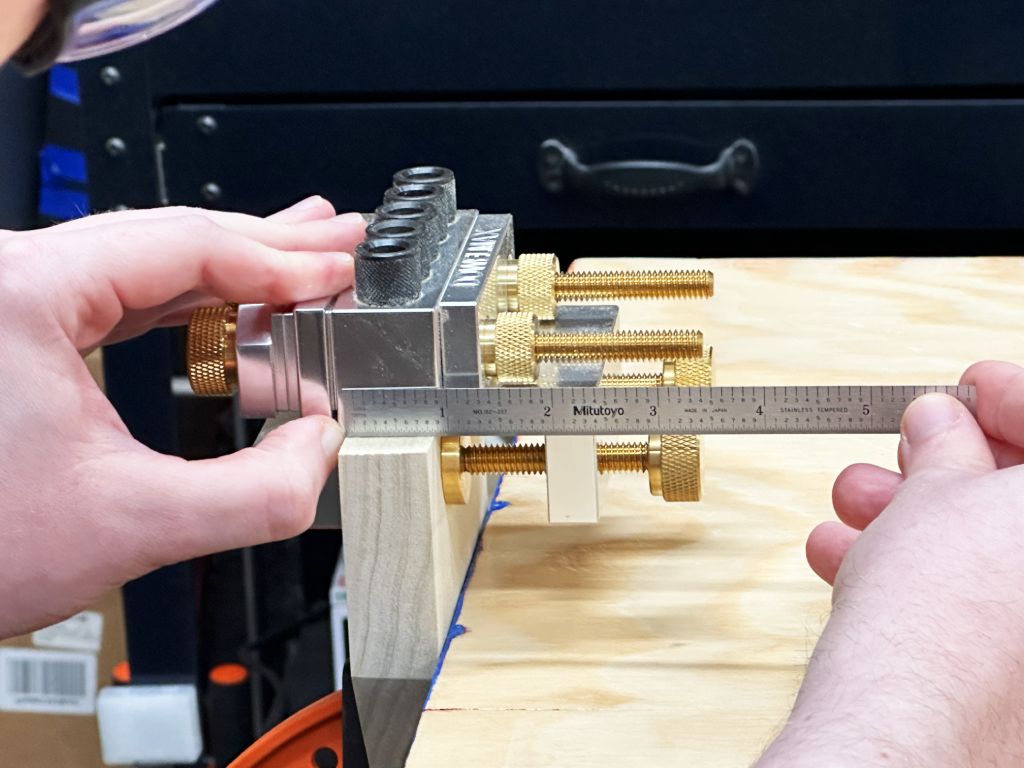 |
| I start by measuring the distance between the right edge of my wood and the right edge of my drill guide block. With my rule, I can see on the top of the rule it says about 0.9 inches, and on the bottom it says 0.87 inches, for a difference of 0.03 inches. |
 |
| Then, I measure the distance between the left edge of my wood and the left edge of my drill guide block. This ends up being a distance of 0.10 inches. |
I want both of these distances (0.03 and 0.10 inches) to be the same, because
then I will know the dowel holes will be centered in the shelf bracket. I can
adjust the spacers in the Dowelmax to make this happen. How much do I need to
remove from my current spacer on the left side?
Mc04c6cae
I have a spacer that can give me that!
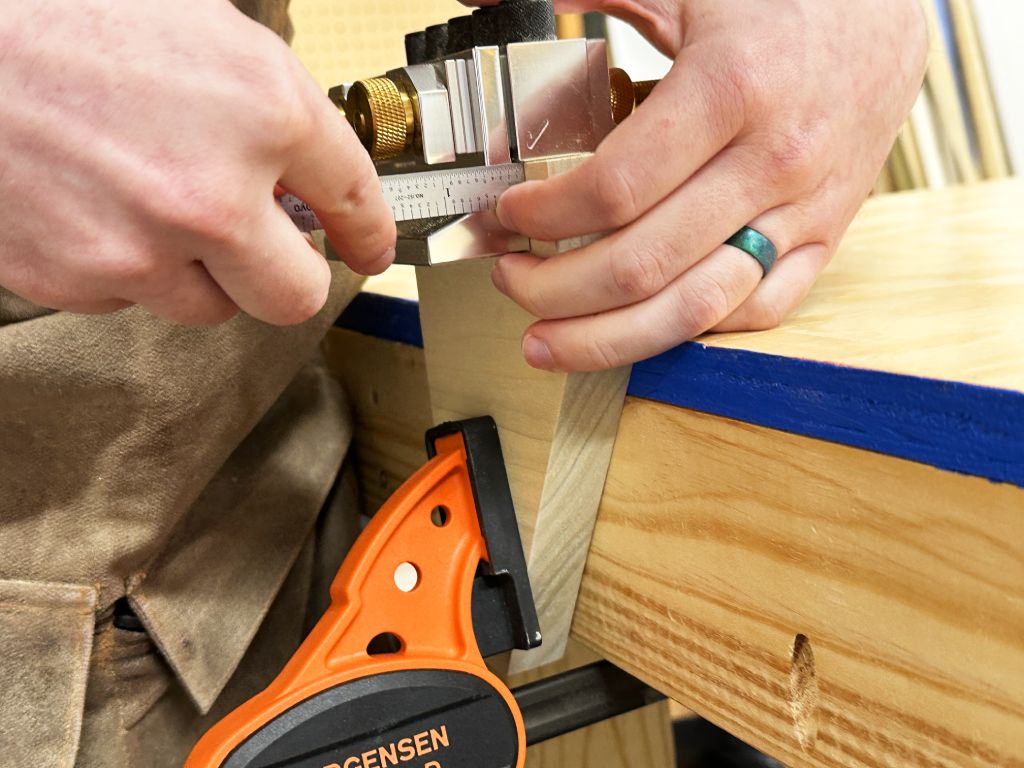
 |
| I swap in a different spacer into the Dowelmax, and then I do the same measurements again to verify the holes are centered. And they are, first try! #math |
 |
| To be ultra sure, I drill just one of my brackets first and then measure it. It’s perfect! Also, doesn’t this picture kind of evoke a little of the “Salt Bae” chef meme, but for woodworking? |
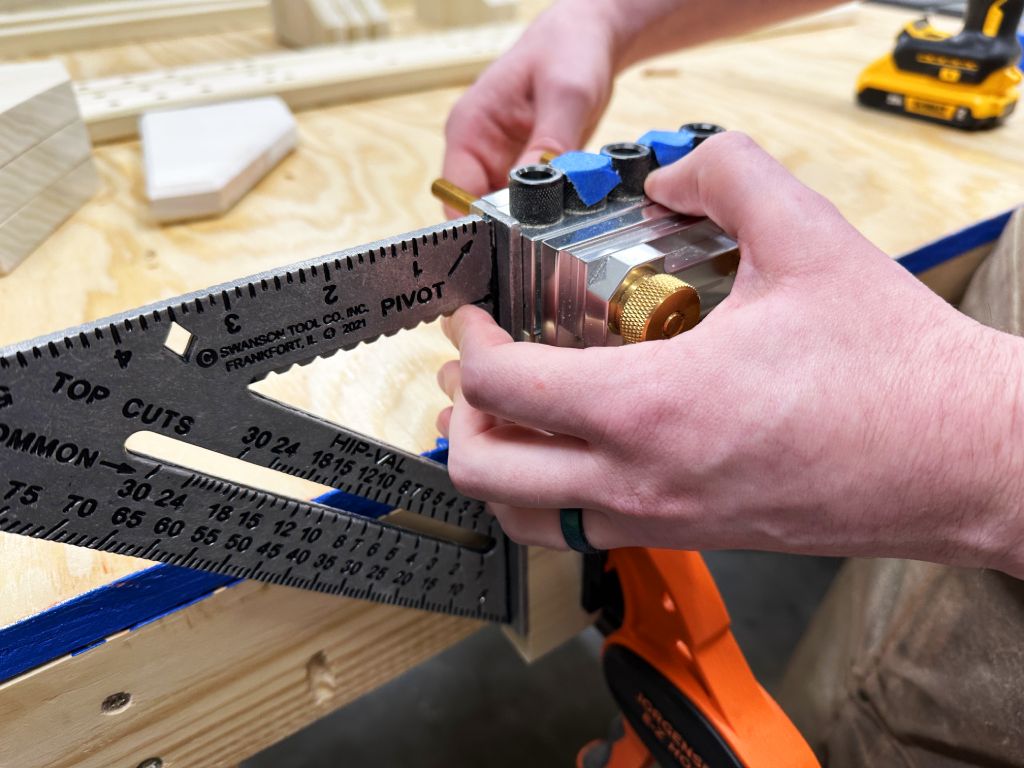 |
To make sure I only drill holes 1, 3, and 5, I place some tape on 2 and 4. I can now quickly line up my Dowelmax with my square to the edge of my wood, clamp it down with the integrated brass clamps, drill, and repeat on the next one! |
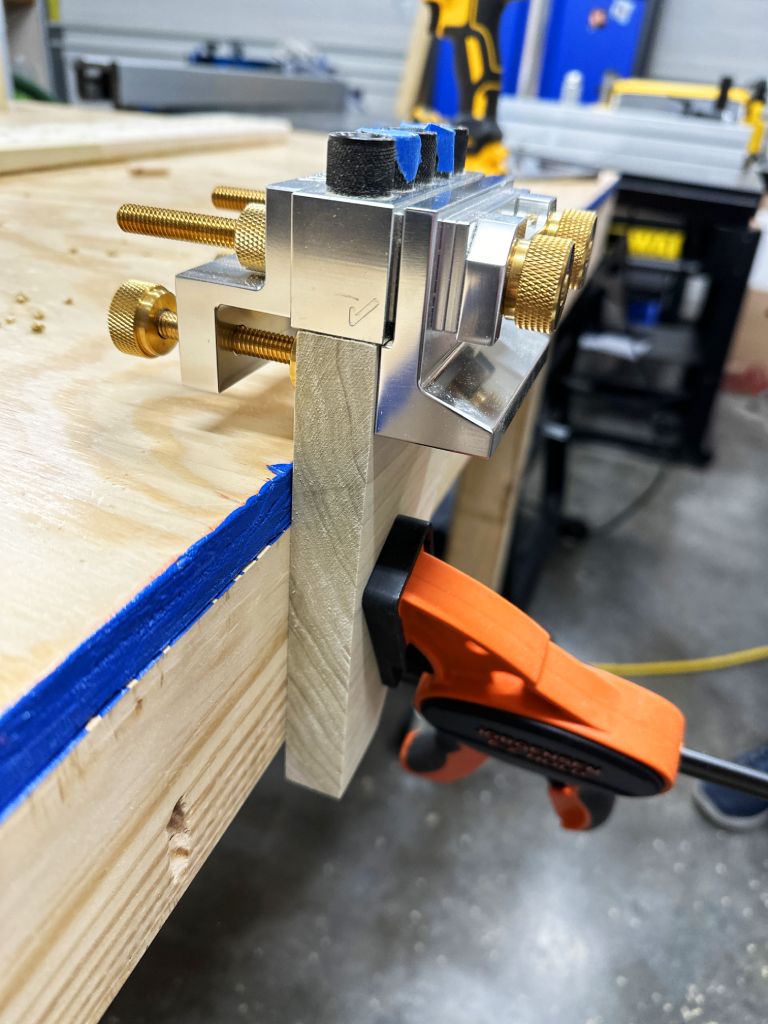 |
| Here is another view of the Dowelmax clamped and ready to be used. Notice how the wood is perfectly centered on the drill guide block so that the holes will be perfectly centered. |
 |
| Here are 6 of the 9 shelf brackets done, with just 3 more to go! It’s going fast now that it’s all set up. I’ll finish the last 3 now! |
 Shelf Brackets → Shelves
 |
| Looking back on the drawing from the previous article, I need to figure out where the dowel needs to be between the shelf bracket and shelf. The wall bracket isn’t shown here. I’ve drawn in the vanity plate that will be attached to the wall bracket (top left). The shelf bracket is on the bottom. |
The 5.08 inch and 3.73 inch measurements are the centers of gravity of the
largest books and smallest books, respectively, if they were on the shelf. I’ve
assumed the books’ spines are aligned with the front of the shelf, which is the
worst case scenario for potentially flipping the shelf.
 Selecting Dowel Position
It’s surprisingly somewhat complicated to optimize, but bear with me! Or just
skip down to the next section where I’ll be
drilling the holes. I won’t be offended!
The dowel pin that will connect the shelf bracket to the shelf will not be
glued, in case we ever want to disassemble the bookshelf. Because of this, when
books are placed on the shelf, I want to make sure that the shelf will move as
little possible. If it moves too much, then the pin might work itself out over
time, as unlikely as that is.
In our scenario, the only likely movement when a book is placed on a shelf will
be the shelf attempting to rotate about the end of the shelf bracket (right side
of above picture), since the shelf is hanging off the shelf bracket.
Therefore, the dowel pin should be as far from the end of the shelf bracket as
possible.
But, there is one more bit of info to consider. Remember that I joined together
two boards with dowels to make the
shelves,
and I don’t want to drill into a dowel that connects the shelves. I had already
thought of this possibility, so when I created my dowel pin layout, I made sure
to leave some room for this step.
Therefore, the only two Dowelmax positions that are possible are 7 and 8,
labeled in the picture above.
Since 7 is the furthest possible from the potential fulcrum of the shelf on
the end of the shelf bracket, I’ll use that one. This will ensure the shelf
moves as little as possible when books are placed on it.
Shew! That was a lot of thinking for a simple dowel hole Now, time
to put the plan into action!
 Drilling the Perfect Hole
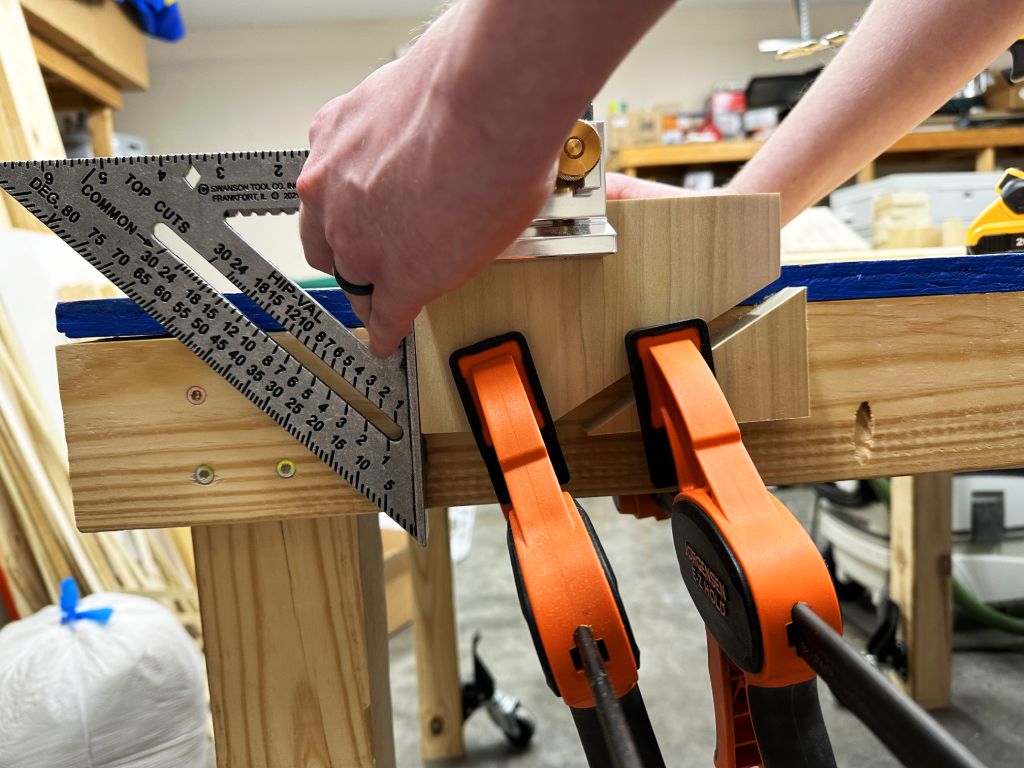 |
| While setting up my shelf bracket in a similar way as I did when drilling the other side of them, I realized that it was hard to clamp it securely to my table. So, I used one of my triangle offcuts to help secure my clamps better. |
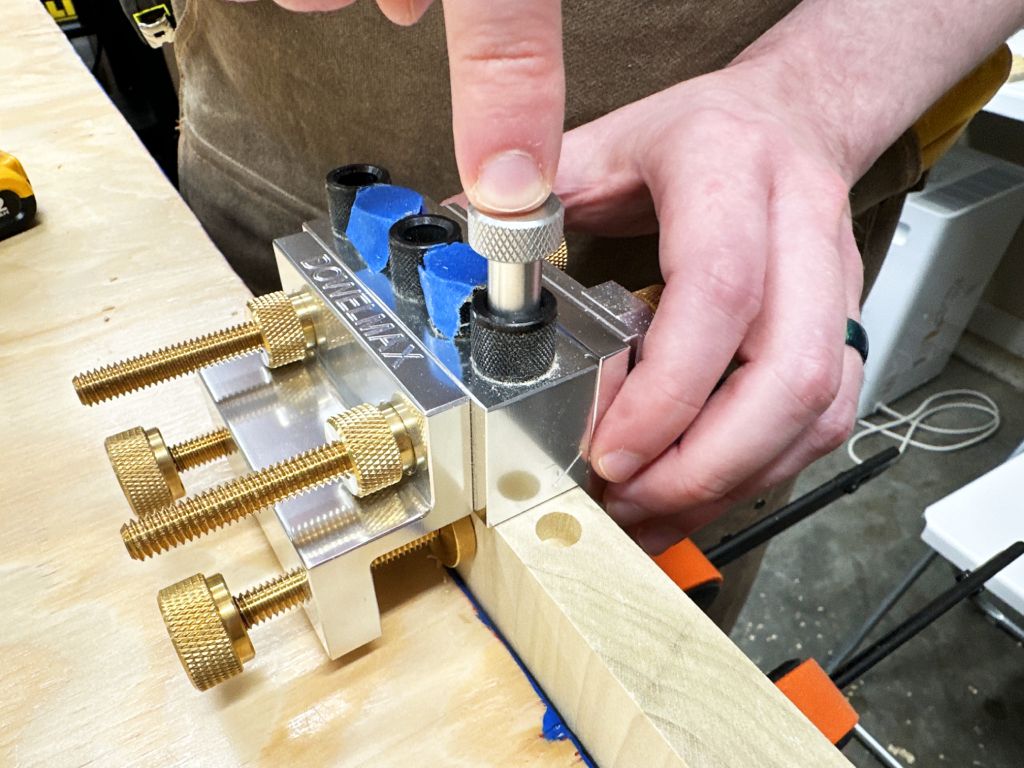 |
If the Dowelmax only has 5 positions, and I need to drill position 7, how is this possible? First, I drill a shallow hole in position 5, then unclamp the Dowelmax. |
 |
| Next, I use a temporary pin that came with the Dowelmax to insert into this hole. |
 |
Finally, I clamp the Dowelmax, and I’m now able to drill position 7! |
 |
I got tired of my triangle offcut falling every time I unclamped, so I taped it to the table. Ever heard of “you can never have too many clamps”? Well, you can never have too much tape!  |
 |
Story  also made an appearance to help drill these dowel holes! also made an appearance to help drill these dowel holes! |
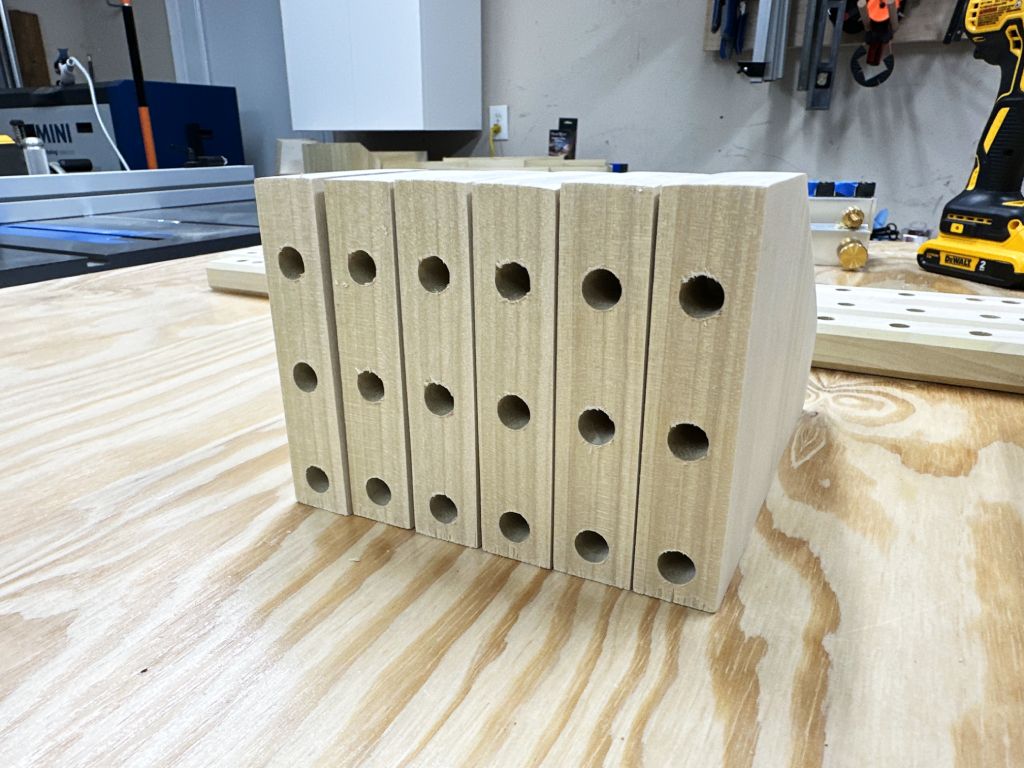
Results
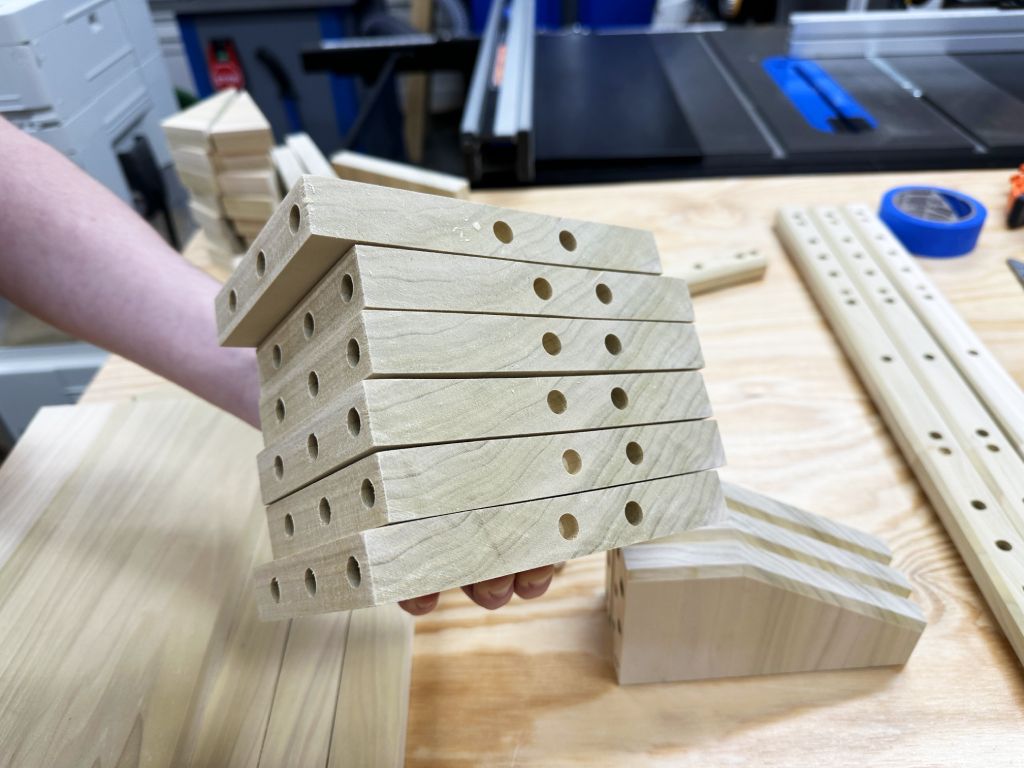 |
| And just like that, all the precise dowel holes are complete! |
We have blocks of wood with holes in them. Next time, we’ll make them look less
like chunky blocks and more like sculpted wood! We’ll be routing all the edges
with the router table. Then, we’ll do the final sanding on all the pieces to
ready them for painting!
We’re almost at the end of this project! 
Until next time,
 Pixel
Pixel
 Next Time!