The Bookshelves DIY experiments are complete! At least, they will be… I’m
going to review the results from last
time, and then redo some of
the experiments, but BETTER this time! ![]() We’ll have a path forward by the
end of this article!
We’ll have a path forward by the
end of this article!
 Starting Point
 |
|---|
| Too many experiments to put a small review here for each one! See the last article to review the experiments. |
 Wood Filler Results
 |
|---|
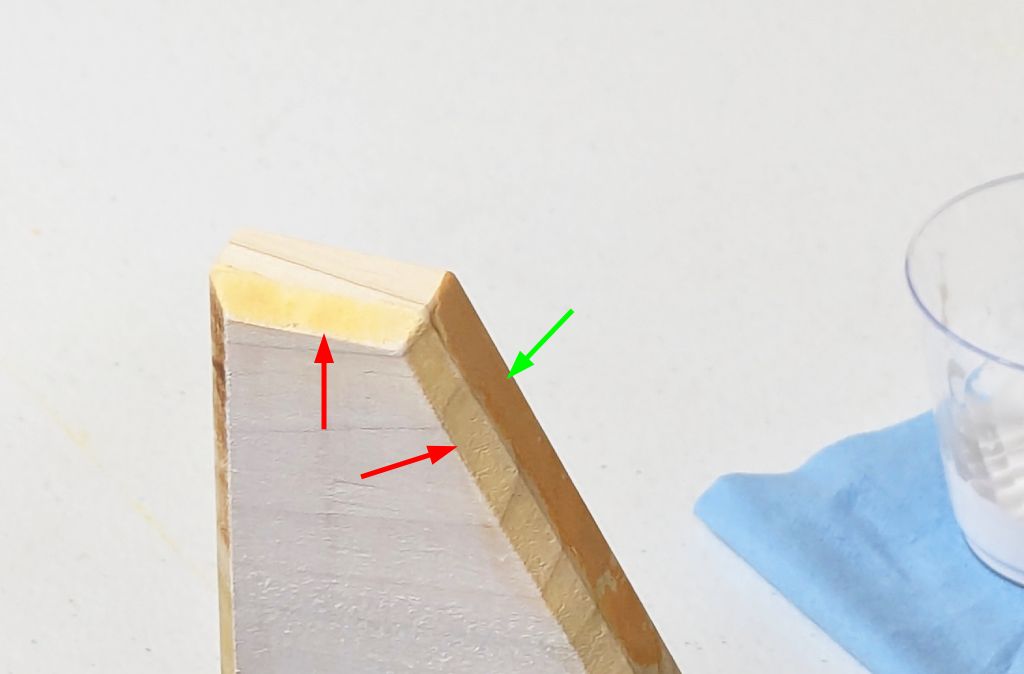
| I sand the wood filler flat. The quick drying filler (red) seems to behave better than the normal filler (green). |
Even though the quick drying filler is slightly easier to sand down and the application was easier, both are an extreme pain to sand flat due to how I had to apply them in these thin areas. I’m sure I could improve my application technique… however… I don’t like the result at all!
The wood filler completely kills the look of the grain, and it’s hard to make it
flat and uniform after sanding. So, no reason to refine my application
technique, since I don’t want to use wood filler now! ![]()
I think I’ll just sand any end grain the best I can and we’ll see how it turns out after applying the chosen finish! In fact, I wonder how the whitewash will look on this larger piece of wood… Let’s try it out!
 Whitewash Finish, Part 2
 |
|---|
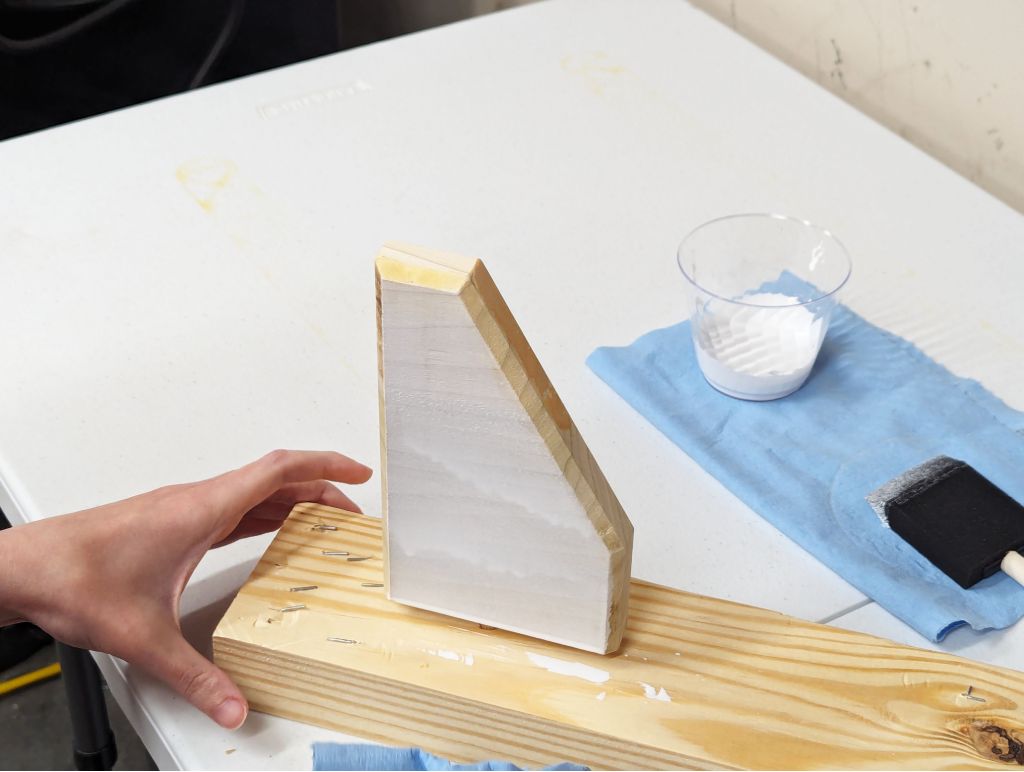
| I made a quick holder for keeping the bracket standing up with a dowel while the paint dries, similar to what we’d do for painting all the brackets when the time comes. Painting the bracket results in a lot of runs on the vertical surface! |
This paint running is a problem, and does show up in the final result after wiping off the excess paint. But it just means we’ll need to be careful when painting the real brackets, and keep the surface we’re painting flat until after we wipe the surface.
Otherwise, the whitewash looks great! And we’re able to keep the white uniform to get the modern look we’re wanting.
 Once More, With Clamps!
This whole time doing these other experiments, I just CANNOT get the poor glue-up out of my head. I want to try again, and I don’t care how, I want it now!
 |
|---|
| Veruca Salt from “Willy Wonka and the Chocolate Factory” (1971) also wants this experiment redone now! |
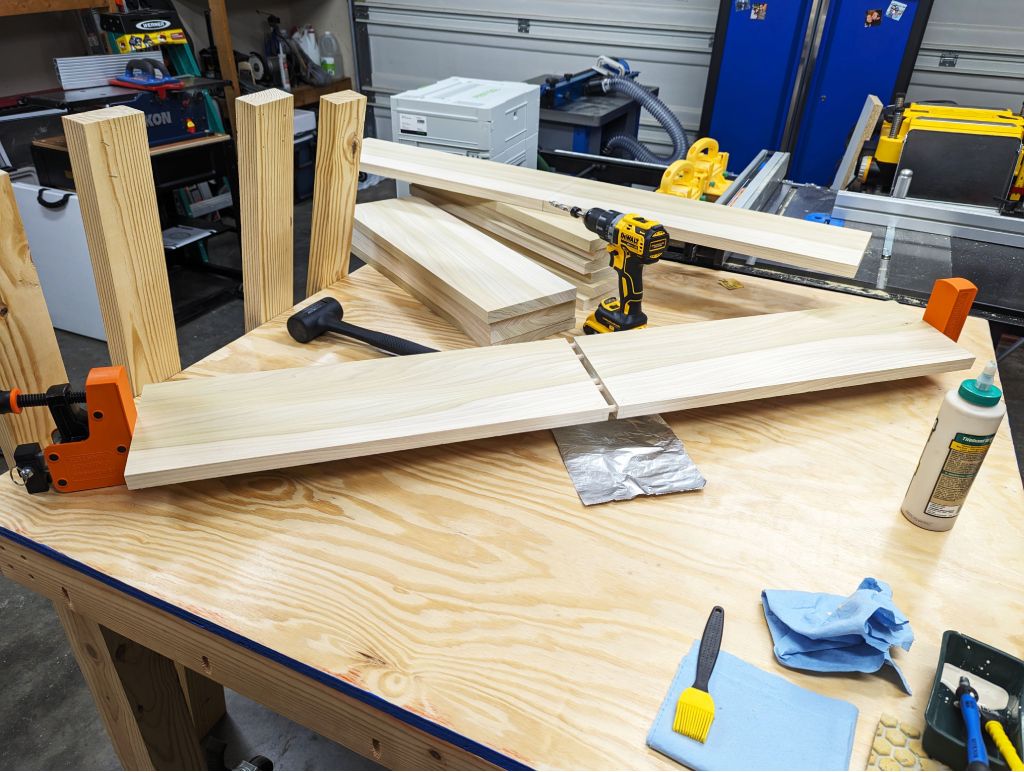
After a quick trip to Lowe’s, I’m back with two long parallel clamps! I’m going to try this glue-up again, and I’m going to get it right this time!
 |
|---|
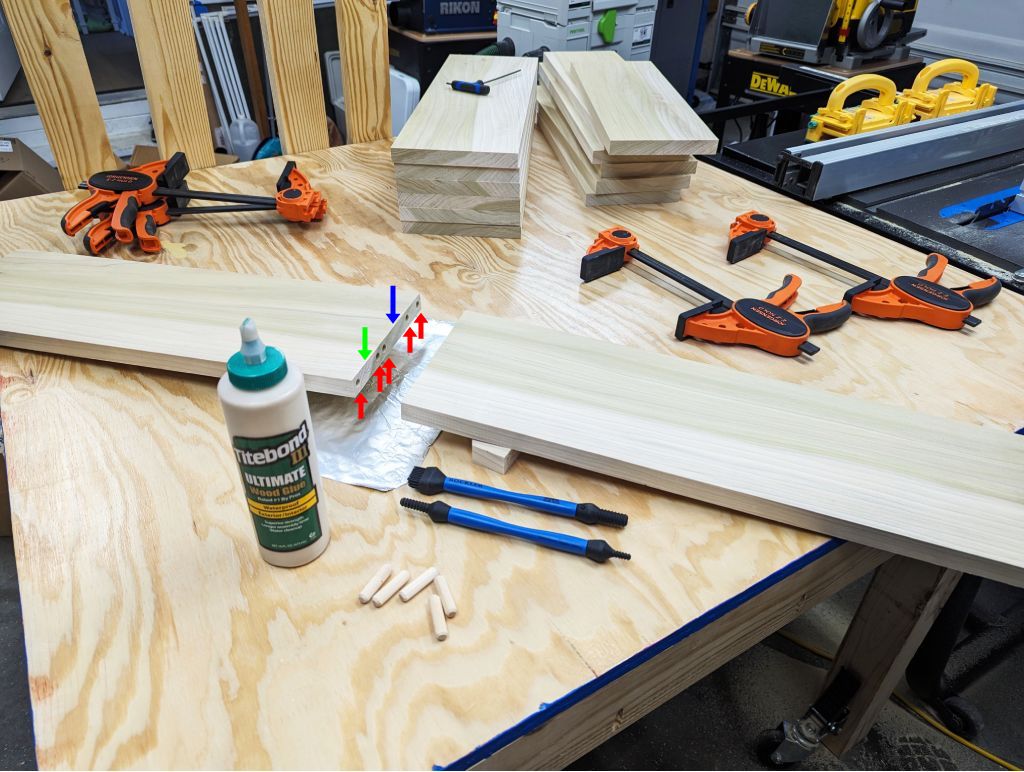
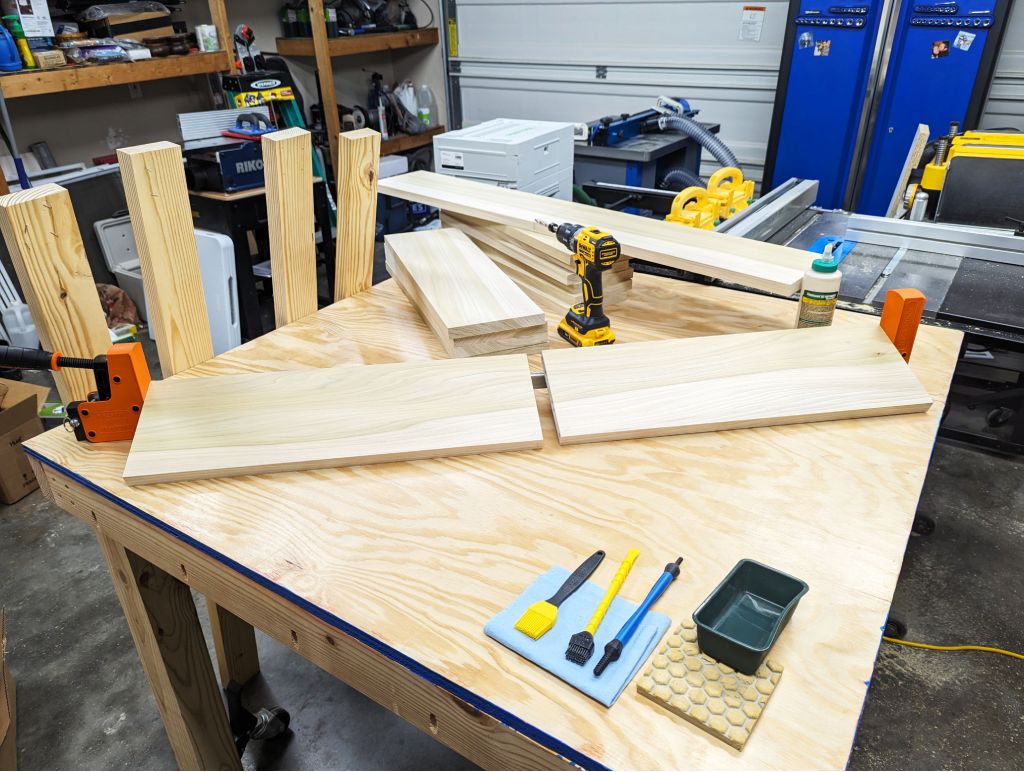
| Got my area set up again for another shelf glue-up! I’m going to try just using one of my two new clamps. If successful, I can glue another shelf together at the same time with the second clamp. |
 |
|---|
| After gluing and placing the dowels, I start clamping the joint together, using the screw handle to tighten the joint closed. It appears to be working! |
 |
|---|
| Change of plans! As I clamped the joint tighter, only having one clamp resulted in uneven pressure, causing the dowels to bind and the joint couldn’t be tightened any further. Good thing I have the second clamp as a backup! |
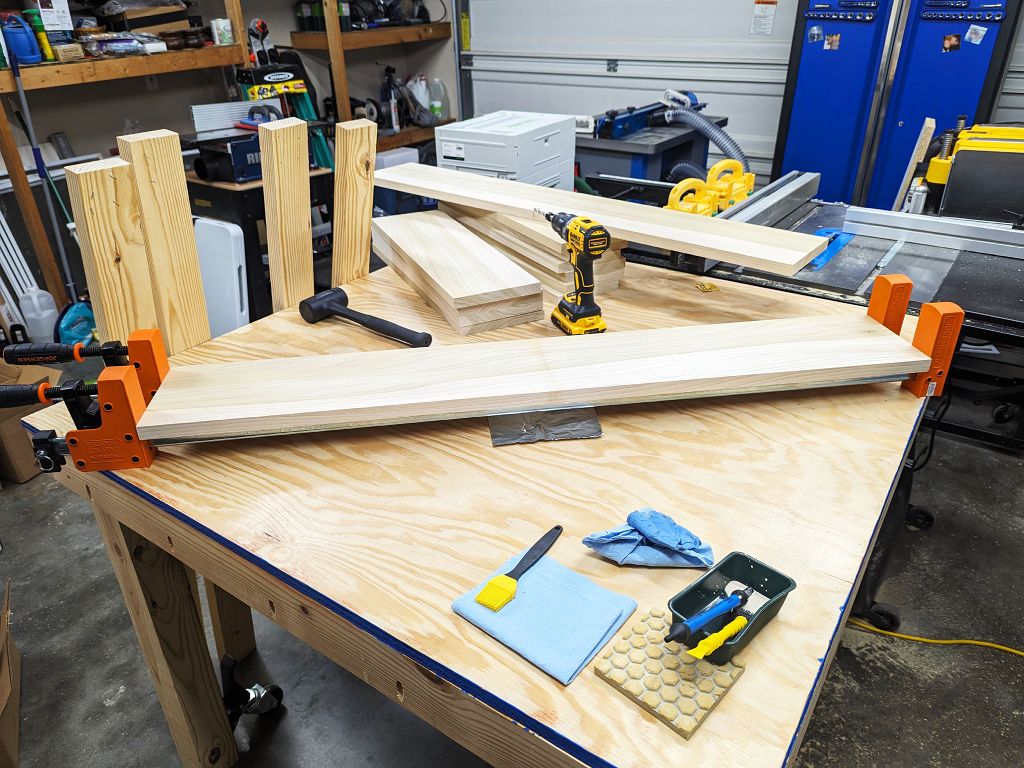
 |
|---|
| The second clamp makes it easy to get a tight joint |
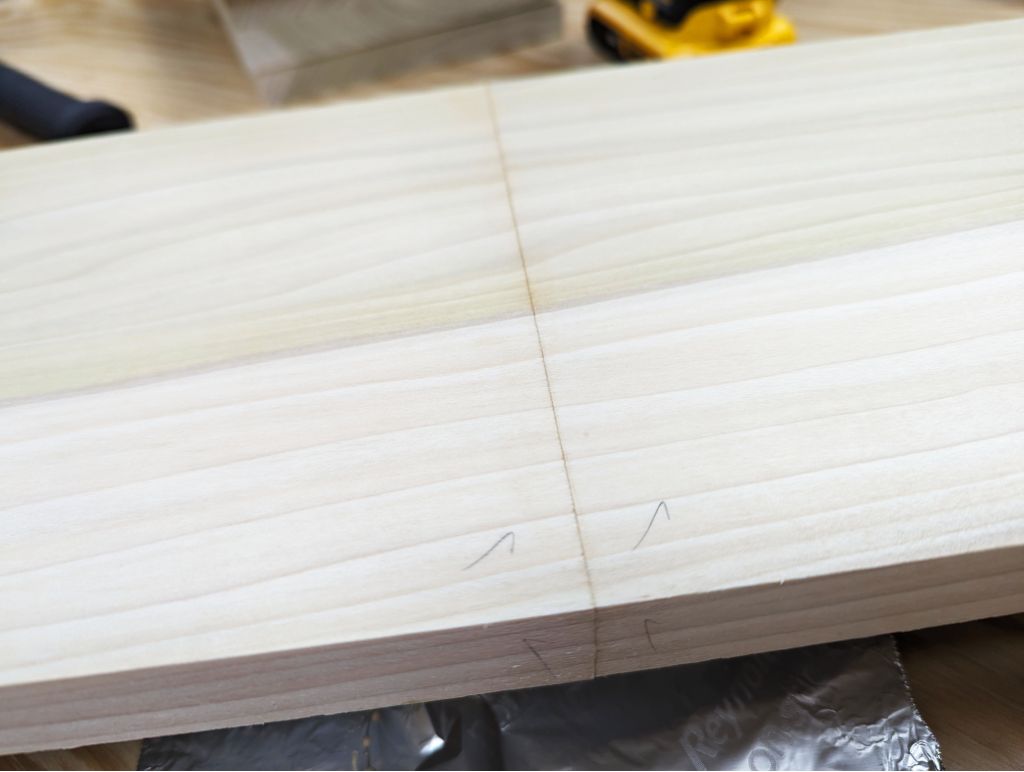
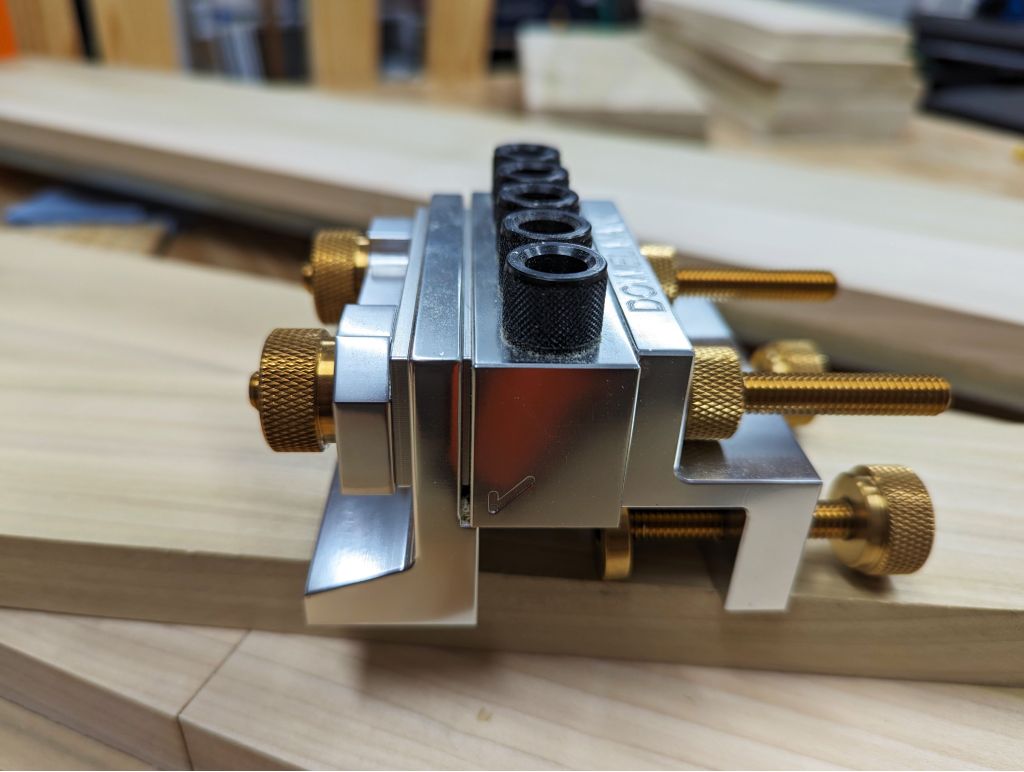 |
|---|
| If you’re wondering what the checkmarks on the wood are from, it’s how I mark which edges should be aligned to the Dowelmax jig. See the checkmark in the metal here? |
 Lessons Learned
I learned a lot from these experiments! Here are the key takeaways:
 Tape Key Features in the Room
Taping exactly where the bookshelf’s features will go was great! It was more than just taping off an outline. It allowed us to see the size AND shape of the bookshelf exactly where it will go on the wall. We were even able to hold books to the wall to visualize how many and where they would go.
Dowelmax = WOW!
The Dowelmax is a great tool! I can tell the joints are VERY strong. I probably
didn’t even need to use glue on the two shelves I made ![]() Being
able to make a precise joint quickly is truly a transformative shop tool!
Being
able to make a precise joint quickly is truly a transformative shop tool!
 Clamps > Arm Strength + Hammer
Even with a hammer, I was unable to squeeze together my shelf glue-up properly. I should have went out and bought the long clamp I needed instead of trying to make do with what I had. And this is a good lesson in general: get the right tool(s) for the job! Else, you’ll just spend more time and effort trying to fix an avoidable problem you will end up creating.
Don’t Shorten All the Wood
I should have just cut a 48 in (122 cm) long piece of wood for the shelves, instead of making everything the same 24 in (61 cm) long. The Dowelmax worked great, but it was just a lot of extra work when I could have just left a few pieces of my wood longer during milling.
Then the question is, could I have kept enough thickness in the wood if I had
done so? Or would what happened last
time happen again? ![]() I
just need to make sure and buy straighter or thicker wood in the future so I can
keep the thickness I want with longer boards.
I
just need to make sure and buy straighter or thicker wood in the future so I can
keep the thickness I want with longer boards.
Wood Filler on End Grain
I don’t like the look of wood filler on end grain. It’s hard to apply, hard to sand, and it kills the look of the grain. But, if I was doing a painted piece, with solid paint and not whitewash, then using wood filler would probably be worth pursuing.
Whitewash Finish
Whitewash is a great finish for poplar! It’s easy to apply, dries quickly, and
does a great job taking away the green color that poplar has. It’s also easy to
make it look uniform and modern. I’m excited to see how it looks on the whole
bookshelf! ![]()
Paint Runs
Paint runs are a problem when painting vertical surfaces. Easy fix: we’ll keep the surface we’re painting flat until after we wipe the surface.
Two Clamps > One Clamp
Two clamps for a glue-up provides so much more stability and is a much calmer experience than trying to use one clamp.
 Next Time!
We have a path forward! Now, I can feel good cutting all the wood for the
brackets, so I’m going to do that next ![]()
Until next time,
![]() Pixel
Pixel