I started this project to learn basic woodworking skills to make furniture and
wooden house projects. Like many woodworkers starting out, I wanted to do a
beginner-friendly(-ish) project that would still be impactful at the end, and
motivate me to continue woodworking. And now, here we are!
The airy bookshelf project will be complete in this article! I am so incredibly
excited to see the final results!
 Starting Point
 |
 Let do this. Let do this. |
 Attaching to the Wall
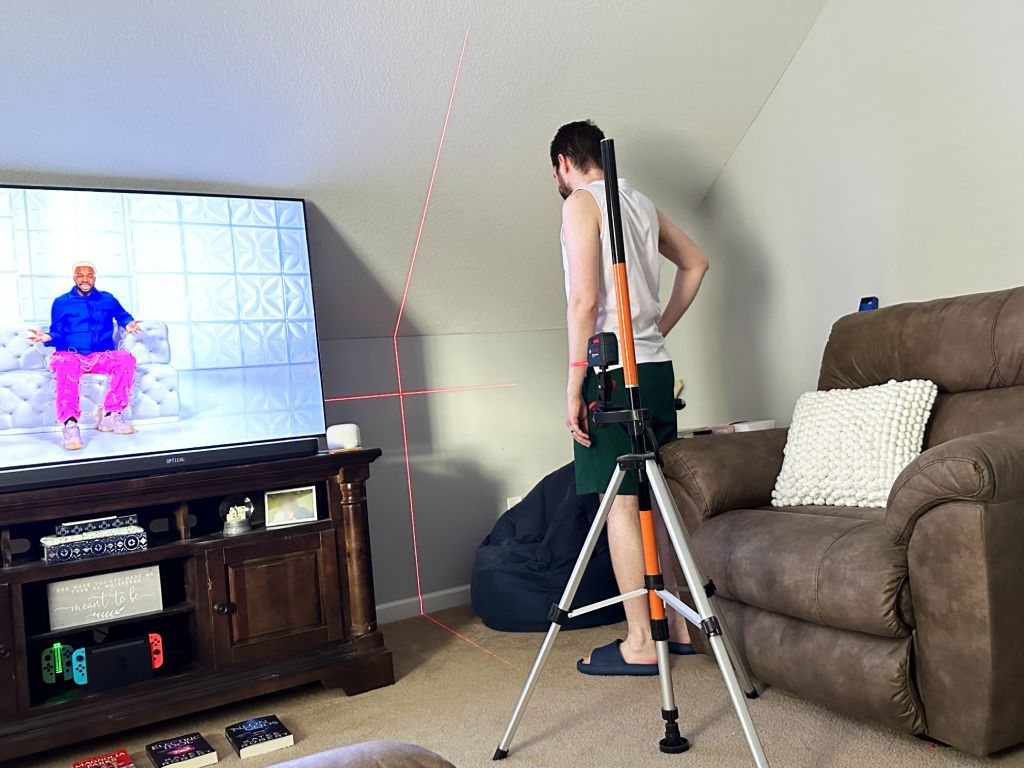 |
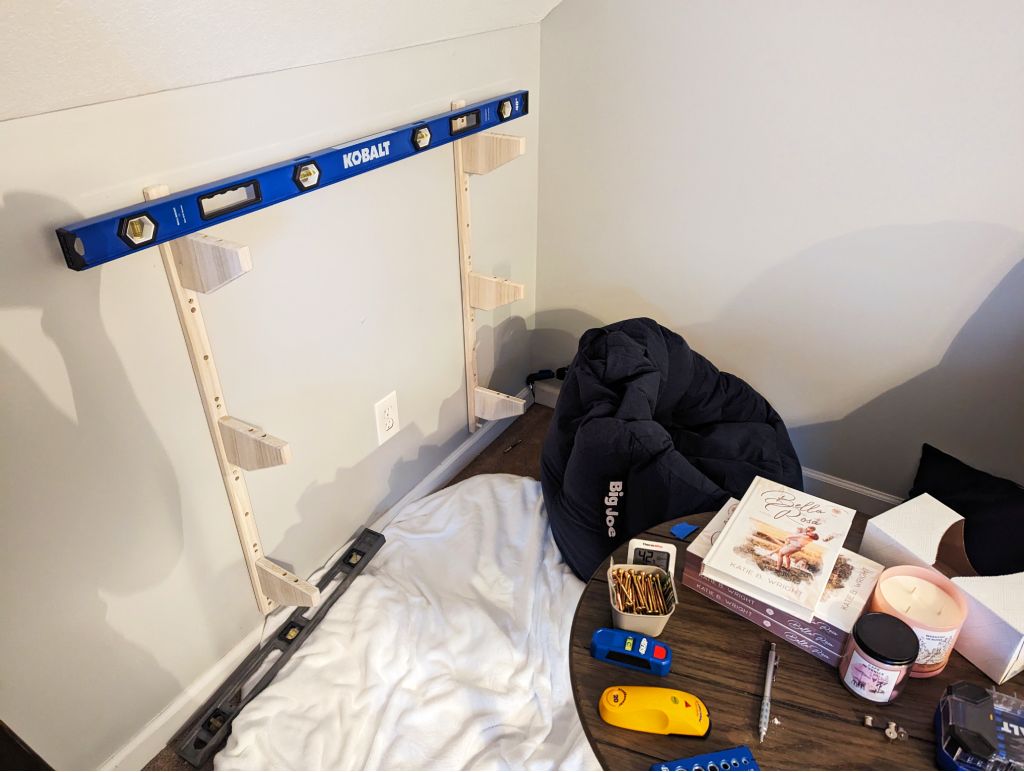
| I do an early morning inspection of the wall where the shelf is going. I line up the laser level where I’ve previously marked the location at the top of the left-most bracket assembly. I’m groggy, but determined. |
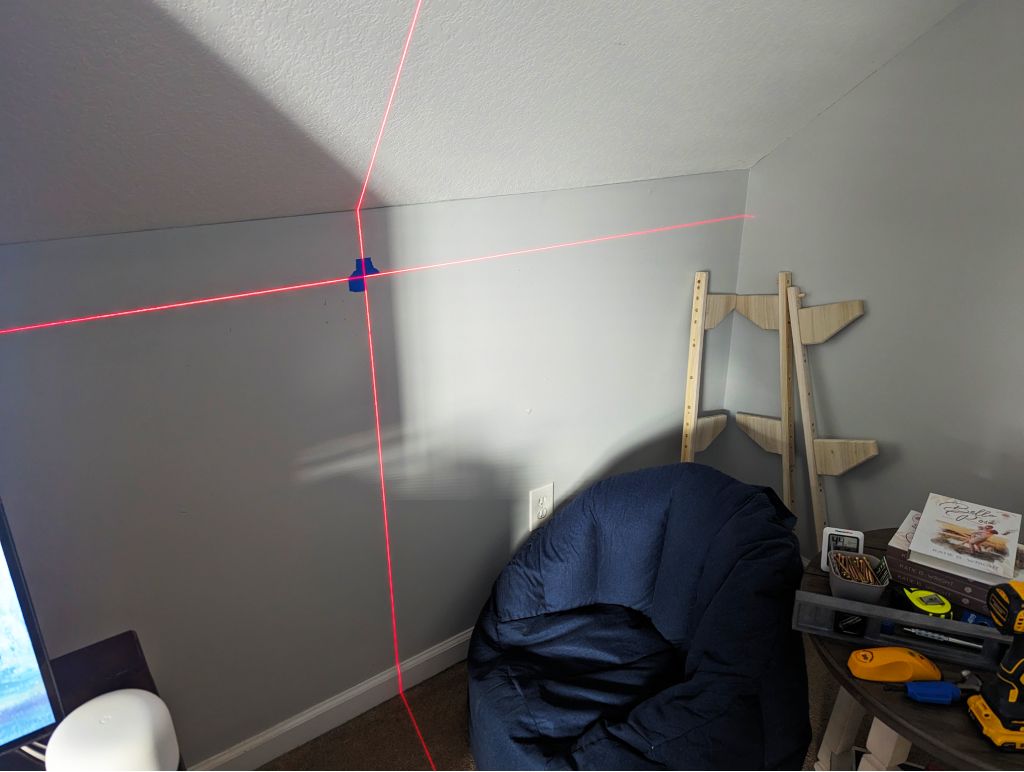 |
My wife Story  and I decide we like the location! I mark it with some tape in such a way that the tape won’t get stuck behind the bracket assembly once it is attached to the wall. The top left corner of the bracket assembly will be exactly where the laser is marking. and I decide we like the location! I mark it with some tape in such a way that the tape won’t get stuck behind the bracket assembly once it is attached to the wall. The top left corner of the bracket assembly will be exactly where the laser is marking. |
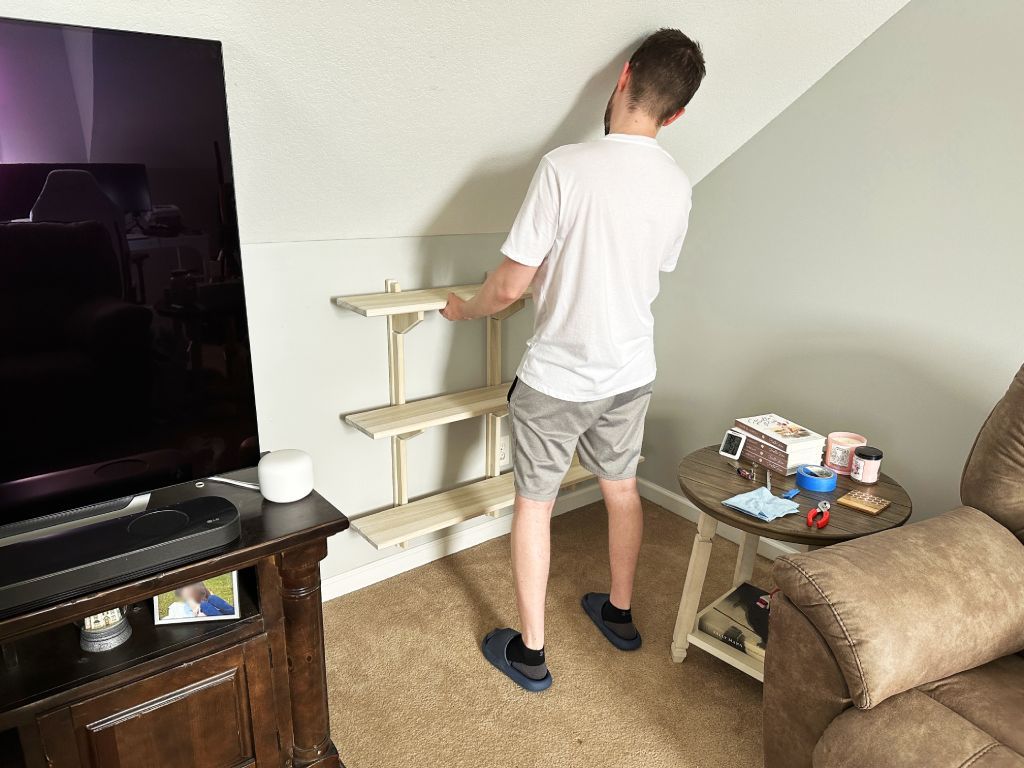
I pick the straightest bracket assembly, and Story holds it securely to
the wall. I then drill a pilot hole in the top hole through the wall, then
immediately put a screw in it. I work my way down one hole at a time so that any
bowing away from the wall will be gradually flattened with each screw.
 |
| I realign the laser level to mark where the top shelf will be, and that will be used to line up the next bracket assembly. |
For the right-most bracket assembly, I pick the most curved
assembly.
I figure this is the best time to use that one since it will be the furthest
away from the user. We screw in the top hole. Then the next hole down. The rest
of the bracket assembly is crooked.
My wife puts her ENTIRE body into this thing to get it to stay securely
in place while I do the third hole. We do this for the remainder of the 6 holes,
and we are both sweating at the end of this one. It was about 10 minutes of a
full body workout, using muscles we didn’t know we had  I’ve learned how
to not have this problem
again
in the future!
I’ve learned how
to not have this problem
again
in the future!
 |
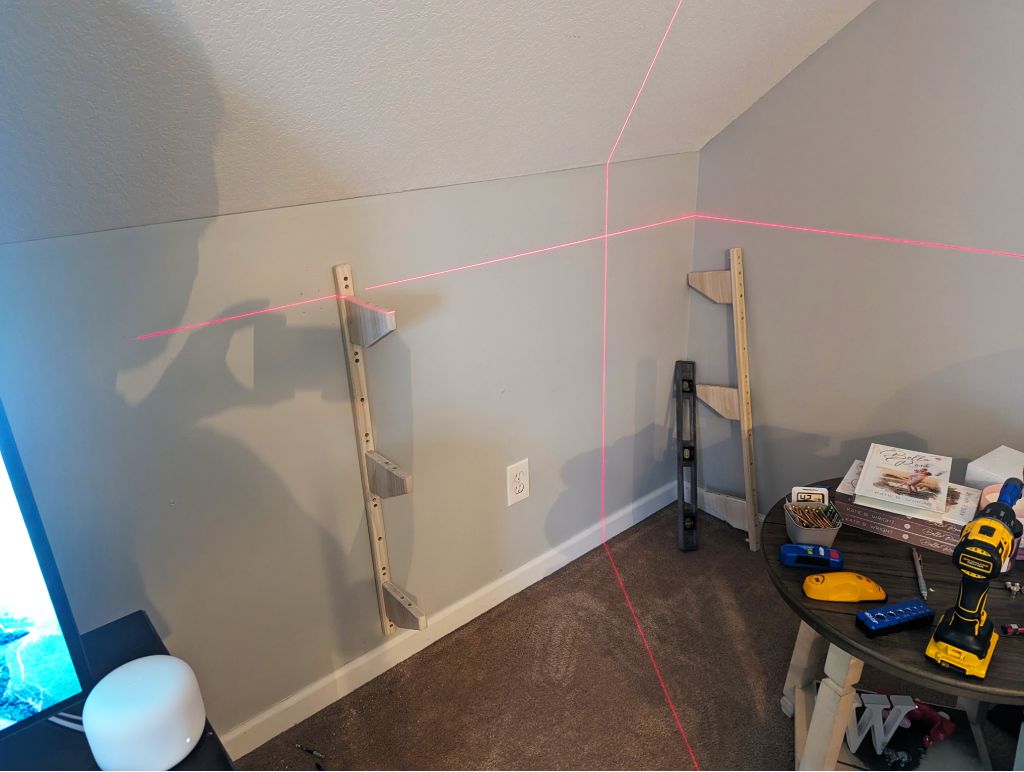
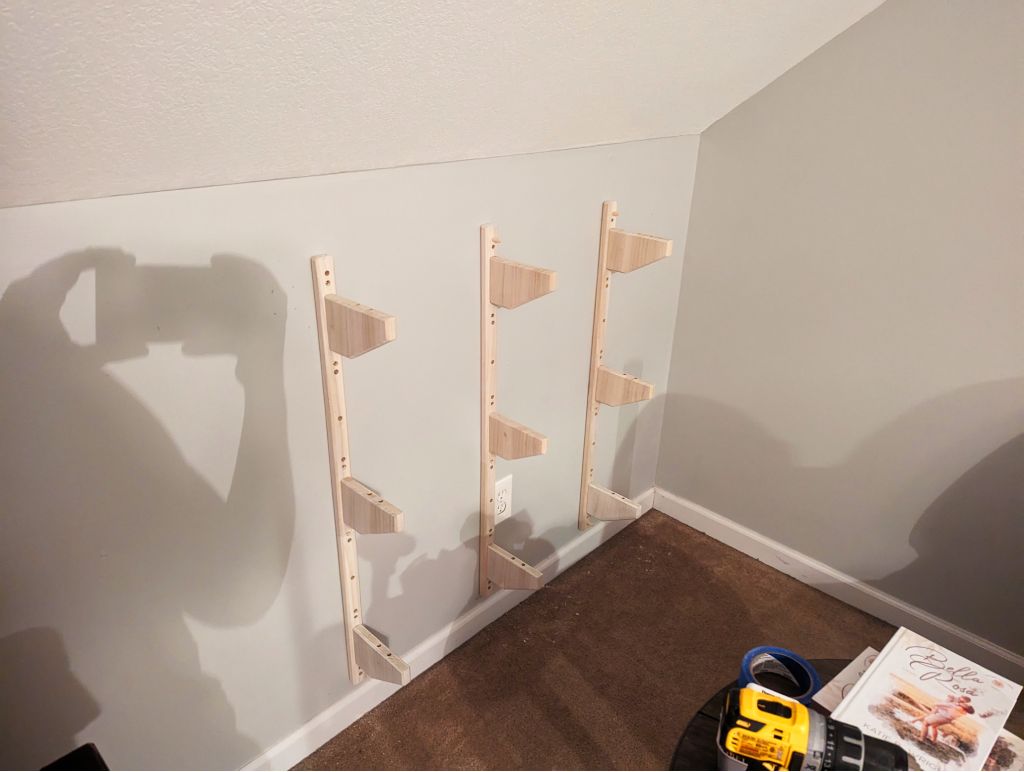
| At the end of our impromptu exercise session, we now have 2 bracket assemblies attached to the wall! Verification of it being level is confirmed with our large bubble level. |
For this third and final bracket assembly, it is imperative that it is not too
low or too high, else each shelf will not sit properly on the brackets. This
alignment is difficult, and is a major downside to a 3-bracket-assembly design,
as opposed to just 2 bracket assemblies with one on each end of the shelf.
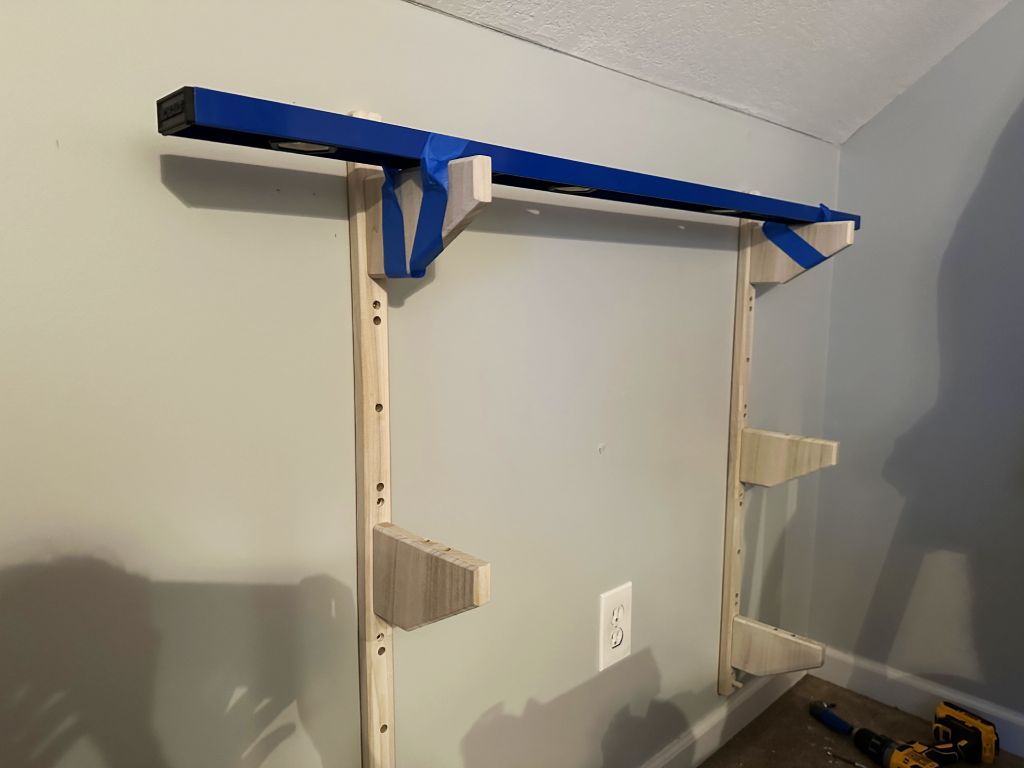 |
To help with alignment, we tape the bubble level to the top bracket so that we can just press the remaining bracket assembly up and make positive contact with the level. This will ensure it is perfectly aligned! This bracket assembly is also curved, so we get some more impromptu exercise to screw it to the wall  |
 |
| Success! It’s already looking so good!!!! But, let’s verify the alignment with an actual shelf, just to be sure! |
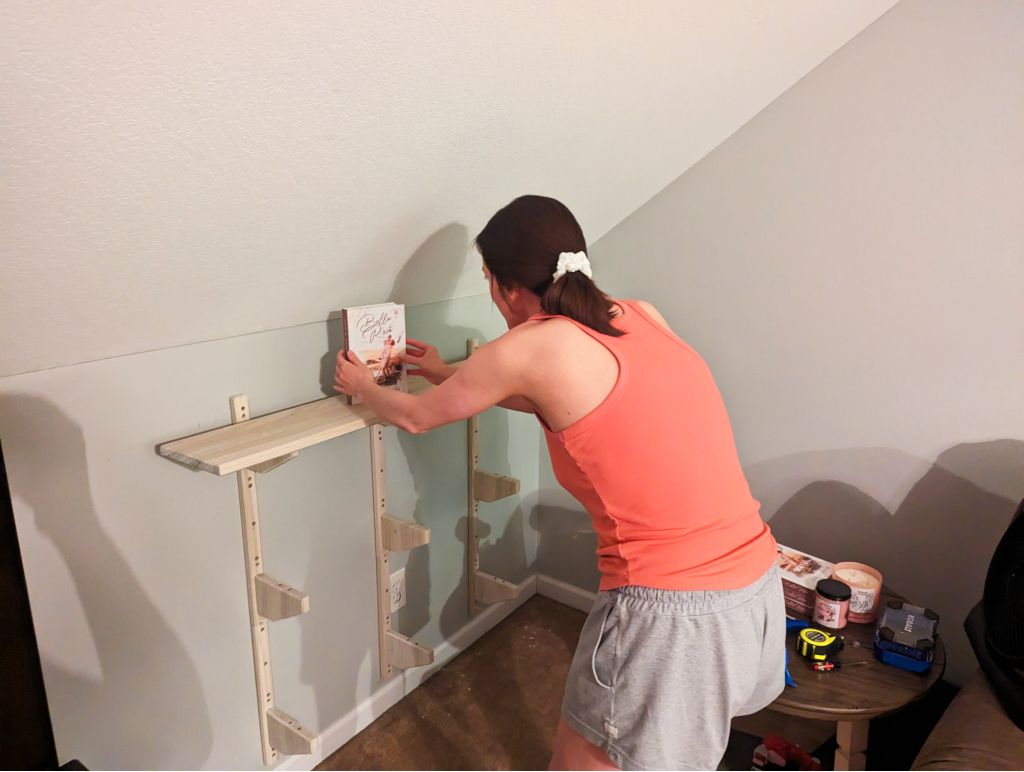 |
I lay an unbuffed, still-not-doweled shelf on top, just to see. WOW!! This is going to look amazing once the vanity plates are on it! My wife immediately puts the book she wrote on top just to see it on the shelf. I wish you could have seen her face once she did  |
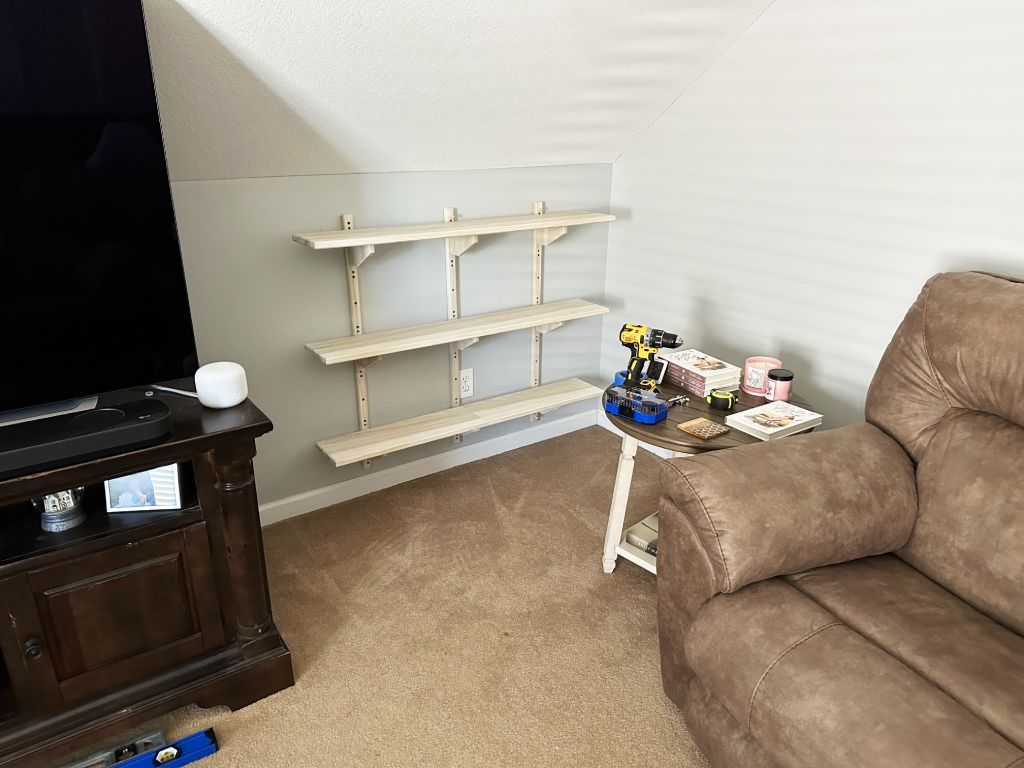 |
| We go ahead and rest the other shelves on the brackets, just to get a look at it. We’re very excited! Let’s get these buffed and attached, for real now! |
 Buffing Better
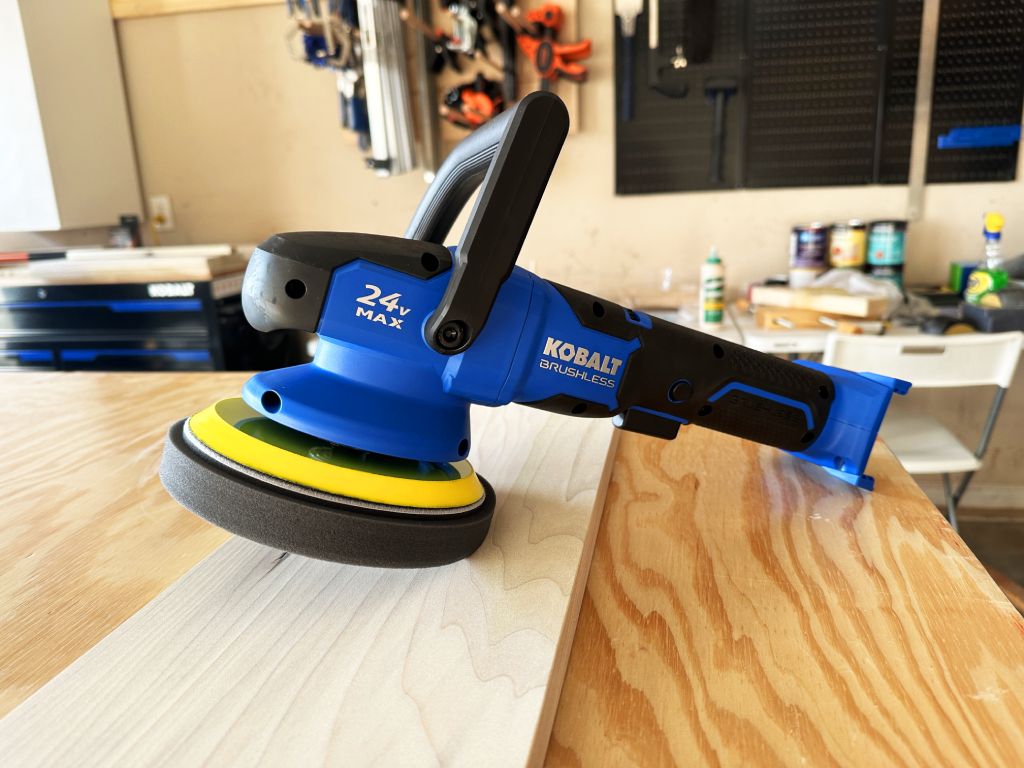 |
Remember that time I hurt my elbow trying to buff the shelves by hand? Well, no more of that! I’ve upgraded from the Stone Age  |
 |
I don’t really like any of the 3 pads that come with it, since none of them seem to make a difference when buffing this Osmo wood wax. So, I take a disposable shop towel, place it underneath one of the pads, and it works AMAZING! I hold the wood in place with 2 clamps at either end of the table. This works goes FAST, and without any elbow injury this time  |
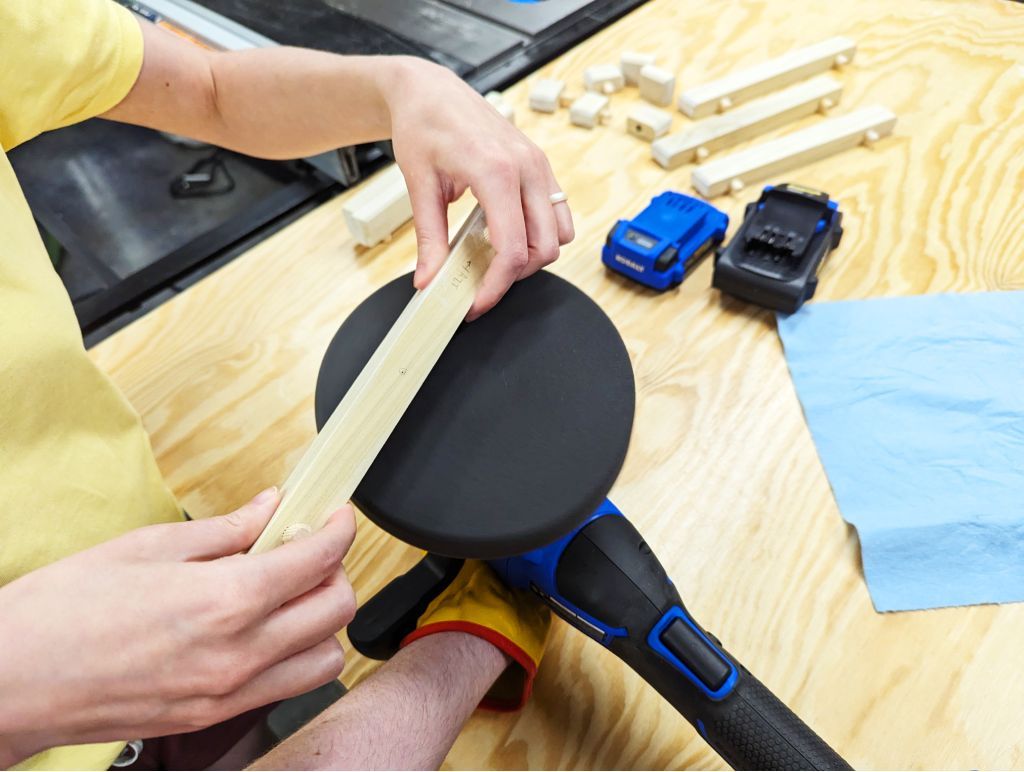 |
Who says we can only use this on the big shelves?? Not me! Story can buff the vanity plates while I hold the tool steady, saving my fingers from having to buff these manually  |
 |
| That took no time at all! Everything is buffed, and we’re ready to attach it all! |
 Attaching Shelves
 |
| We attach the vanity plates to hide the fasteners on the brackets. Then, I tape two 1/4 in (6 mm) spacers where the bottom shelves will go. I place dowel transfer plugs in the holes I want to use for securing the shelf with dowels, like I did before with the vanity plates. |
We place the shelf here, center it, then press down on it to make two divots on
the shelf where we should drill dowel holes. We repeat this for the 2 remaining
shelves.
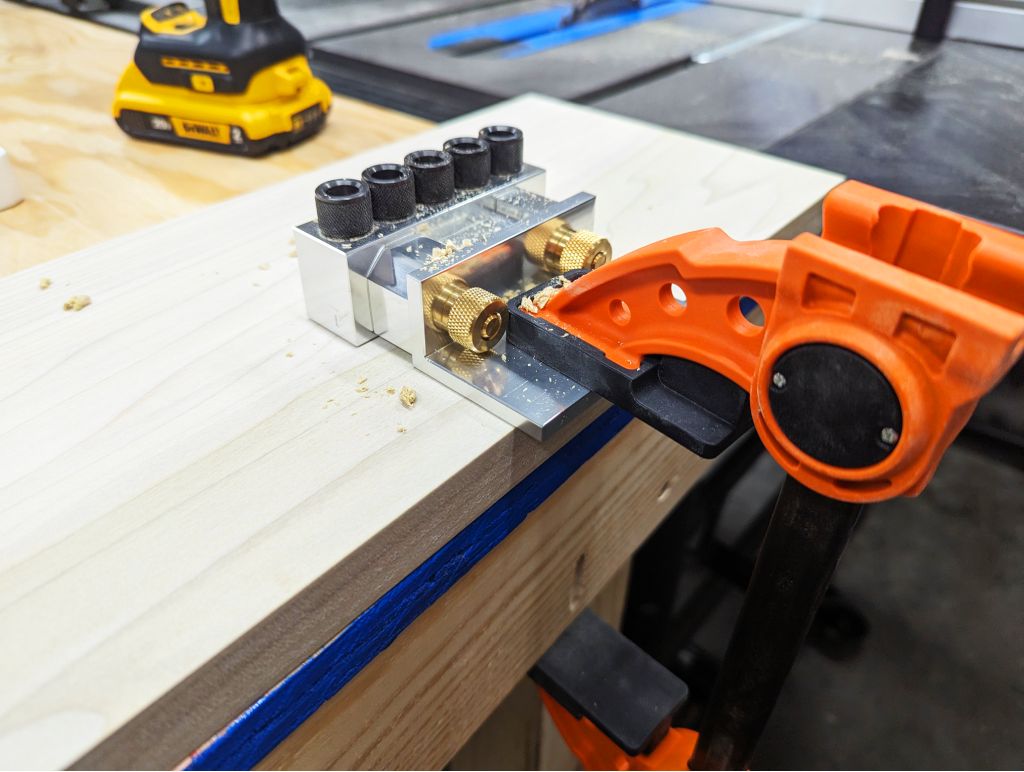
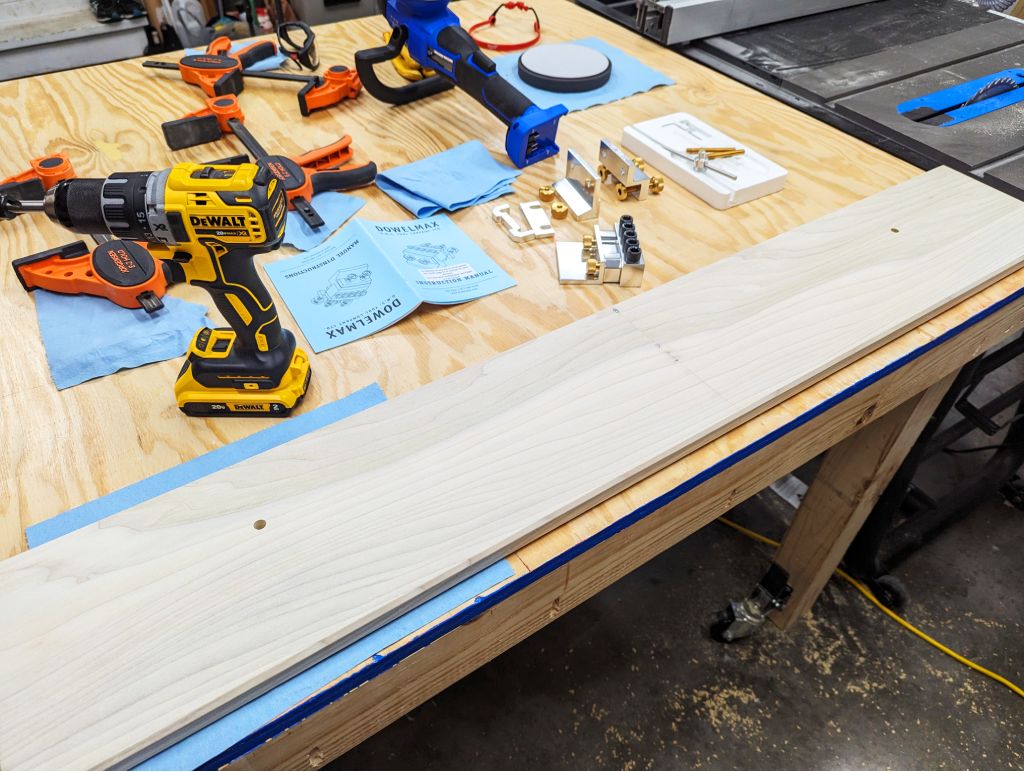
Now that I have my divots marked in the shelves, I need to drill the holes! I
take my Dowelmax and adjust my drill bit to come out of the Dowelmax enough to
drill the holes, but not enough to penetrate fully through the shelf.
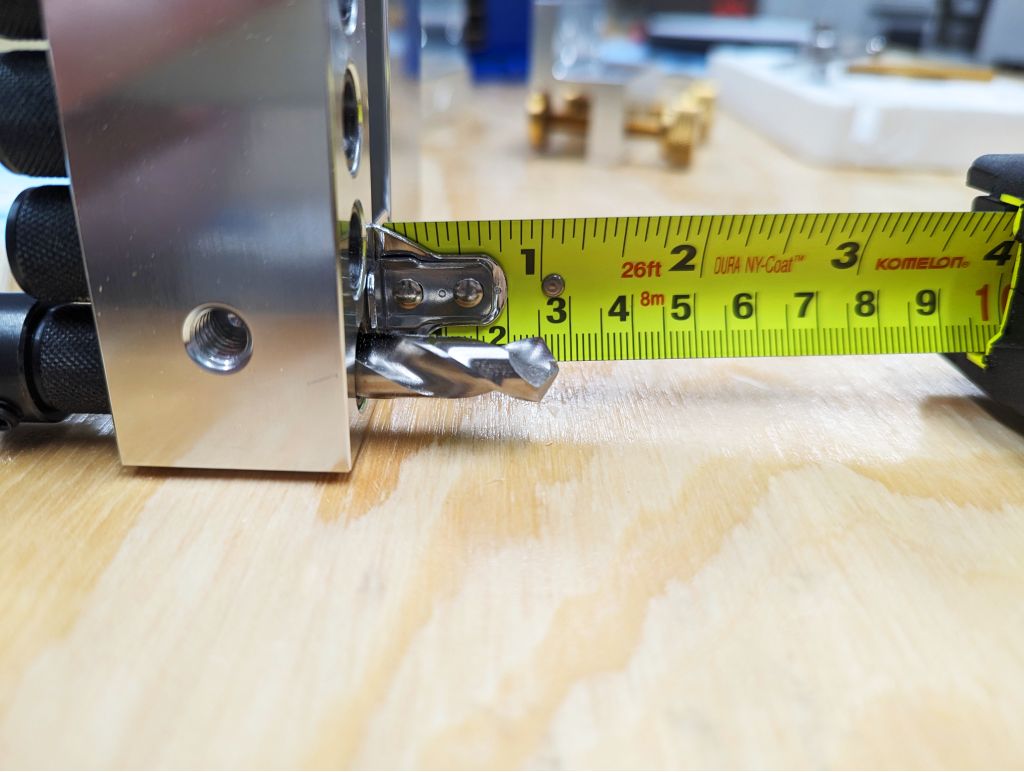 |
If I left my drill set at where you see it in the picture, it would go all the way through  I end up setting this to be around 0.5 in (12 mm) deep. I end up setting this to be around 0.5 in (12 mm) deep. |
 |
| Here, you can see the two holes completed on one of the shelves. As an aside, you can kind of see my label marks in the middle of the shelf, marking which shelf this is. This will never be seen because this is the bottom of the shelf, and the middle shelf bracket will fully hide this. |
 |
After doing all three shelves, I take them upstairs. You know what this means, don’t you????  |
 FINAL Results
I have this divided into 3 parts:
-
Empty — this is just the Airy Bookshelf, with nothing on it, and will
allow us to see many of the woodworking details.
-
Staged — this will show the bookshelf with some items on it, but not
too many.
-
Real Life — this is the bookshelf in its natural habitat, with as many
books will possibly fit on it
 Empty
Empty
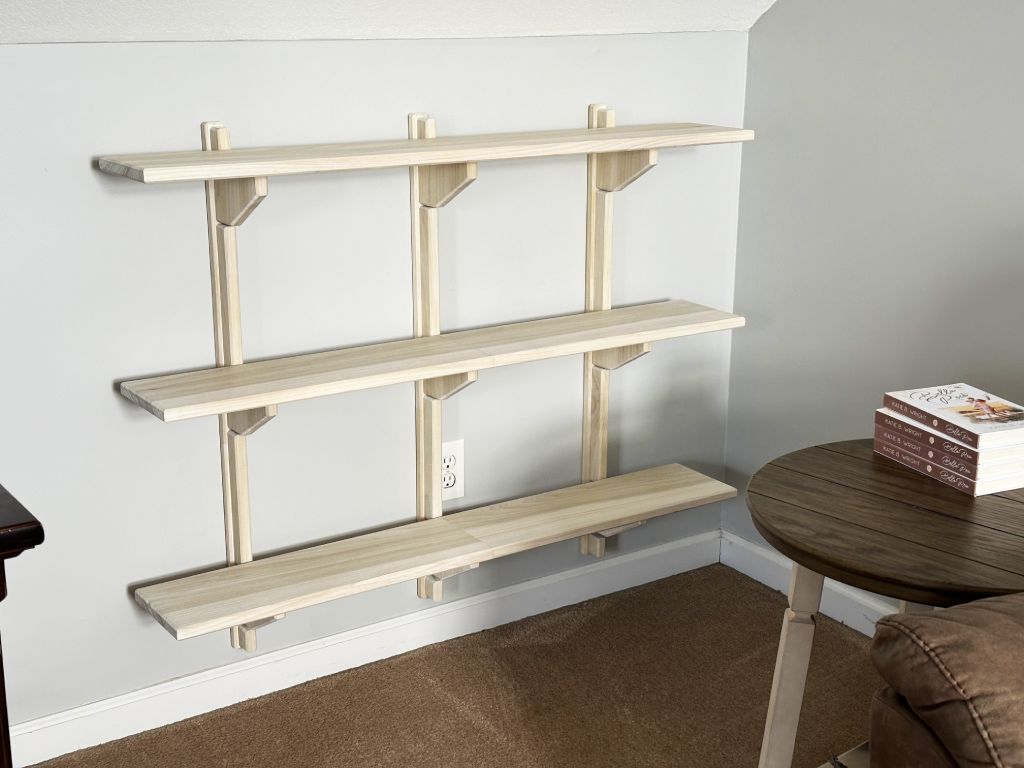 |
| Here it is in all its glory! While it looks airy—and that was the goal—something you can’t tell in the photo is how wildly sturdy this thing feels! I’m pretty sure I could jump on it and it would be undamaged! Putting my hand on it… it just feels so substantial |
 |
| The vanity plates hiding all the wall fasteners really help tie this together! And the shelves just kind of look like they’re floating there. Everything seems… Airy |
The bottom is high up enough so that a vacuum cleaner won’t collide with it. And
the middle bracket assembly is perfectly to the left of the outlet, allowing us
to use it in the future, if needed.
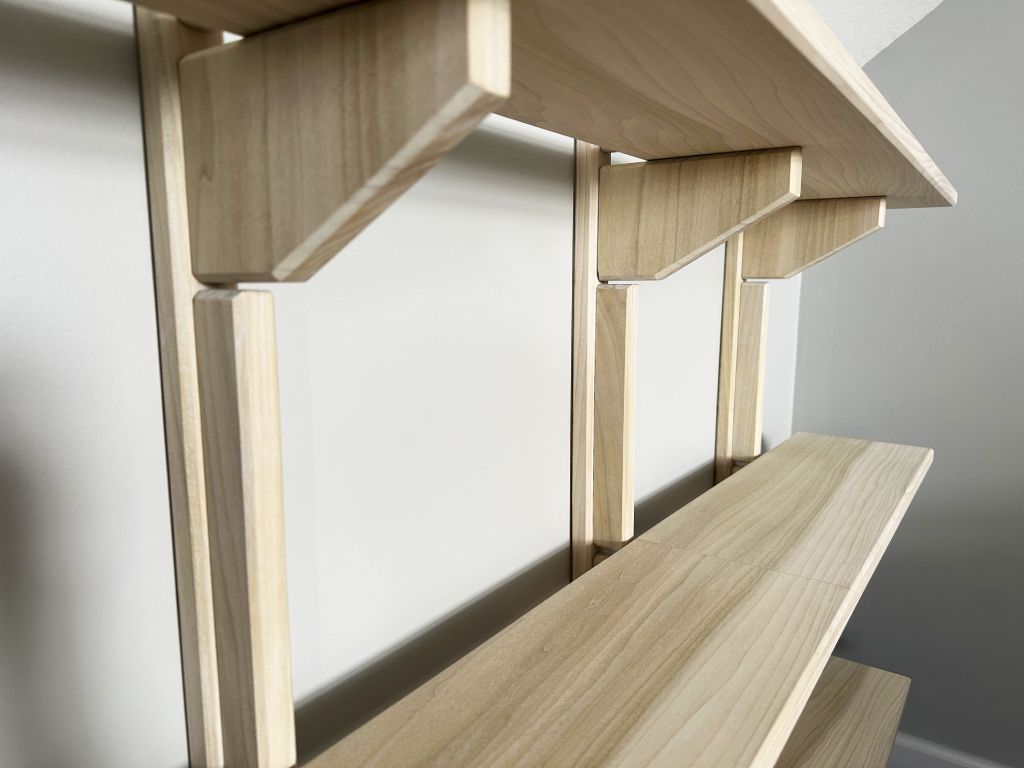 |
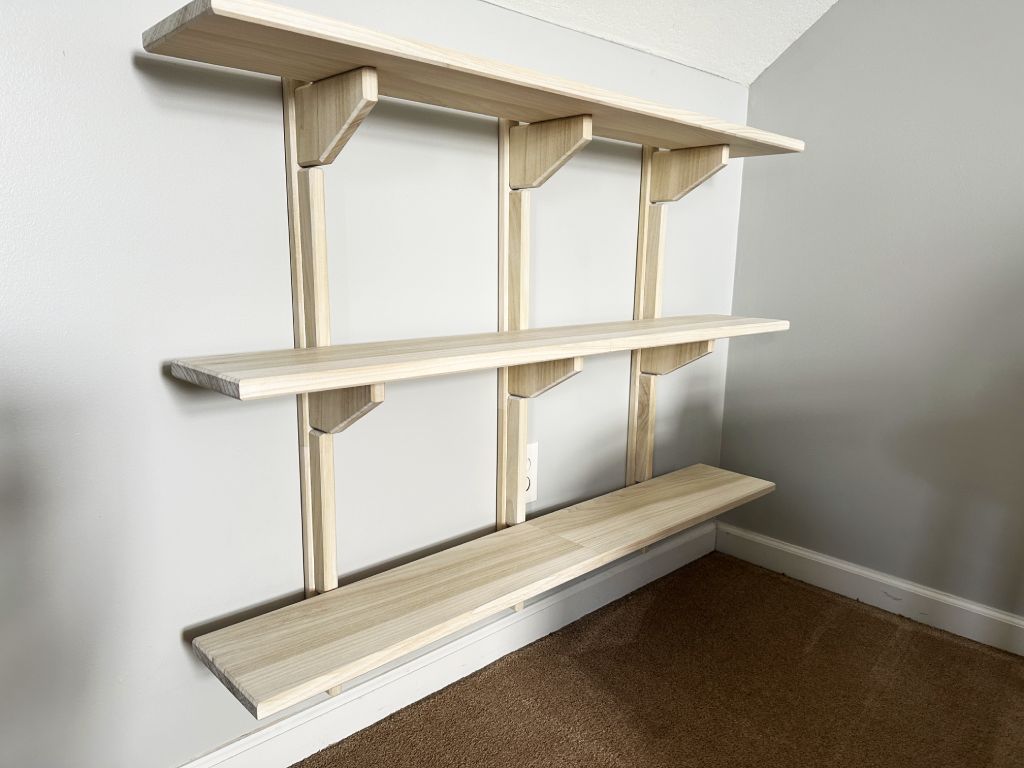
You can see here how all the spacing is perfectly uniform, and that also includes the subtle spacing between the shelf and the vanity plates in the back. And since we buffed the wax finish, everything is so incredibly smooth to the touch  |
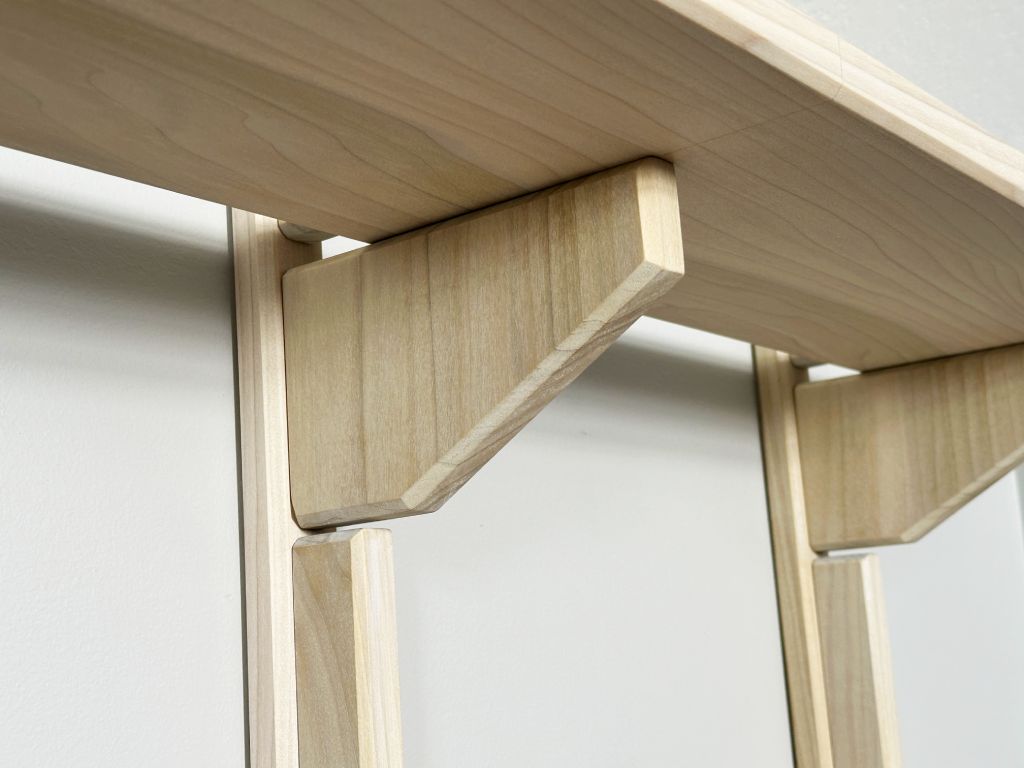 |
| Here is a closeup of the connection between the shelf and shelf bracket. Because you can’t see the dowels on any of them, it looks like it’s just sitting there! |
You are unable to see that larger gap above the shelf bracket from a normal
view, which is by design. I left a larger gap here just in case I ever want to
integrate lighting, I have somewhere to run the wires behind the shelves.
 |
| The edge of one of the shelves. Notice how the chamfers meet perfectly around the edges. |
The end grain got a bit dark on me. Unexpected, but not unwelcome! I kind of
like it. Next time, though, I’ll sand the end grain to a step beyond the 220
grit I
used,
maybe to 320 grit. That way, the end grain won’t soak up my finish at a faster
rate than my long grain, causing the darkness.
 Staged
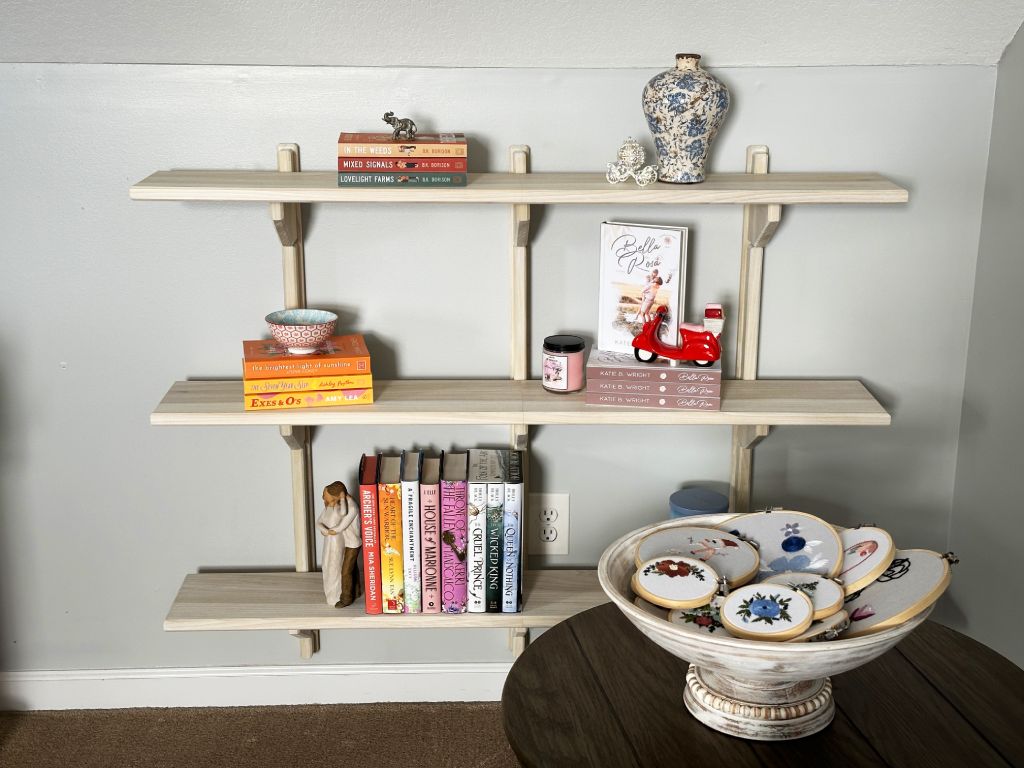 |
| I asked Story to decorate the shelves for a photo shoot, and she delivered, as always This is the view when you first walk into the room. |
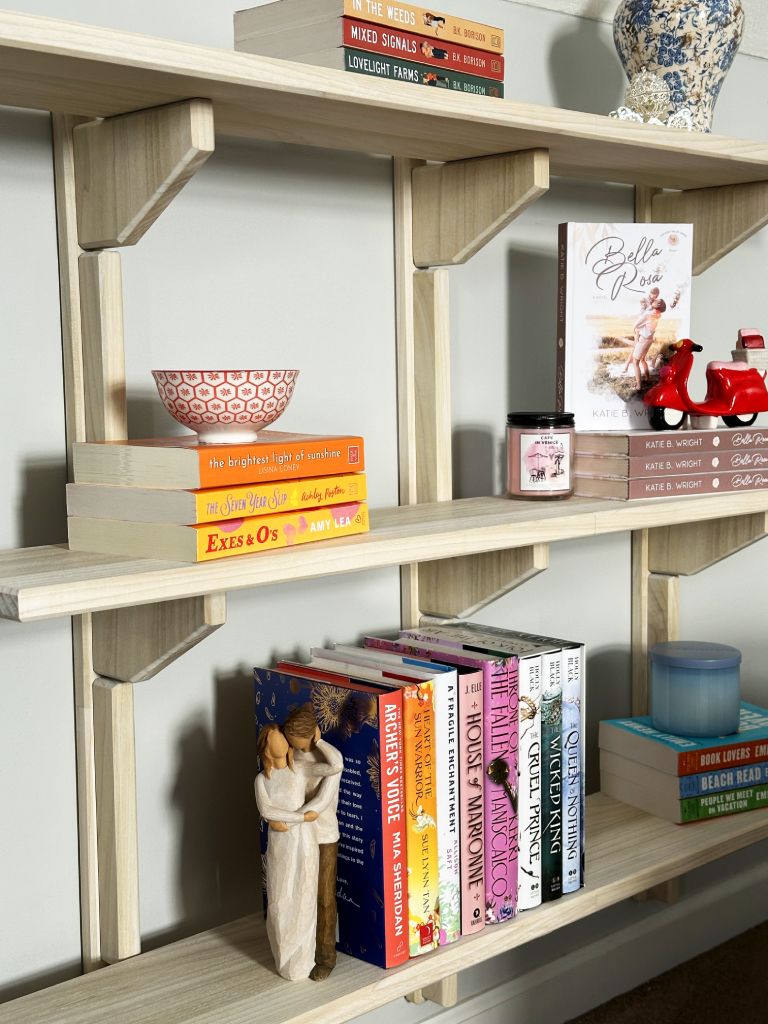 |
| A closeup of all 3 shelves. There is plenty of vertical room for anything we’d want. If needed, we can always take advantage of the extra space between the brackets, like we did with Bella Rosa. |
 |
A zoomed out photo of the same view. I’m so proud  |
 Real Life
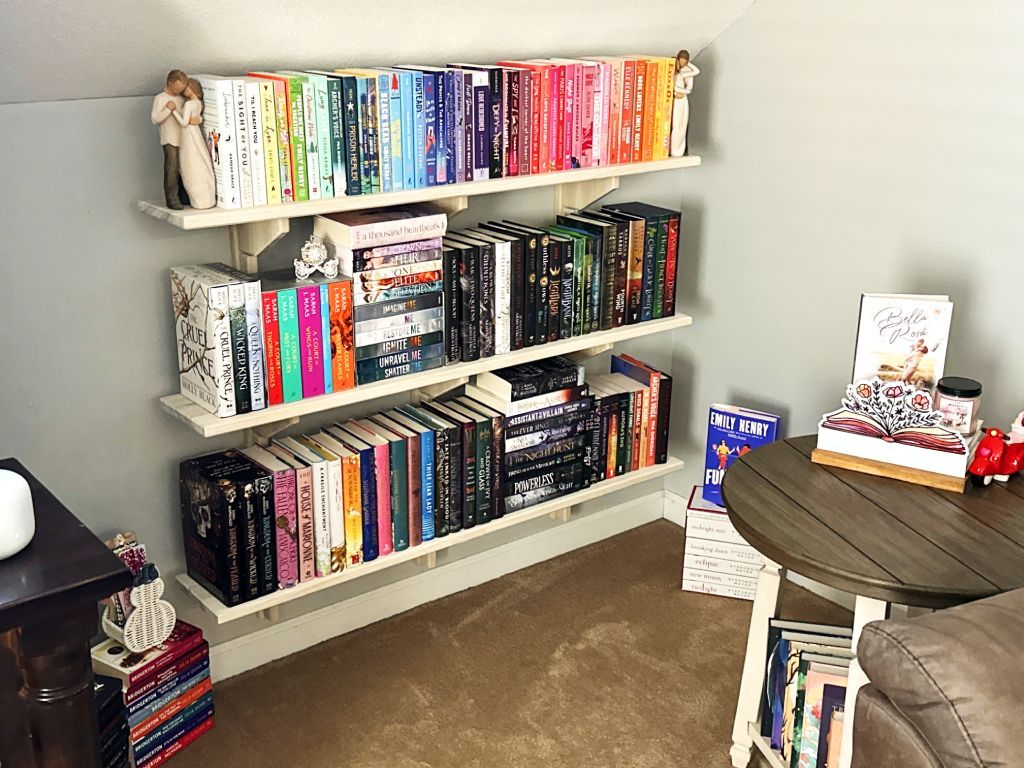 |
| Once the photo shoot was done, this is what happened to the bookshelf almost immediately It holds a great number of books for its size! And yet, you can see that I already need to build another bookshelf |
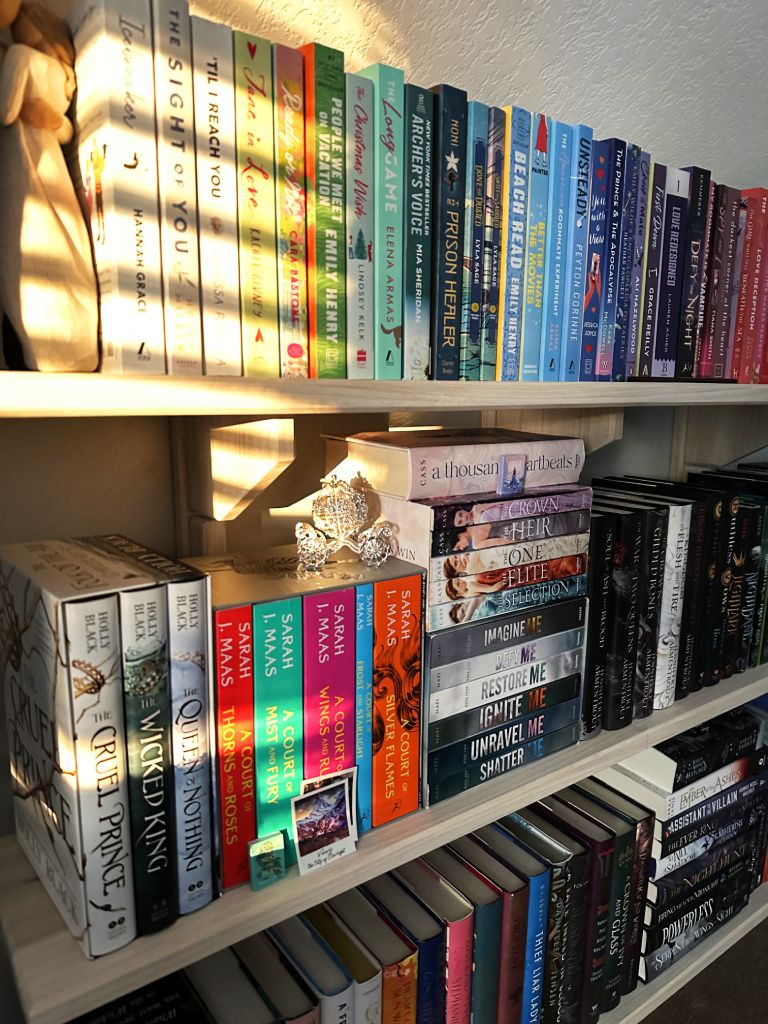 |
| A close up of the real life configuration in the setting sun. There isn’t even a hint of sagging on this sturdy, yet airy, bookshelf |
 Conclusion
Wow. I can’t believe I did it! I made a bookshelf! And it looks and feels
amazing! I’m so proud of myself! And, best of all, I got to do it all with my
forever love, my wife Story
Not only did I get to work on a cool project, but I got to make it for someone I
care so much about, and that makes it all the more special.
 Why Woodworkers Work Wood
I think I’ve just figured it out… This is why so many people get into
woodworking. It’s not just about the project, but the people you get to share it
with—whether that’s working on it with them, sharing your knowledge with
others, or giving someone a piece of your wooden art.
I have always felt a bit like a loner, almost in isolation, from those around
me, even if I’m in a group of people. It may sound like nonsense to you, but the
feeling this project gave me of being able to connect with someone through my
work is very fulfilling. Yes, I help create products in my regular job for
people, but this is different… I hope this is the start of me further
unlocking this side of myself 

 What’s Next?
I learned so much, and I’m excited to apply this knowledge and learn even more
in the future. And I hope you’ll join me on that journey! Please subscribe to my
newsletter to get updates on my next project!
In the meantime, I’m going to just go stare at and admire this bookshelf for a
little while, and recover from the whirlwind this has been
Until next time,
 Pixel
Pixel