In my last article, I built the drawers for my router table cabinet. I had a few issues with the fit, but I’ll be fixing those now, and will walk through my thinking on how to solve the problems. I’ll also be installing the drawer handles and router bit inserts, and then I’ll show off the final reveal!
 Starting Point
 |
|---|
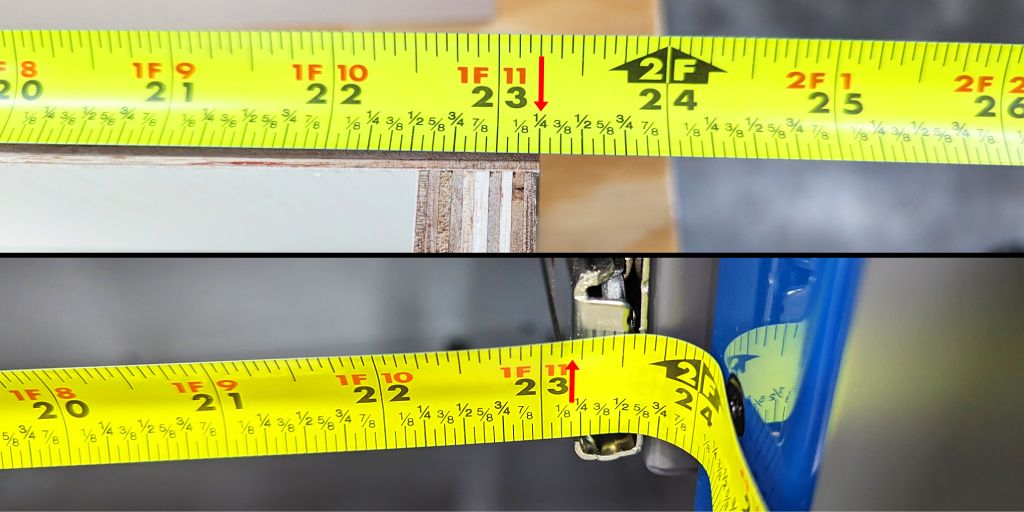
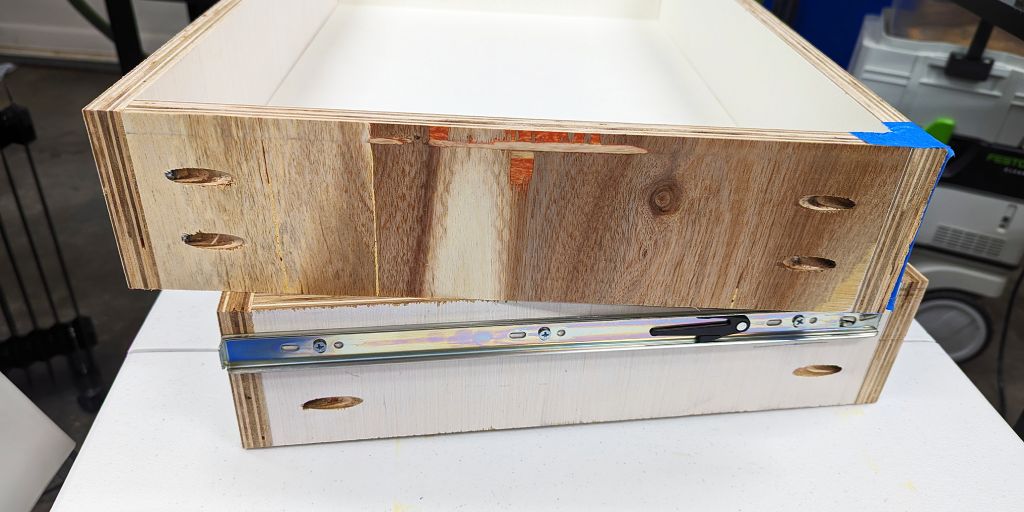
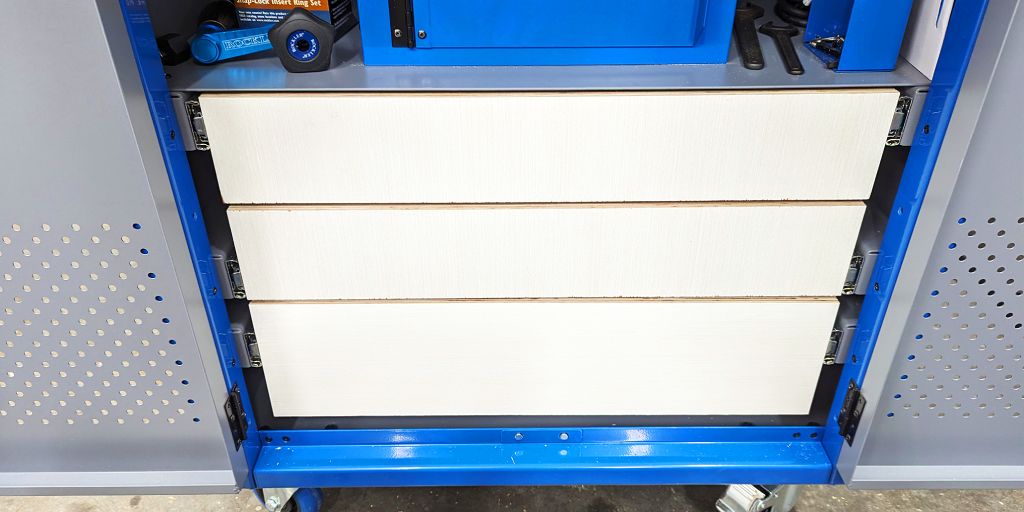
| The drawer width is 23.25” (591mm), but the cabinet opening between the drawer slides is 23.188” (589mm) |
After assembling all the drawers and attaching the drawer slides, I found that the drawers were just barely too wide to fit into the cabinet. The cabinet opening is 23.188” (589mm) wide, but the drawers are 23.25” (591mm) wide.
 Trimming the Drawers
So, what are my options for fixing this??
![]() 1. Disassemble and Trim — I could disassemble the
drawers, trim each front, bottom, and back piece of each drawer individually
with the table saw, and reassemble them. This would be the most time-consuming
option, but it would also be the most exact and would give me the best results.
This option is pretty straight forward, so I have not included an example photo.
1. Disassemble and Trim — I could disassemble the
drawers, trim each front, bottom, and back piece of each drawer individually
with the table saw, and reassemble them. This would be the most time-consuming
option, but it would also be the most exact and would give me the best results.
This option is pretty straight forward, so I have not included an example photo.
![]() 2. Trim with Table Saw — I could use the table saw with the drawers
still assembled and trim off the excess on the outer sides. I would have to flip
the drawers over and trim each drawer twice since my table saw can’t cut through
the full height of the drawer in one pass. But, it would be faster (and less
annoying) than disassembling and reassembling the drawers, and I could use a
single table saw setup to trim all three drawers. But, I could end up leaving a
ridge where the two cuts meet which would need to be sanded, and the setup is a
bit awkward. Plus, the white veneer on the sides of the drawers would be
completely stripped off.
2. Trim with Table Saw — I could use the table saw with the drawers
still assembled and trim off the excess on the outer sides. I would have to flip
the drawers over and trim each drawer twice since my table saw can’t cut through
the full height of the drawer in one pass. But, it would be faster (and less
annoying) than disassembling and reassembling the drawers, and I could use a
single table saw setup to trim all three drawers. But, I could end up leaving a
ridge where the two cuts meet which would need to be sanded, and the setup is a
bit awkward. Plus, the white veneer on the sides of the drawers would be
completely stripped off.
 |
|---|
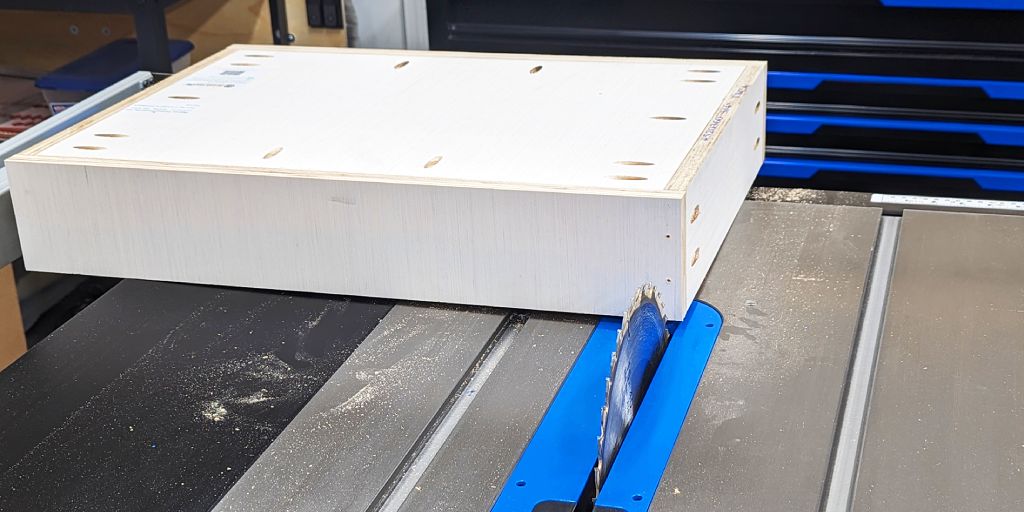
| Option 2: The table saw setup to trim the drawers |
![]() 3. Trim with Jointer — Definitely NOT a standard use for a
jointer, but the theory is sound. A jointer can easily be adjusted to take off a
very small amount of wood on each pass, and it would be guaranteed to be flat
without a risk for a ridge, like in the table saw method. Unfortunately, just
like in Option 2, the nice white veneer on each side would be completely
stripped off, but not anywhere else such as the important front.
3. Trim with Jointer — Definitely NOT a standard use for a
jointer, but the theory is sound. A jointer can easily be adjusted to take off a
very small amount of wood on each pass, and it would be guaranteed to be flat
without a risk for a ridge, like in the table saw method. Unfortunately, just
like in Option 2, the nice white veneer on each side would be completely
stripped off, but not anywhere else such as the important front.
 |
|---|
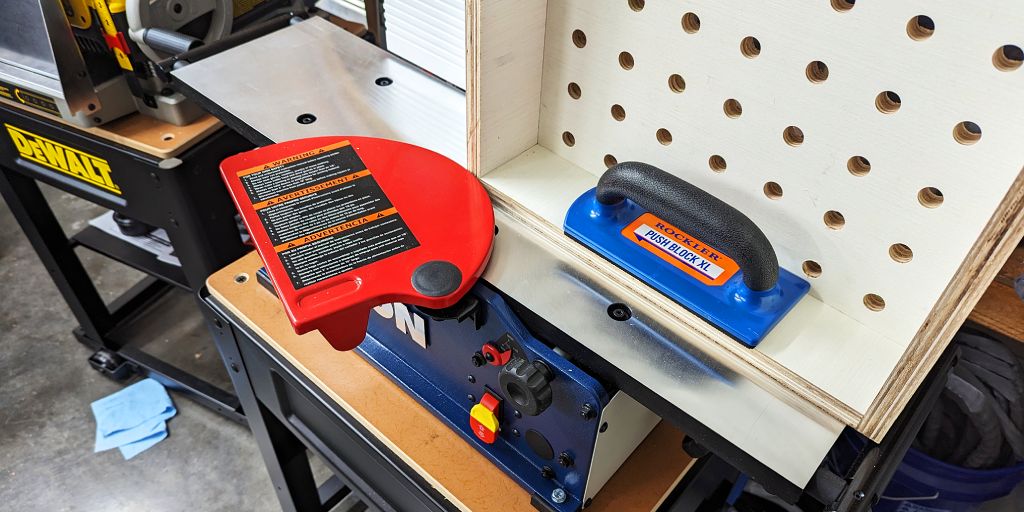
| Option 3: The jointer setup to trim the drawers |
I think I’m going to go with Option 3 with the jointer. Option 1 will take too long to “do it right”, and the only benefit will be that the white veneer on the sides will be preserved, but I doubt I’ll ever really notice this anyway. The table saw setup in Option 2 is just too awkward and risky for me to feel comfortable with it, plus it may still leave me with a ridge to sand down.
The jointer in Option 3 will also give me the added benefit of being able to
take off a small amount of wood each time to hopefully ![]() avoid
taking off too much and hitting the heads of my pocket screws with the jointer
blades. Hitting these blades will almost certainly mean I’ll have to replace
them, and I don’t want to do that!
avoid
taking off too much and hitting the heads of my pocket screws with the jointer
blades. Hitting these blades will almost certainly mean I’ll have to replace
them, and I don’t want to do that!
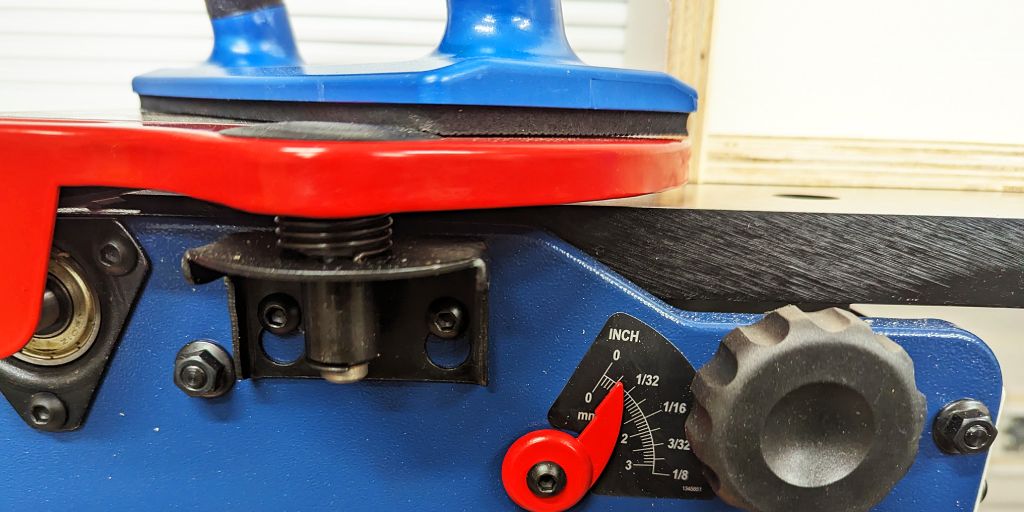
I unscrew the few pocket screws whose tips are going through the wood I’ll be jointing, since I won’t be able to tell if I’m getting close to those. But I leave everything else, including the screw heads that are located in the sides where I’ll actually be trimming! I need to make sure the heads won’t stick out past the wood when I’m done, so leaving them in will let me see when I’m getting close. I set my jointer to 1/64” (0.4mm) and I plan to take many careful passes!
 |
|---|
| Trimming the drawers with the jointer to take off a small amount of wood each pass |
I take it slow and steady, taking about 4 passes per left and right sides of the drawer, until I just feel too darn close to the screw heads for comfort. The side veneer is completely gone, but hopefully it’s enough to get the drawers to fit!
 |
|---|
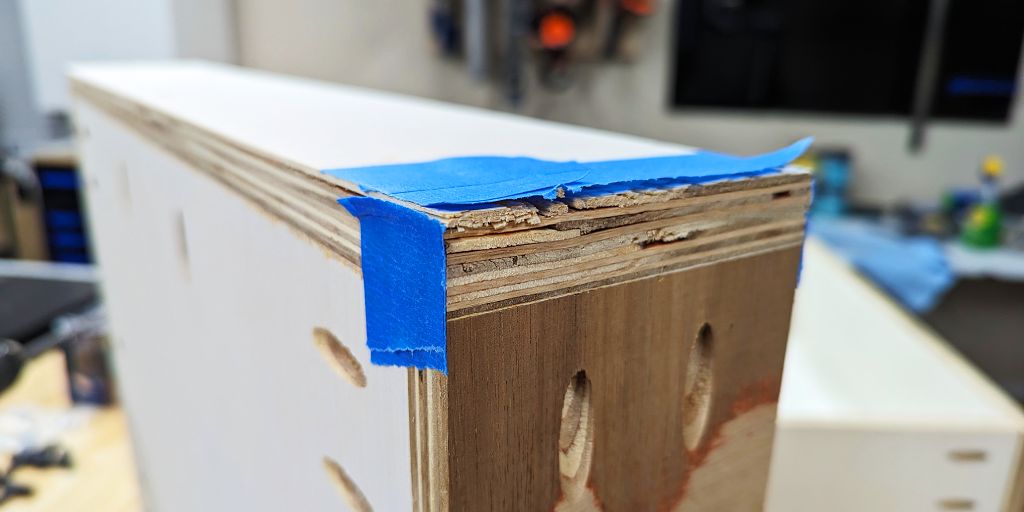
| Comparing the lost veneer on the side of the drawer after trimming with the jointer with another drawer that still has its veneer |
 |
|---|
| I make sure to point the front side of the drawer through the machine first so the unseen back side’s plywood can be free to delaminate as it passes through the machine, an unfortunate side-effect of using this jointer method |
I get the top drawer complete, and while it couldn’t be even a hair’s width
wider, it fits between the cabinet slides! Good enough for me! I’ll take it!
![]()
 Fixed?
I close the drawer and… THUNK. You. Are. Kidding me, right?! It won’t go in
more than a couple inches! I can tell from the sound that it’s hitting something
solid like metal, and I can’t see anything the drawer might be hitting on the
slides! ![]()
This project started so smoothly ![]()
I remove the drawer and take a closer look at the slides. They’re fine! What is this thing hitting?!
I get out the flashlight on my phone and look in the cabinet. There it is!
 |
|---|
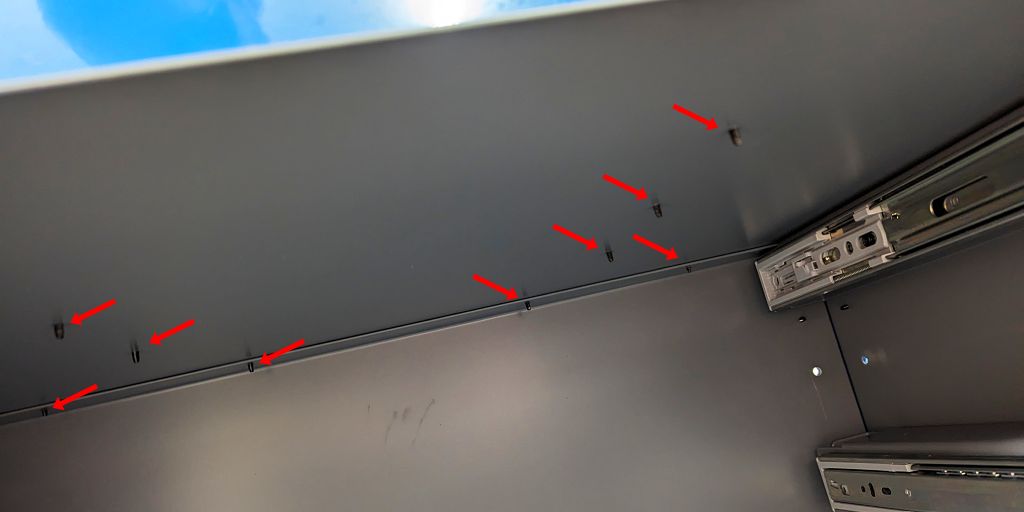
| The drawer is hitting the screws that hold equipment to the top of the shelf above the drawer (not all screws are in the picture) |
That’s a lot of screws! After measuring, we’re talking only about 1/16” (1.6mm)
that would need to come off of each. But it will take FOREVER to trim all of
these down. This is the fate of every “quick” project ![]()
However, I quickly realize that since all the screws are near the center of the cabinet, just the back of the drawer will hit, not its sides. So, if I can get past the back of the drawer, it should just work! Instead of trimming all the screws, I decide to take just a sliver off the back of the top drawer! This should be quick work with my table saw, and I can do it with the drawer still assembled.
 |
|---|
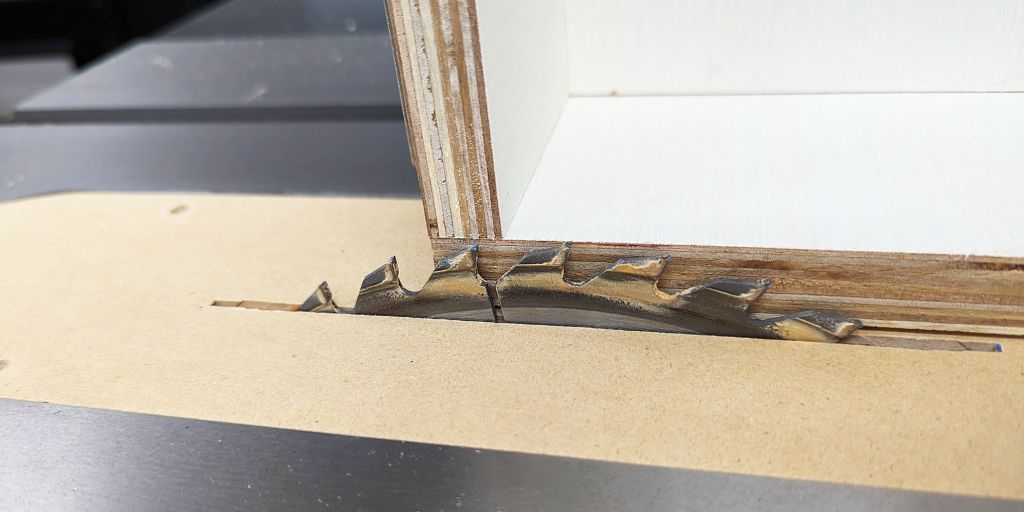
| Trimming only a blade’s width from the back of the top drawer to give enough clearance between the overhead screws and the top drawer |
I put the drawer back in, and it works perfectly! I’m so glad I didn’t have to
trim all those screws! ![]()
I finish using the jointer on the other two drawers, and then I install them! I didn’t have to worry about the overhead screw problem with either of the remaining drawers.
 |
|---|
| All three drawers installed, but not yet complete |
 Installing Handles
I have another tool that I bought a few months ago that I haven’t used yet: a drawer handle jig. I’ve always known that I’ll want to build some furniture around the house, and once I do, I want it to be enjoyable and not feel like a chore. So, I’ve been slowly buying tools that will make the process easier and more enjoyable. This jig is one of those tools!
This part should be pretty simple #famousLastWords ![]()
I selected these particular handles so that they’d be short enough to not hit the cabinet doors when they are closed. And yes, I DID verify this fit before installing them this time, unlike my drawer fit fiasco…
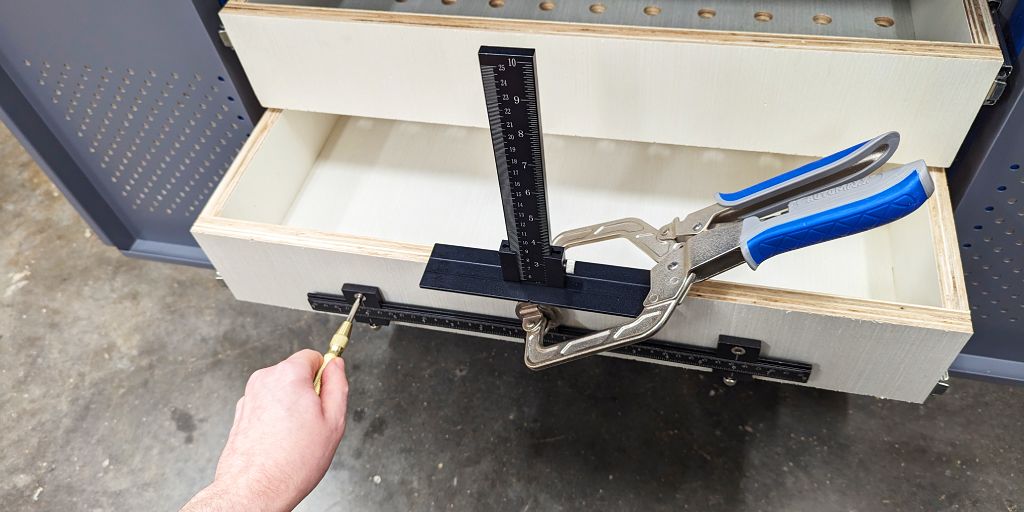
I set up my jig for two small pull handles per drawer, spaced about 12” (30cm) apart. I want each drawer to have its handles positioned the same distance from the top of the drawer, including the larger drawer at the bottom.
 |
|---|
| The drawer handle jig set up to mark the holes for the drawer handles, and me punching a divot for drilling |
I use my awl to punch two divots in the drawer front through my designated jig holes, drill my holes with a handheld drill guide, then attach the handles. I use my bubble level to make sure all the handles are twisted to be parallel with the ground and each other.
Finally, something goes to plan!
 |
|---|
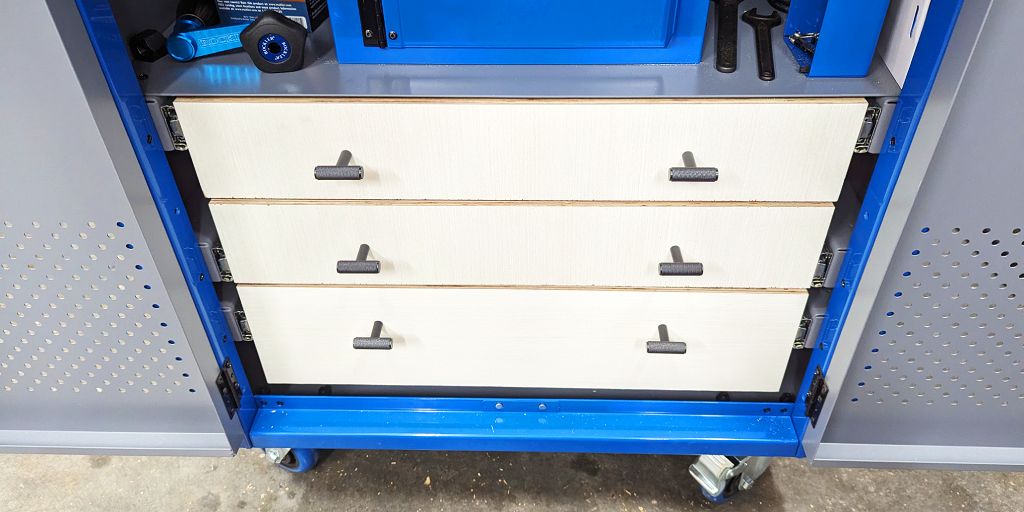
| All three drawers with their handles installed |
 Router Bit Inserts
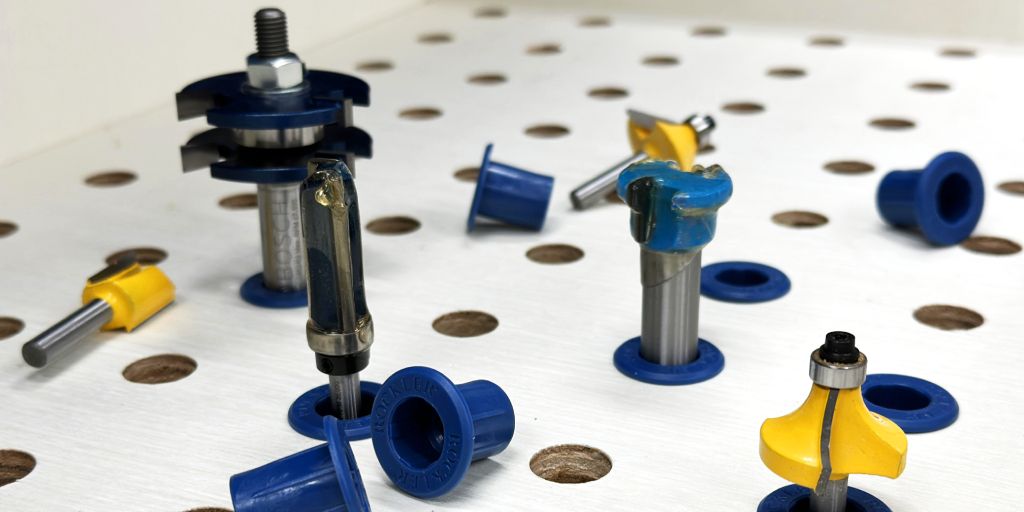
At last! The final and easiest step of the whole project: inserting the router
bit inserts. I just push them one by one into the holes I drilled earlier in the
top drawer, and then place a few router bits in them just to see how it looks. I
have only about 20 router bits, so I have plenty of room to grow into the 77
holes I drilled ![]()
![]()
![]()
 |
|---|
| A few of the router bit inserts installed in the top drawer, with a few router bits placed—note that shafts of different sizes can fit |
I also take the opportunity to place some thin white rubber drawer protectors in the bottom two drawers to help protect the drawers and also dampen the sound of anything I place into the drawers in the future. You can see these in the final reveal below.
 Lessons Learned
Before I show off the final reveal, there are some keys lessons I’ve learned from this project, or in some cases, re-learned:
- Pre-assemble as much as I can — If I’m going to be installing something into an enclosed space, I should first attach the parts together outside that space, if possible. This is what I should have done with the drawer brackets and slides.
- Cut to fit when able — One of my critical dimensions was the cabinet opening width, which could have only been directly measured if I first assembled the brackets and drawer slides inside the cabinet, THEN measured. I shouldn’t have taken the drawer slide manufacturer’s word for how much space I should allow for the drawer slides.
- Think outside the box — I did this one right! Instead of trimming all the screws, I found a way to make the drawer work without having to do that, and just cut a small sliver off the back of the drawer.
- No more veneered plywood — Specifically, no more unnatural veneers like this white stuff. It was incredibly difficult to keep it from chipping, and while I was able to minimize this, there are still small chips all over the edges. Plus, the chipped off pieces are almost like broken glass and would stick in my skin!
 Check Safety Often
This is the other lesson I learned on this project, but I wanted to give it some more detailed thoughts.
I didn’t check the dust extractor hose before starting to cut, and this resulted in wood dust going everywhere. Overall, this was a minor inconvenience, and that isn’t the lesson here.
What if, instead, it was my push block I was missing, and I was tempted to just “cut one board since I’ve already started, and then I’ll get my block”?
Or what if I didn’t fully think through where to place my hands before I started cutting?
What if I didn’t check where my power cord was before I started using the table
saw or jointer and I tripped on it while the machine was on? ![]()
These are all possible scenarios stemming from the same issue: for a moment, I
was lax on safety. Even though it was only for a moment, that is when bad things
can happen. I take situations like this as free lessons on safety, and so I’ll
be more mindful to check everything in my area before I start operating
equipment in the future ![]()
 Final Reveal
I’m very proud of how this turned out! All the slides feel so smooth, and I’ve
maximized my storage space here! The only improvement I’m looking to do is
eventually find a way to label each router bit insert, but in a way where I can
easily move the label if I wish to move the router bit to a different
location—this is one of the reasons why I left so much space between the
router bit inserts! I have some ideas, but that will be for another day ![]()
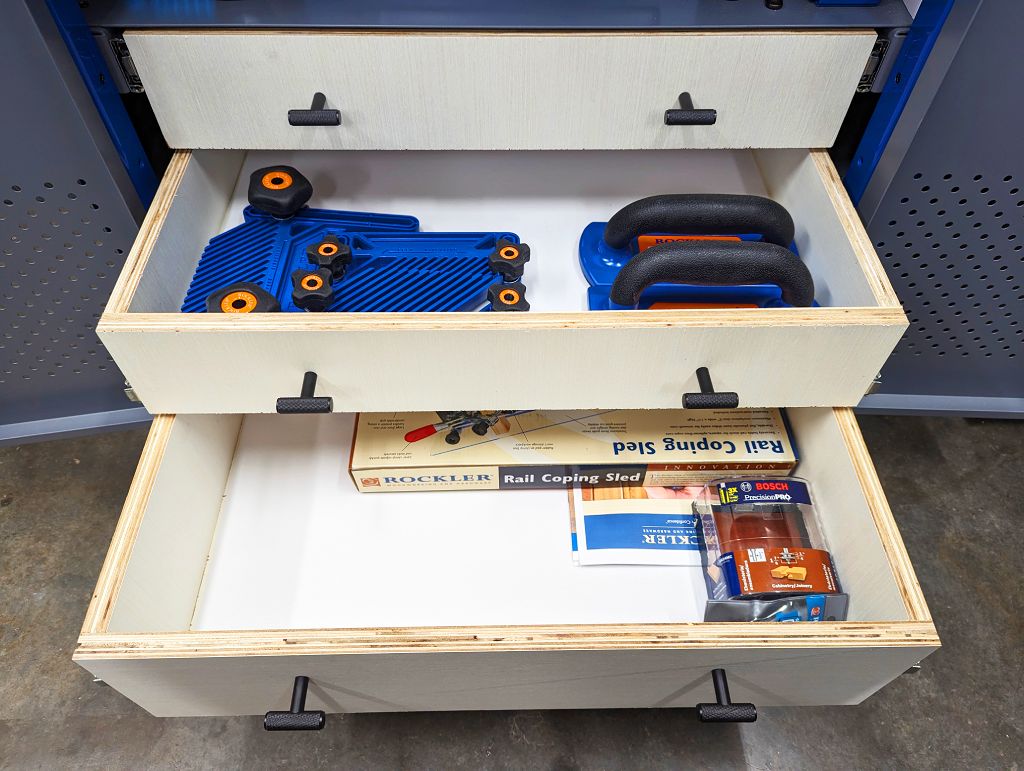 |
|---|
| The bottom two drawers of the router table cabinet opened, white drawer protectors on the bottom of each, drawers partially filled with some safety gear, etc. |
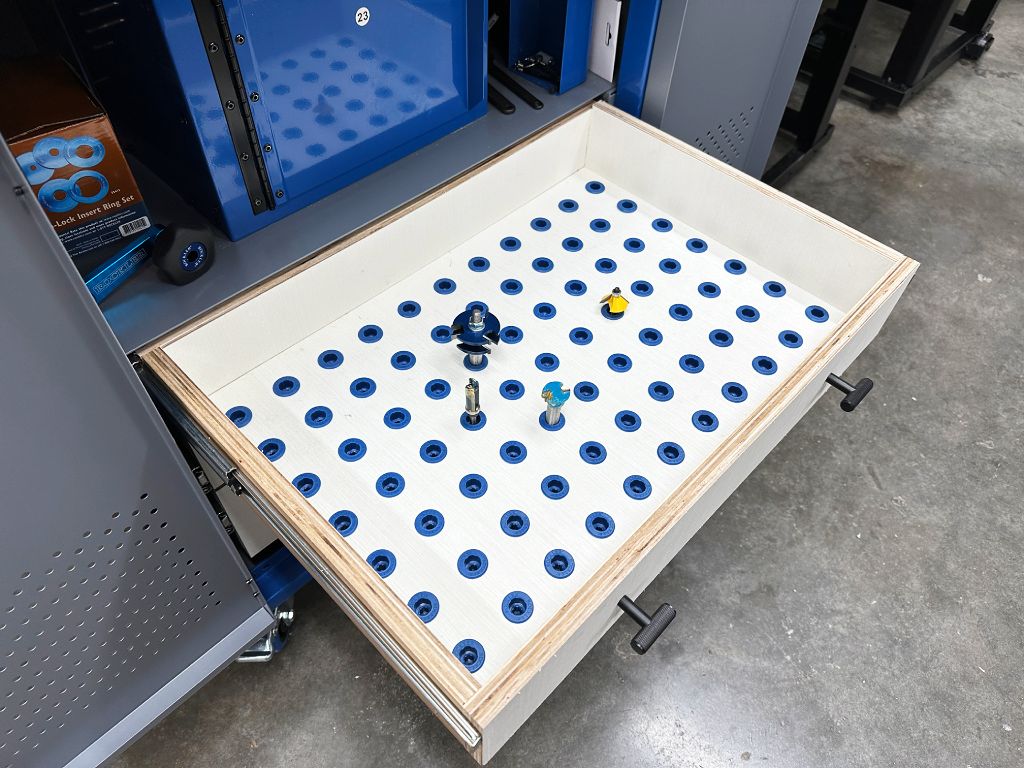 |
|---|
| The top drawer of the router table cabinet opened, all inserts installed, but with only a few router bits in place… for now! |
 |
|---|
| The top drawer of the router table cabinet, with the back notch to miss the screws visible in the first frame, and with the soft-close feature being demonstrated |
 Next Time!
It’s funny how I can have just as much written on “here’s how I built this
thing” versus “here’s how to fix what I did” ![]()
Next time, I’ll hopefully be working on the console bookshelf project! While I
was working on the drawers, I got all the tools in I was waiting for
![]() I’m so excited to get started on this project! My wife
I’m so excited to get started on this project! My wife ![]() and I have been discussing some pretty big changes we may make to the design and
room placement, and I’m excited to share that with you in the next article!
and I have been discussing some pretty big changes we may make to the design and
room placement, and I’m excited to share that with you in the next article!
Sign up for the newsletter if you haven’t already and follow on social media to get notified when the next article is out!
Until next time,
![]() Pixel
Pixel