Since my last article, I’ve ordered a few more tools for the upcoming console bookshelf project. Guess I’ll just wait around while they are shipped out…
![]()
FALSE! This is a perfect time to make some drawers for inside my router table!
I’d like to make these before I actually need them so that I don’t feel
rushed—OR, so I have time to remake them if they don’t turn out correctly
(more likely) ![]()
Let’s take some measurements, buy some wood, and make three soft-close drawers!
 Starting Point
 |
|---|
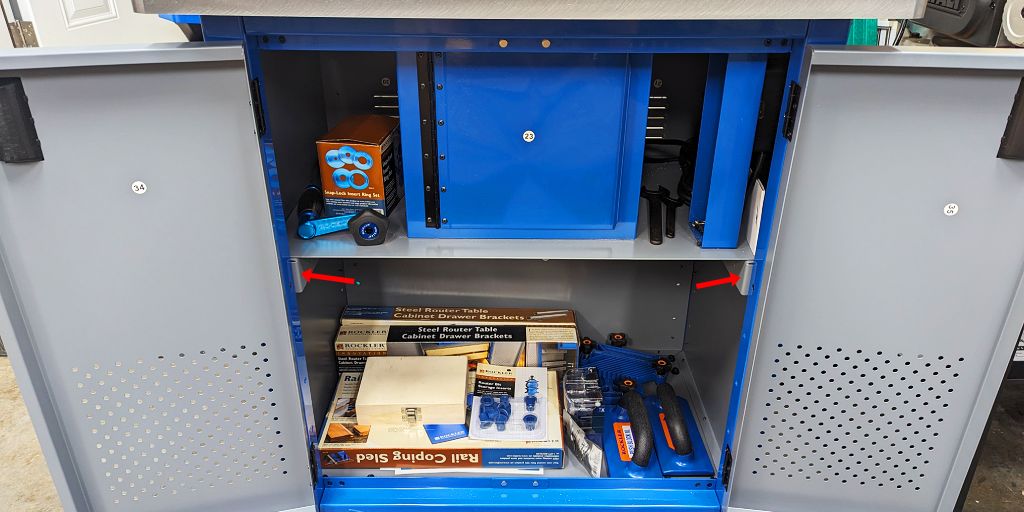
| The router table cabinet with inefficient storage due to having no drawers, but one drawer bracket set is already installed with a shelf on top (red arrows) |
I got this router table cabinet from Rockler, and while they have holes already
punched in the sides of the sheet metal for drawers, they don’t actually sell
drawers for it! Like… what?! ![]() I want to spend my time doing fun
projects, not making drawers for a purchased product! No big deal, though. It’s
good practice for my later projects
I want to spend my time doing fun
projects, not making drawers for a purchased product! No big deal, though. It’s
good practice for my later projects ![]()
I have already purchased two more sets of drawer brackets from Rockler for $70 for both (yikes!) to give me a total of three sets, and also bought three sets of 16” (41cm) heavy-duty, soft-close drawer slides from Lowe’s which have screw holes that line up with the brackets’ pre-drilled holes.
Further, since this is for a router table, I want one of the drawers to be
special-made to fit all my router bits, so I ordered something special for that.
You’ll see that later ![]()
 Cut List
I’m going to use plywood to keep things simple for these shop drawers. I want to figure out how much plywood I’ll need to buy, so I’ll go ahead and make a cut list for the three drawers. I want a configuration of two 4” (10cm) drawers on top and one 6” (15cm) drawer on the bottom—this will completely fill the space I have in the cabinet and also account for small clearance gaps between each drawer.
I measure the distance between the existing installed cabinet brackets, and then subtract 0.5” (1.3cm) to account for the drawer slides, according to their manufacturer instructions. Also, I want the front of the drawers to span the full width to get the clean look I want.
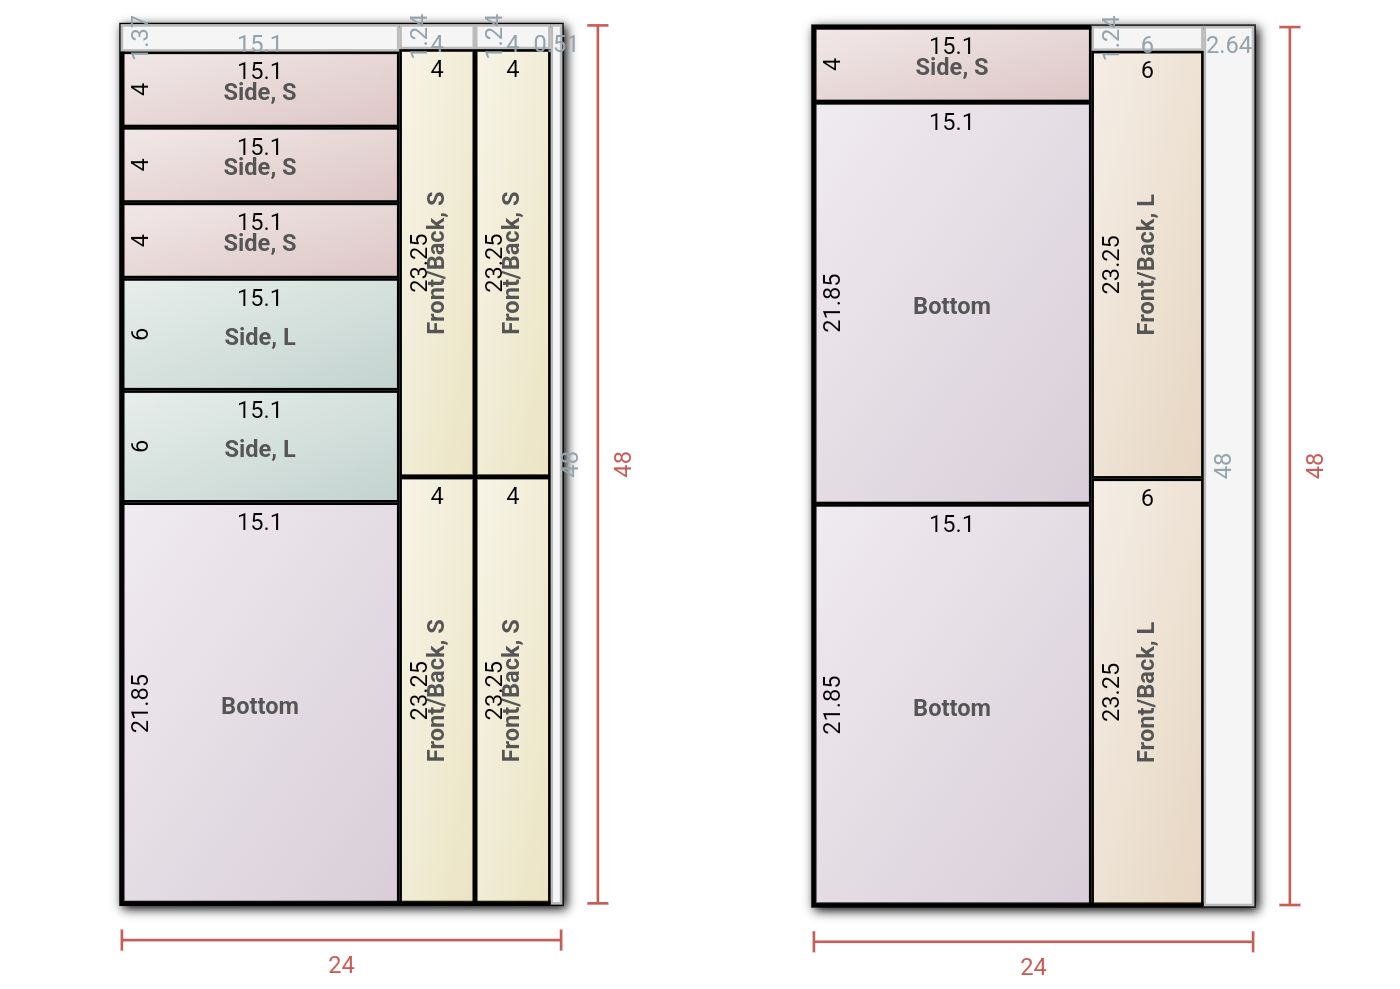 |
|---|
| The cut list for the three drawers, measurements in inches (make your own cut list here) |
Looks like I could use just a single half sheet (4’x4’ or 122cm x 122cm) of 3/4” (1.9cm) plywood to make all three drawers. Once I get to Lowe’s, I notice that they have this interesting looking plywood that is veneered white on both sides, and it isn’t expensive, either! I was planning on painting the drawers white anyway, so this could save me a step! The downside is I have to buy a full sheet. No matter! It’ll give me some extra in case I mess up, or I can use the extra for other projects.
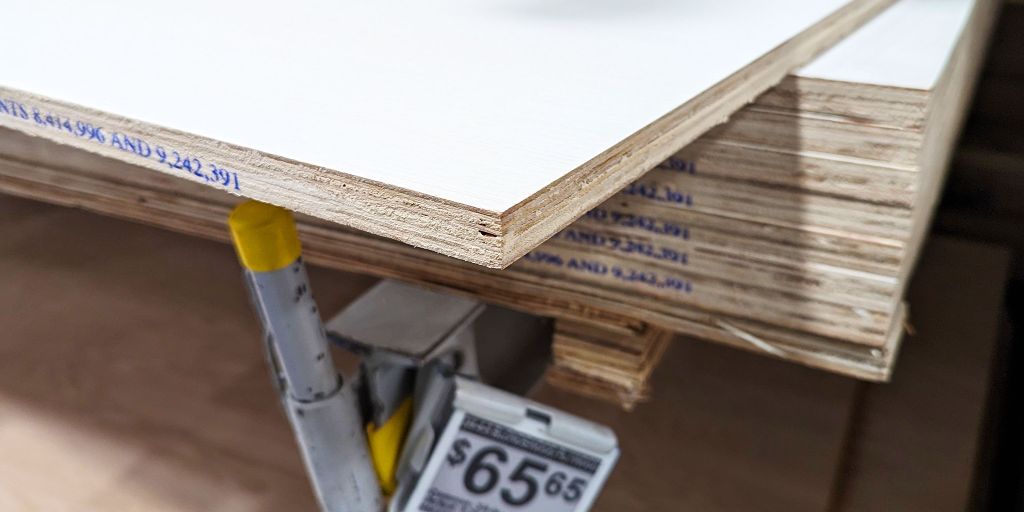 |
|---|
| The white veneered plywood at Lowe’s that I’ll be using for the drawers, $66 for a full sheet |
 Cutting to Size
Using my cut list above, I cut out everything on the table saw. I place tape where the cuts will be to help prevent chipping of the veneer. I wish I had a higher quality saw blade to help with the chipping, but oh well!
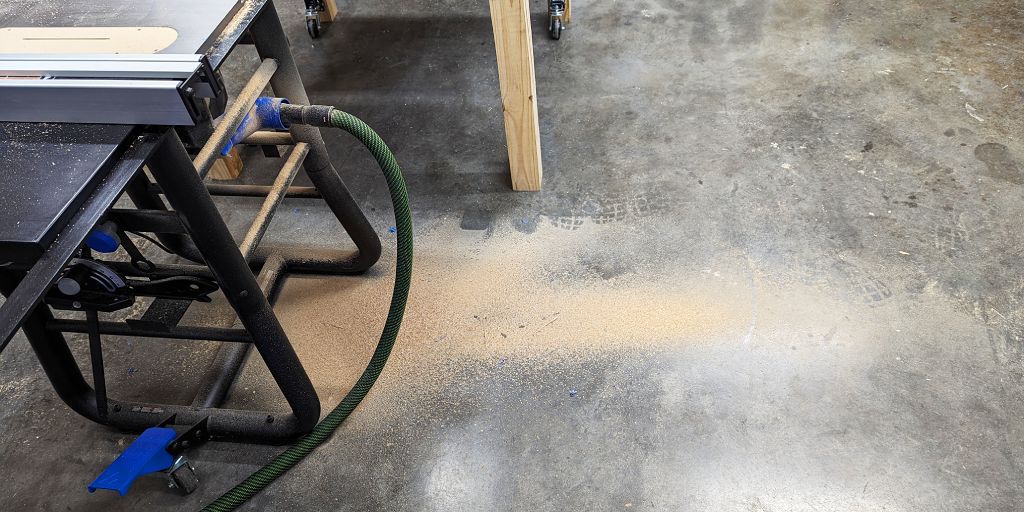
I turn on my new air filtration system, and get to cutting! After a few cuts, I
realize that I smell quite a bit of wood in the air! More than I smelled BEFORE
the air filtration system was installed, which makes no sense. I turn off my
saw, and I check my dust extractor. It’s on. Hmm… I go around to the back of
my saw. I never attached my hose to the saw! ![]()
 |
|---|
| Noticing that I didn’t attach the hose to my saw, but not before spewing wood dust all over the floor and into the air; hose is attached now |
After this one faux pas ![]() , the rest goes easily! I just take my time, cut
out all the same sized pieces in groups to make sure they are all exactly the
same with no errors, and I get all the pieces cut out and stacked neatly to the
side.
, the rest goes easily! I just take my time, cut
out all the same sized pieces in groups to make sure they are all exactly the
same with no errors, and I get all the pieces cut out and stacked neatly to the
side.
 |
|---|
| All of the plywood pieces cut out and stacked neatly, with chipping-resistant tape still attached |
 Checking My Work
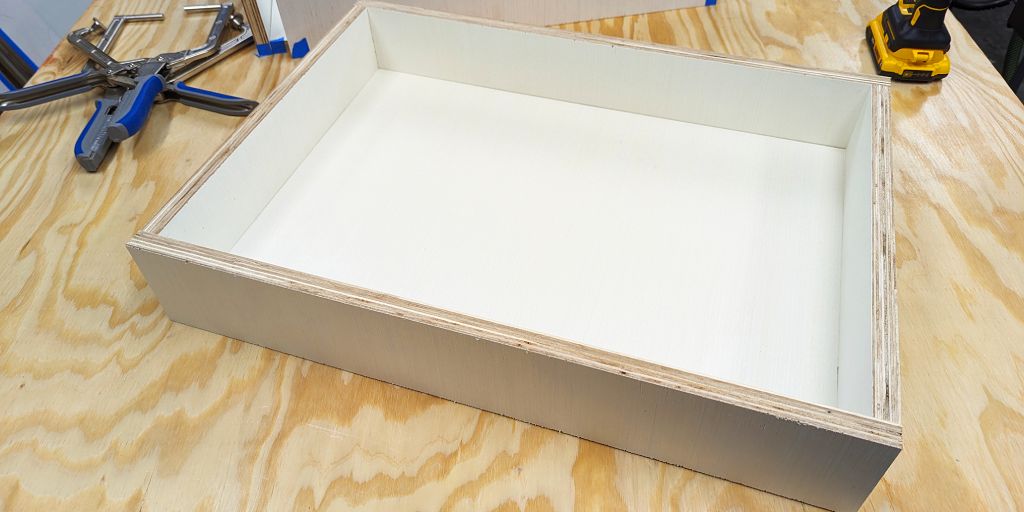
I do a quick check by laying out one drawer’s worth of pieces in their final
configuration. Looks like everything fits perfectly! Perhaps I’m finally getting
the hang of this woodworking thing ![]() #possibleForeshadowing?
#possibleForeshadowing?
 |
|---|
| Drawer pieces laid out for a quick check before continuing |
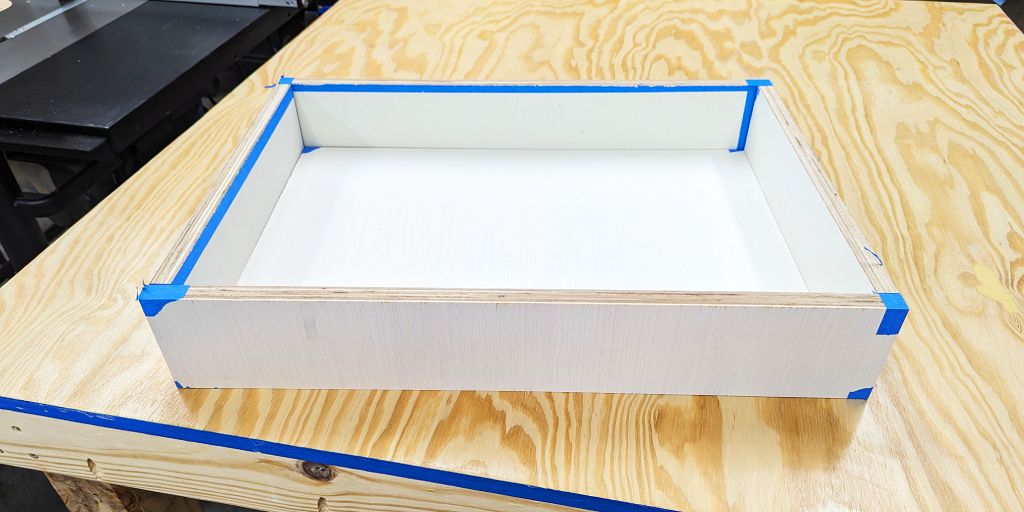
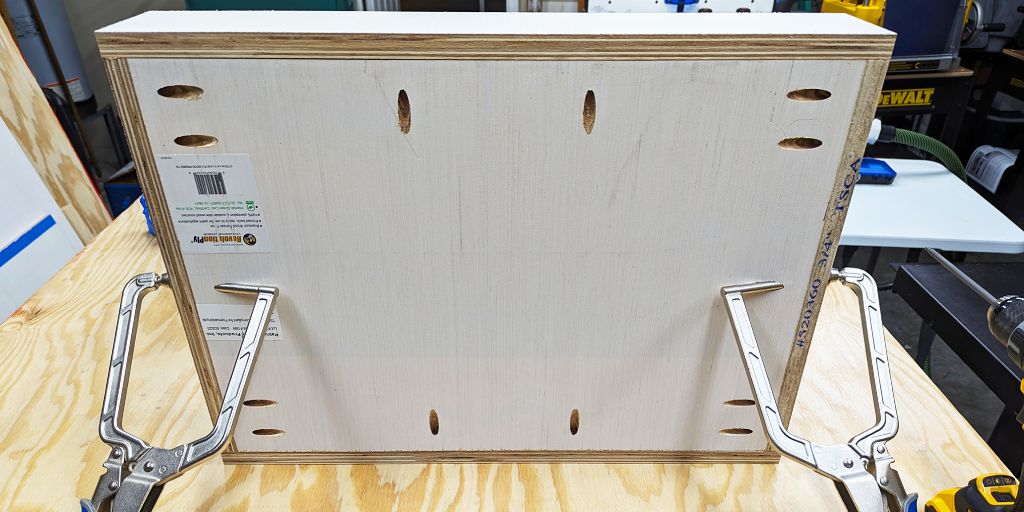
I want to make sure everything truly fits once screwed together, so I go ahead and do all the pocket holes for this one drawer’s worth of pieces. I use my Kreg 720PRO pocket hole jig for this, and that makes it go very fast! I clamp the pieces together and begin attaching them with pocket screws.
 |
|---|
| The pocket holes for one drawer’s worth of pieces, with some pieces clamped together and others screwed |
 |
|---|
| One drawer’s pieces fully screwed together |
It looks good, and with no gaps!
Now, to do it all two more times. While I was doing the first drawer’s pocket holes, I went ahead and used some tape on my jig to mark exactly where I’ll need to place the other drawers’ pieces to make it faster to do the remaining pocket holes. In just a few minutes, all the pocket holes are done!
 Drilling the Holes
Before I assemble the drawers, I need to drill 77 holes in the bottom of one of
the drawers to fit my current and future router bits. This is the “something
special” I referenced at the beginning ![]() I bought some very nifty (and
blue
I bought some very nifty (and
blue ![]() , of course) router bit holder inserts from Rockler, and
they each need a hole to go into. I’ll show you what those inserts look like
soon!
, of course) router bit holder inserts from Rockler, and
they each need a hole to go into. I’ll show you what those inserts look like
soon!
 |
|---|
| The plan for the router bit holder inserts in the bottom of one of the drawers |
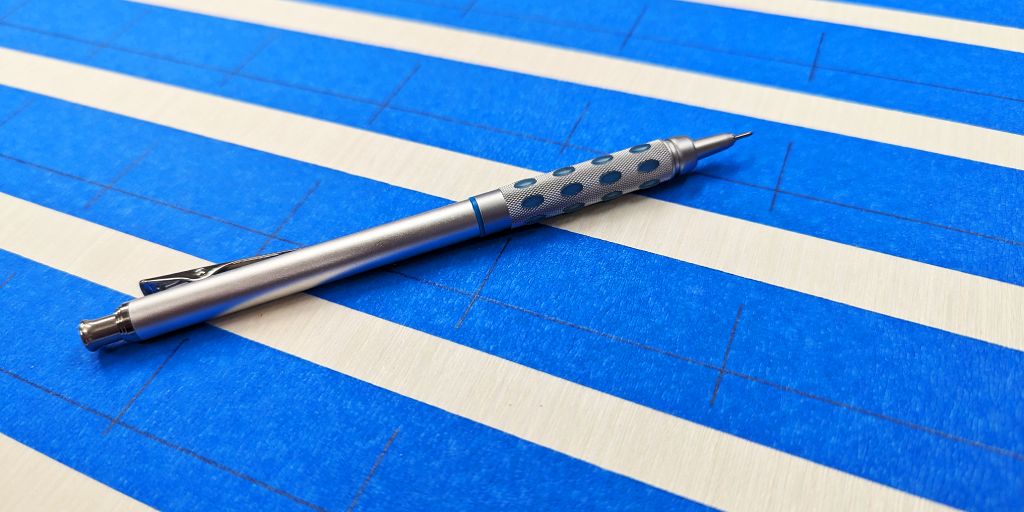
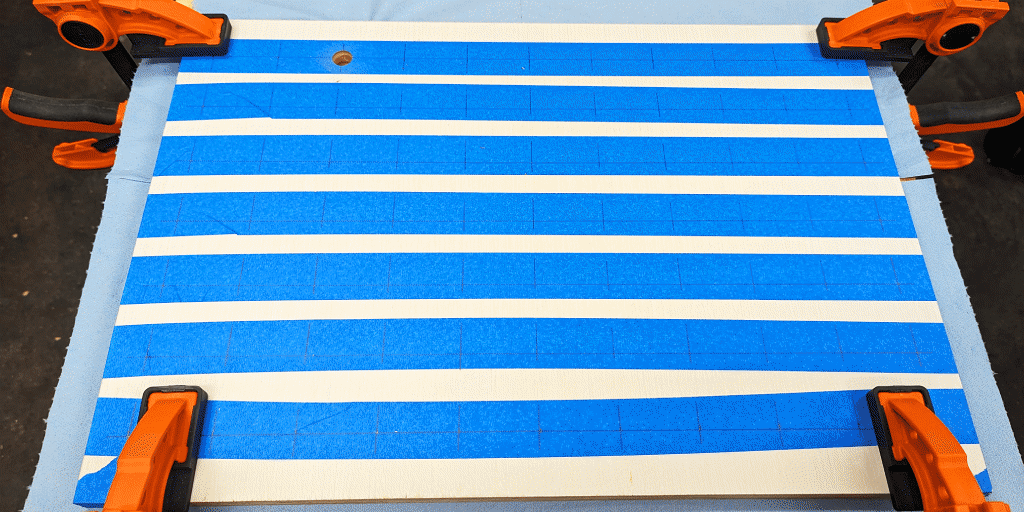
I measure and mark where I want each hole to go. I apply some tape to my wood since this veneer will be the final finished surface, and I don’t want pencil marks all over it. Plus, it should help resist tear-out from drilling, even though I’m using a Forstner bit and these types of bits generally don’t result in tear-out on the top of the hole.
 |
|---|
| Measuring and marking where the holes for the router bit holder inserts will go |
I don’t have a drill press, but I do have a new precision drill guide! This will
be the first time I’ve used it, and I’m SO glad I went ahead and bought it after
I built the clamp wall and
wished I had one then to drill all those holes ![]()
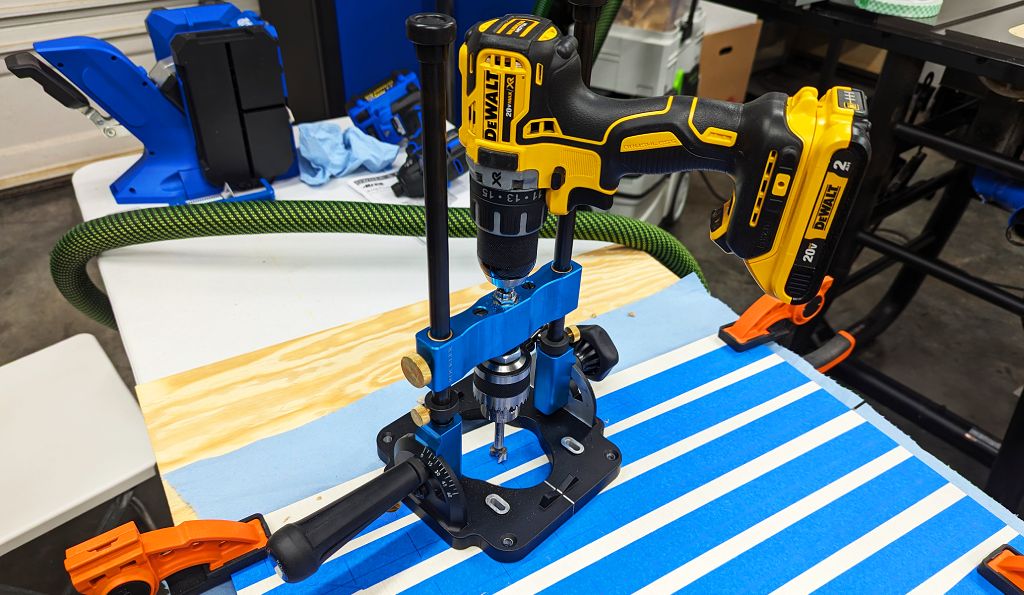 |
|---|
| The precision drill guide set up to drill the holes for the router bit holder inserts in the bottom of one of the drawers |
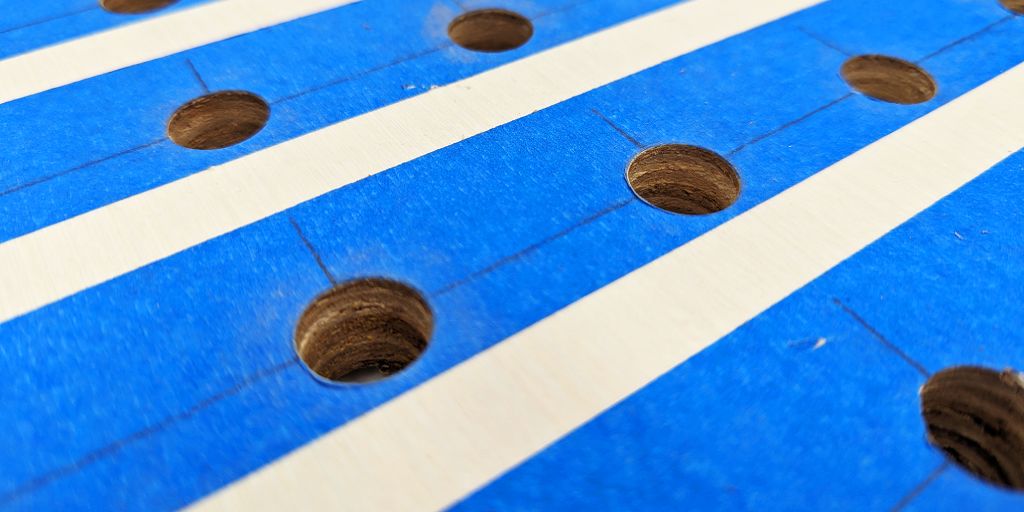
I take the next three hours (YES, THREE HOURS!!) to drill all 77 holes. WOW, ARE
MY HANDS AND ARMS SORE! Even my back is sore from all the force I had to exert
while bending over to drill these holes ![]() I’m so glad I’m done with that
part! But it will all be worth it!
I’m so glad I’m done with that
part! But it will all be worth it!
 |
|---|
| Drilling all of the holes for the router bit holder inserts in the bottom of one of the drawers, showing the tear-out on the thankfully unseen bottom of the drawer |
It almost seems criminal how three hours of work can be summed up in a quick few
seconds of a GIF ![]()
Despite all the tear-out on the bottom of the drawer, the top looks very clean! And that is the important part since the quality of the top of the hole will directly affect how secure the router bit holder inserts will be.
 |
|---|
| The cleanly drilled holes for the router bit holder inserts, with protective tape not removed yet |
 Assembling the Drawers
All the parts are now ready! Time for assembly ![]()
I don’t bother gluing my drawers, since they won’t be taking that much weight, and I want to be able to take them apart if I need to make adjustments or repairs. I use pocket screws to assemble all the drawers just like the first drawer.
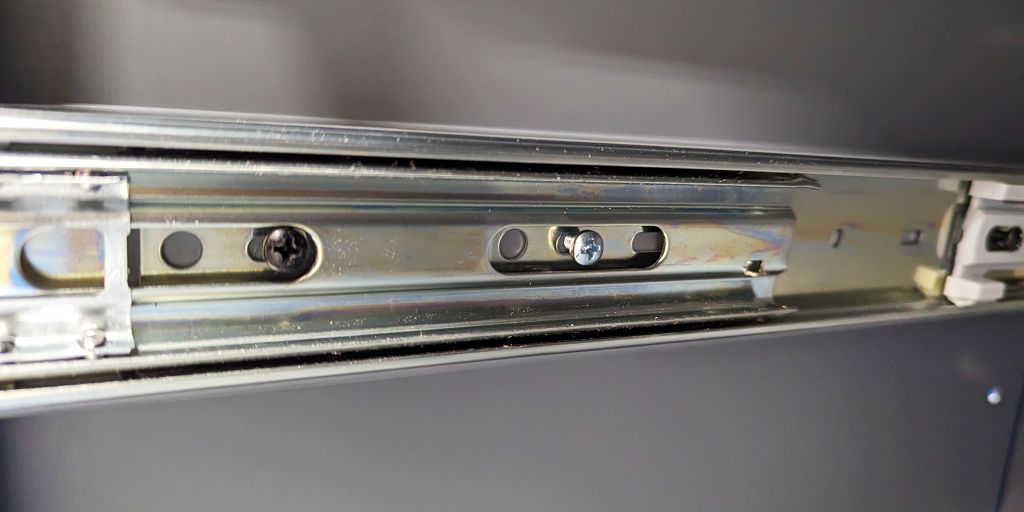
I need to attach the brackets inside the cabinet before I continue. So I take a moment to do this, then attach the drawer slides to them.
 |
|---|
| The drawer slides in the process of being installed on the brackets inside the cabinet |
MY.
GOODNESS.
If I had to do it over again, I would have attached the drawer slides to the brackets before installing the brackets inside the cabinet.
It was so awkward to attach the slides while half of my upper body was crouched into the cabinet. Why was I in this position? Because the screws required some manhandling when they didn’t want to fit into the holes very easily. And trying to balance the slides in this enclosed space while trying to fit screws to them made me wish I had a third or fourth hand.
This took much longer than I would have liked and was a strain on my already
sore muscles from drilling all those holes earlier. But hey, bet you I won’t
forget this lesson anytime soon! Though, I generally prefer to learn from other
people’s hard lessons—much easier on myself ![]()
I quickly attach the drawer slides to the first drawer, using the now-mounted other half of the slides in the cabinet as a guide to make sure everything is aligned correctly. I then attach the drawer to the slides, and it slides closed perfectly!
…
…
No it doesn’t ![]()
 |
|---|
| The drawer slide fit issue, with the drawer not closing properly since the drawer is barely too wide and catches on the slides on either side |
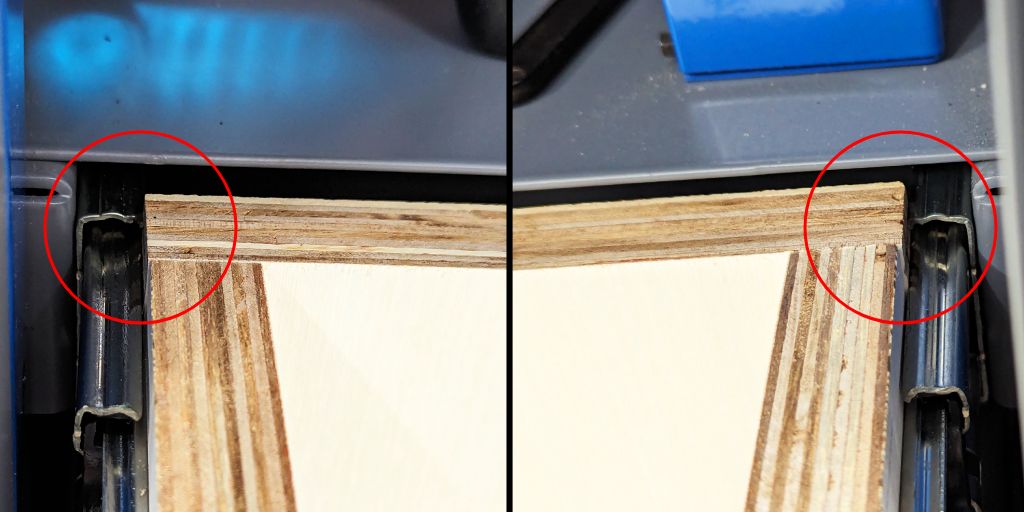
 Identifying the Problem
I take out the drawer and measure the width of the drawer and the width of the opening in the cabinet. The drawer is about 1/16” (1.6mm) too wide!
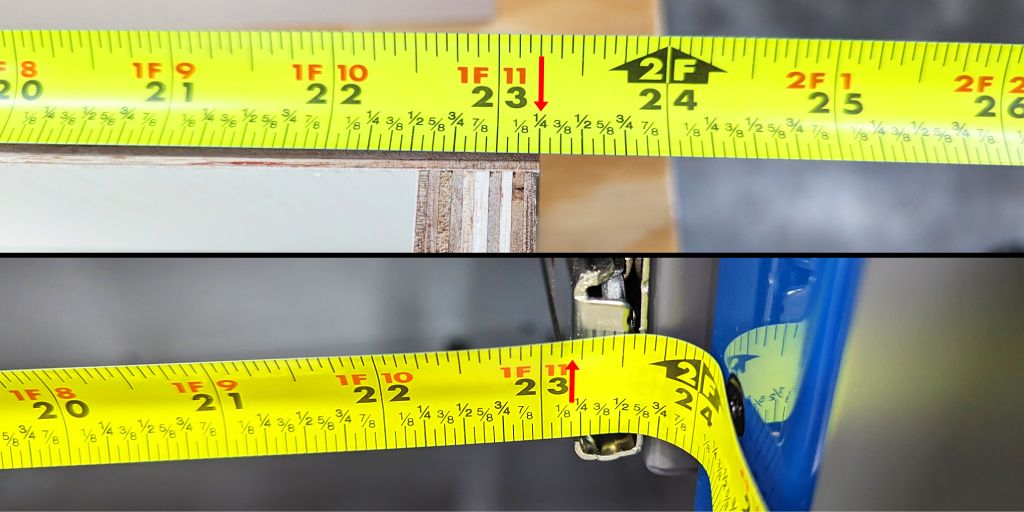 |
|---|
| The drawer width is 23.25” (591mm), but the cabinet opening between the drawer slides is 23.188” (589mm) |
But that can’t be… The drawer is exactly what I said it should be in the cut list which is based on the measurements I took beforehand, so it’s cut correctly…
AH-HA! I didn’t actually measure what the drawer slide width would be. Instead,
I read what the manufacturer instructions said it would be. I should have known
better! ![]()
I quickly measure the other openings for the other two drawers. They all have
the same problem. And in fact, one of the drawers is almost 1/8” (3.2mm) too
wide! Ugh! It’s SO CLOSE! And yet, the fix feels like it will take so much more
time and effort that could have simply been avoided with proper measuring in the
beginning before cutting ![]()
 Next Time!
Sorry to leave you hanging at such an unsatisfying point, but that’s exactly how I feel about it, too! I have to take a break and think about how I want to proceed. A good night’s sleep will do my sore muscles some good, too. I can tell if I keep going while I’m this tired, I’ll be a bit sloppy, and that’s how safety mistakes happen.
Next time, I’ll finish the drawers, for sure! I’ll show you how I walk through solving this problem, and then I’ll show you the final product!
Sign up for the newsletter if you haven’t already and follow on social media to get notified when the next article is out!
Until next time,
![]() Pixel
Pixel