(The following took place on the week of October 15, 2023)
I’ve been so excited buying clamps and other tools for my shop, that I forgot
about something important… where am I going to store them?? ![]()
Clamp storage that is sold in stores assumes you have a lot of wall space to store them side-by-side (breadth-wise) along the wall, but I don’t have the space for that. I want to store them depth-wise, coming out from the wall, so that I can store many clamps in far less space on my wall.
In terms of shop and tool setup, I still don’t feel like I’m in a position to
make things any easier on myself than in my first project from a few weeks ago
(link here), but let’s see what I can do, anyway!
![]()
 Starting Point
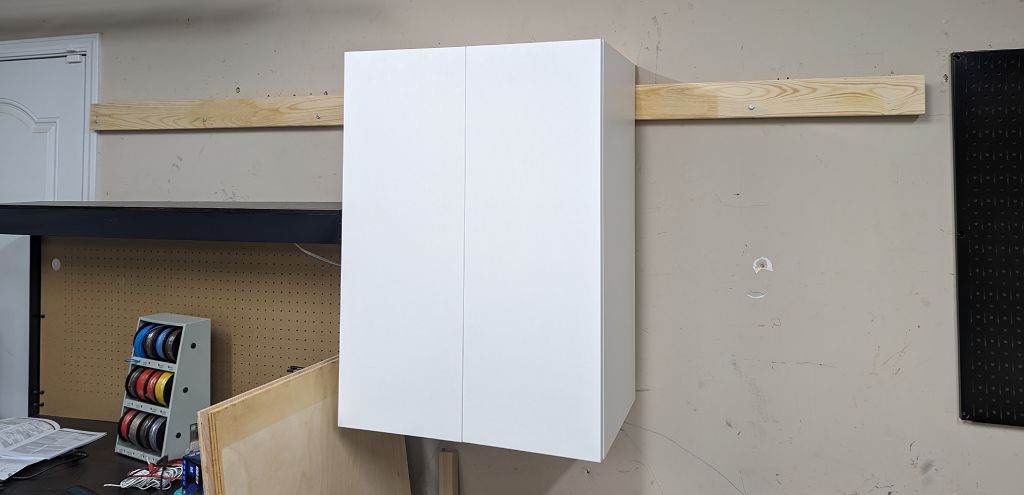
Since I’ve completed my last project, I have attached a French cleat along one of my walls and hooked a cabinet to it. I left the wall cleat long so that I can hang other things on it, plus the cabinet will be modular while I am still figuring out where I want things in the shop. And it looks like the perfect place to hang my clamps!
 |
|---|
| The starting point for my modular clamp wall, with a French cleat along the wall and a cabinet already attached |
 |
|---|
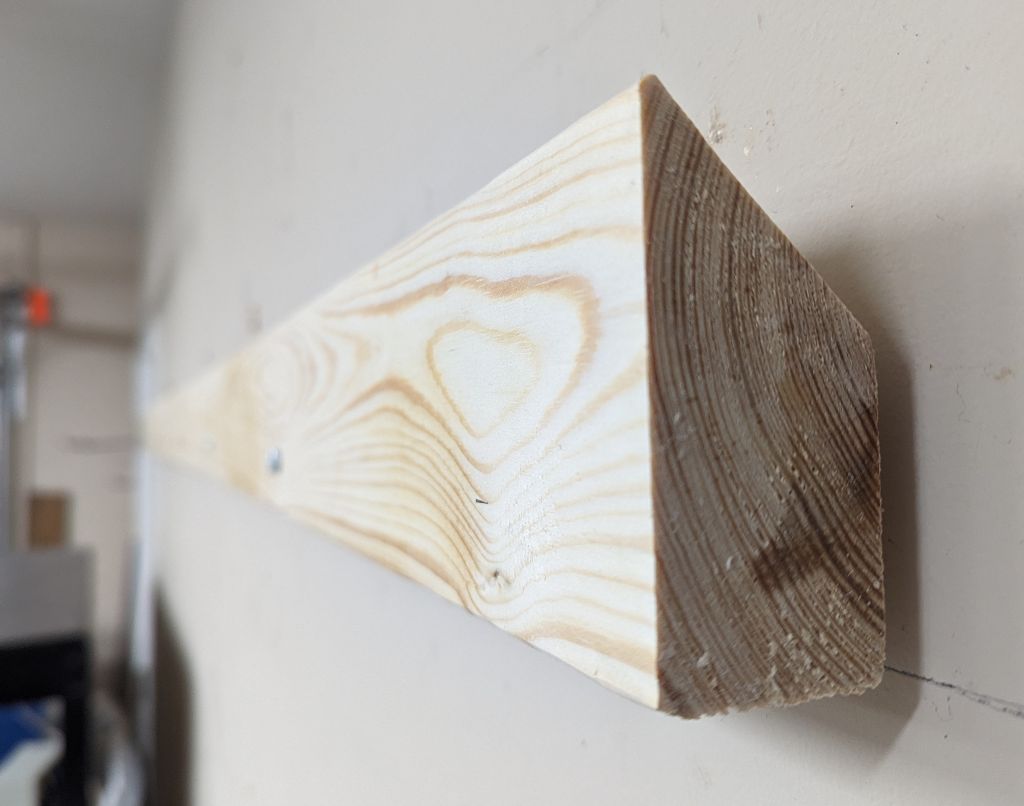
| Closeup of the French cleat on the wall, showing the angled hook on top |
 Planning
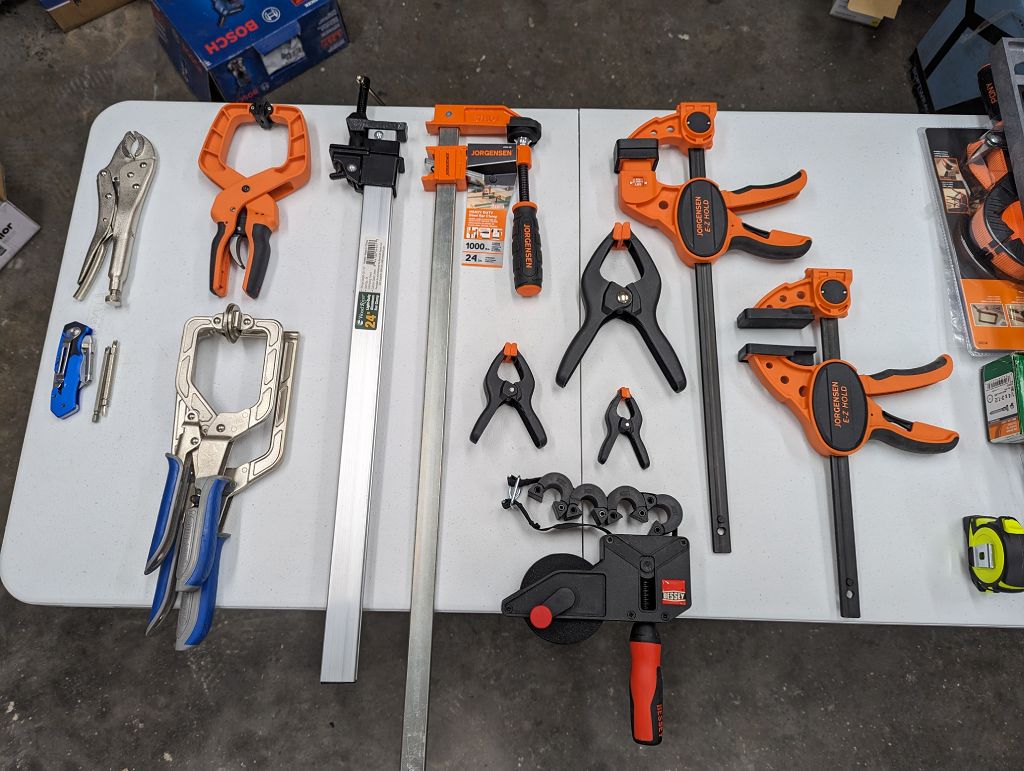
I already have all the clamp types I’ll want to put on this particular modular clamp wall, so it makes the most sense to play with the clamps on my table and see how efficiently I can group them together, while not packing them so tight that they are aggravating to remove or put back onto the clamp wall.
Further, I understand that I will be buying more of the same type each clamp, so I want to make sure I leave enough depth to add more clamps in each slot in the future.
 |
|---|
| Planning the modular clamp wall on my table |
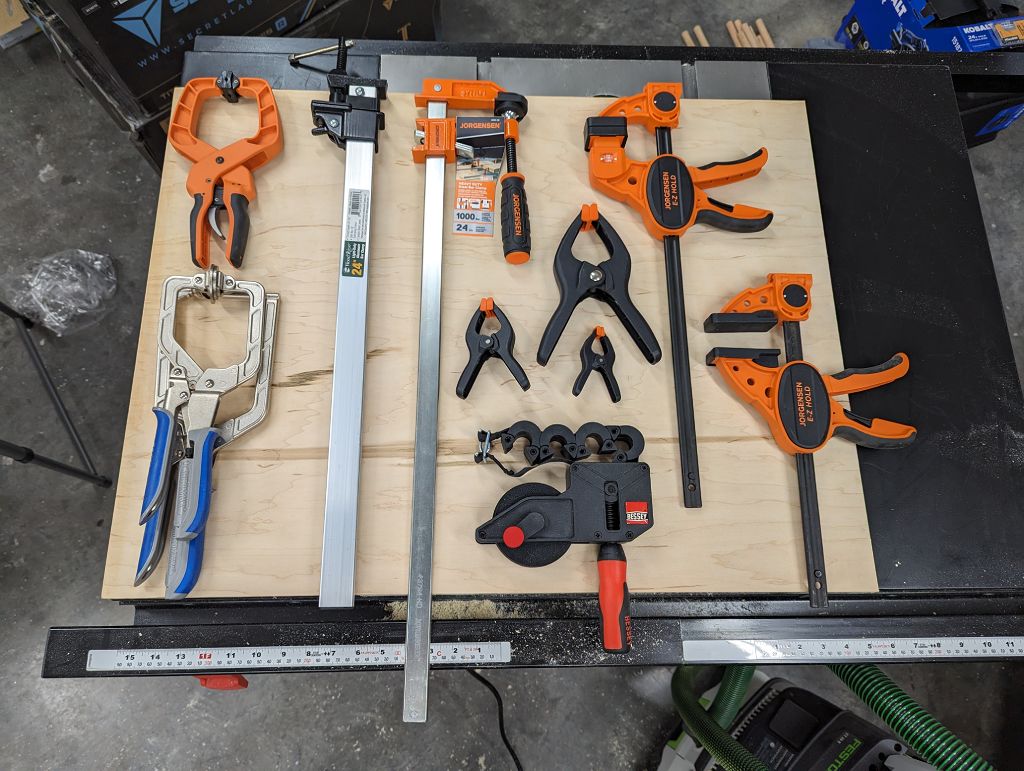
I only lay out one of each clamp since if I can fit one then I can fit many stacked on top of the one. I measure the total length and width this takes up, then cut a piece of plywood to that size.
 |
|---|
| Double-checking the clamps will fit on my freshly cut plywood |
I already bought some dowels for this project, so I can use one to figure out the spacing of all the clamp holders and to act as my template to trace a circle around so that I know precisely where to drill my holes.
And with that, the planning is done! ![]()
Time to choose your own adventure! If you want to see the math behind the planning, keep reading. If you want to skip past the math section, click here!
 Sizing the Dowels with Math
A long, long time ago in a galaxy far, far away, I worked as a mechanical engineer. Because of this, I tend to analyze builds in terms of “stress”, which is a measure of how force is applied to an area of material. Keep the stress under a material’s limit and it won’t break or bend permanently. Go over the limit and it will break or bend permanently. It’s a simple concept, but it’s a good way to design things.
 Beam Theory
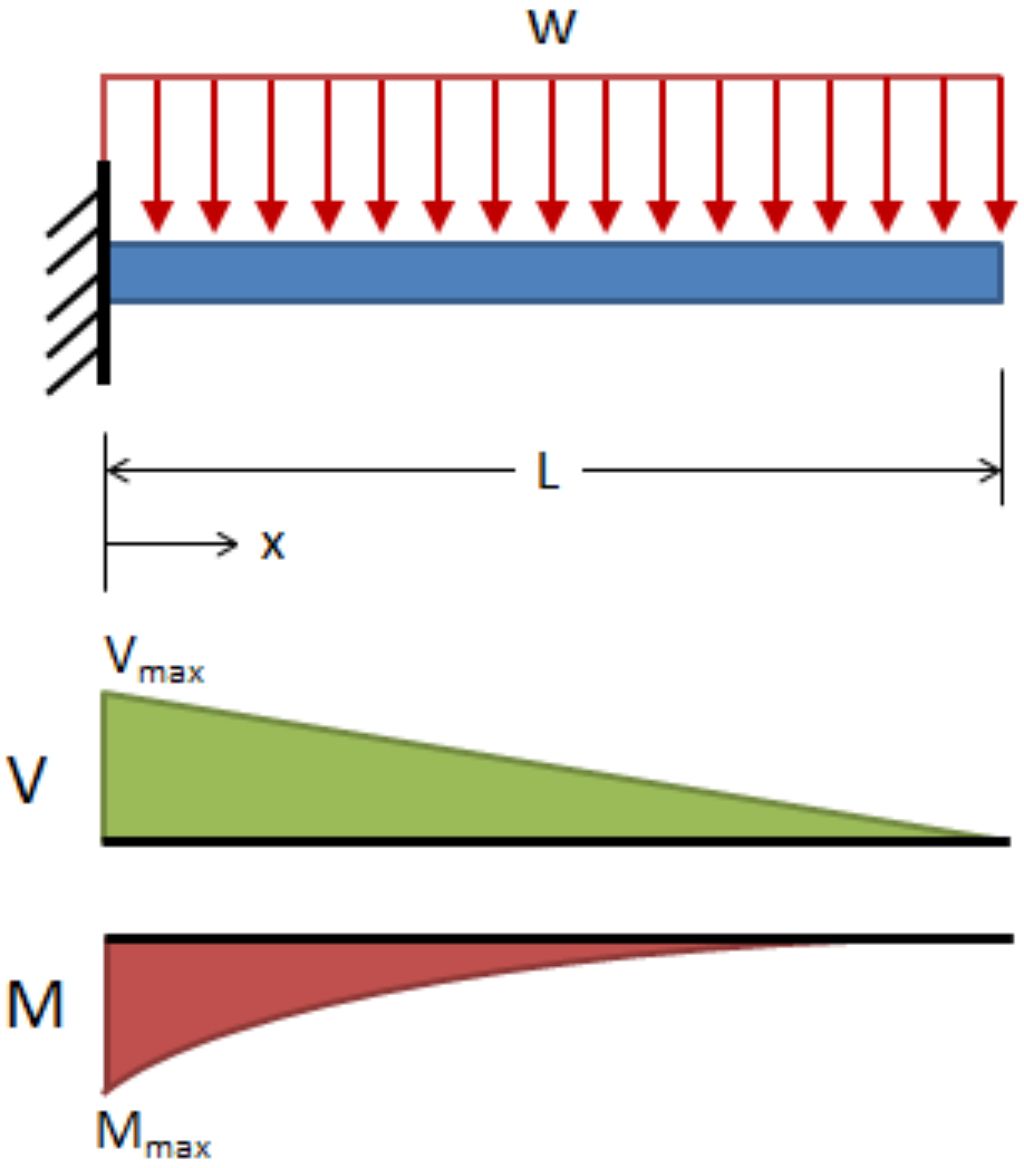
For this project, we can think of the dowels like this, held in place on the left side and free to move on the right side:
 |
|---|
| A simple cantilever beam with a distributed force w (the hanging clamps) applied to it (Image Source) |
Note that with multiple clamps hanging off a dowel, the highest stress will occur on the left side, where the beam is fixed to the wall. And this makes sense if you think about it. When you pry something with a pry bar, the greatest force occurs at the end where you’re prying—that is the plywood in our dowel’s case.
 Calculating Bending Stress
I’m going to assume that the critical stress will be caused by bending of the dowel, so I can find this stress \(\sigma\) with a single equation:
\[\sigma_{\text{dowel}} = \frac{M \cdot c}{I} = \frac{(w \cdot L^2) \cdot \frac{d}{2}}{\frac{\pi \cdot d^4}{64}}\]Where:
- \(d\) is the diameter of the dowel
- \(L\) is the length of the dowel
- \(M\) is the maximum moment—fancy way of saying “bending torque”
- \(c\) is the distance from the neutral axis to the outermost fiber—in this case, from the center of the dowel’s cross-section to the outside, or \(\frac{d}{2}\)
- \(I\) is the geometric moment of inertia—this is just a number which describes how the cross-section of the dowel resists bending
I know my dowel diameter is 0.75 inches (19 mm), dowel length is 16 inches (41 cm), and my max total force \(F\) is 10 pounds per dowel (44 N). The last thing I need is to calculate \(w\) from \(F\):
\[w = \frac{F}{L} = \frac{10 lbf}{16 in} = 0.625 \frac{lb}{in} \text{, or } 0.110 \frac{N}{mm}\]Almost done! I can just fit in all these values and calculate \(\sigma\):
\[\sigma_{\text{dowel}} = \frac{(w \cdot L^2) \cdot \frac{d}{2}}{\frac{\pi \cdot d^4}{64}} = \frac{(0.625 \frac{lb}{in} \cdot (16 in)^2) \cdot \frac{0.75 in}{2}}{\frac{\pi \cdot (0.75 in)^4}{64}} = 3863 psi\]That’s more stress than I thought it would be! Comparing it to the stress limit of the oak dowel I bought, which is 4700 psi (source):
\[\sigma_{\text{dowel}} = 3863 psi < 4700 psi = \sigma_{\text{limit}}\]Definitely a closer pass than I would have liked, but it’s a pass nonetheless!
And now I have the knowledge that I should be careful if I start getting close
to my weight limit ![]()
 Building
Now that I am confident in my design, it’s time to drill all the holes where the dowels will go, glue them in place, and attach the French cleat!
 Drilling the Holes
There’s only one, small, itsy bitsy problem… I don’t have a drill press
![]() This would be the perfect tool to ensure perfectly perpendicular
holes.
This would be the perfect tool to ensure perfectly perpendicular
holes.
I don’t plan to get one for some time since my shop is too small at the moment—I am using only part of the garage, after all—but I can make something good enough for this! I use my small drill guide and new nail gun (I love this thing!) to construct my own “drill press”:
 |
|---|
| My makeshift drill press |
I drill into a test piece of wood, only to find that it’s not “exactly” perpendicular to the wood, but it will certainly be good enough for this project! I can bend the dowel by hand in the hole to make it perpendicular, and the wood glue I eventually use will hold it in place at that angle.
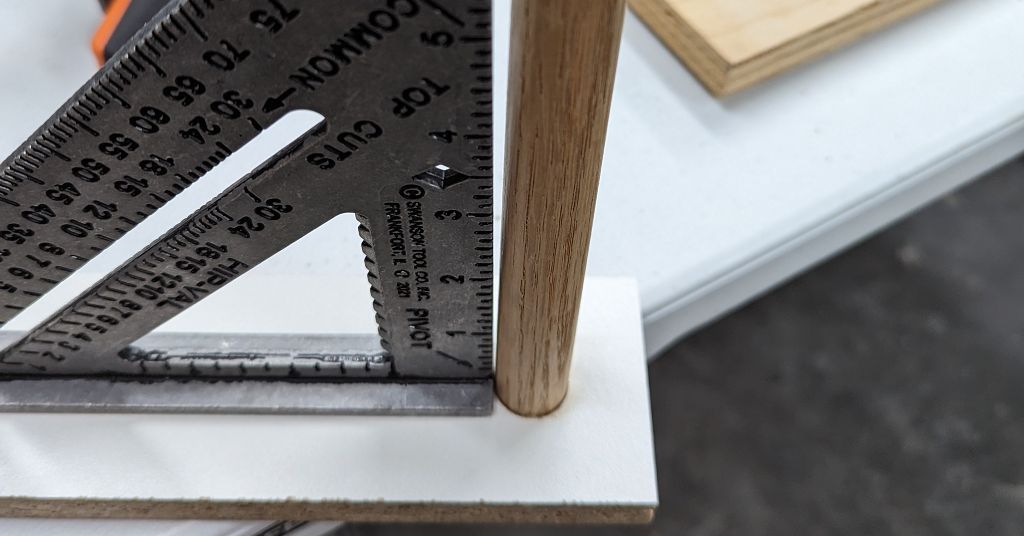 |
|---|
| The drill press is not exactly perpendicular |
Time to drill out all the holes! I use another piece of wood clamped to my surface to help me keep my makeshift drill press in place, and I drill out all the holes.
 |
|---|
| If it’s stupid and it works, it’s not stupid |
This isn’t actually all the holes yet. I’ll wait until after I get the dowels in and actually hang some clamps on it to see which clamps try to hang at an angle instead of straight down. I can then add some small dowels to keep this from happening.
 French Cleat
Before I glue on the dowels, I want to go ahead and attach the mating French
cleat on the back so that I can hang it up and see how it will look ![]() I cut a piece of 2x4 to size and attach it with way too many lag screws to the
back of the plywood. After hanging it up, I can tell it’s going to look good!
I cut a piece of 2x4 to size and attach it with way too many lag screws to the
back of the plywood. After hanging it up, I can tell it’s going to look good!
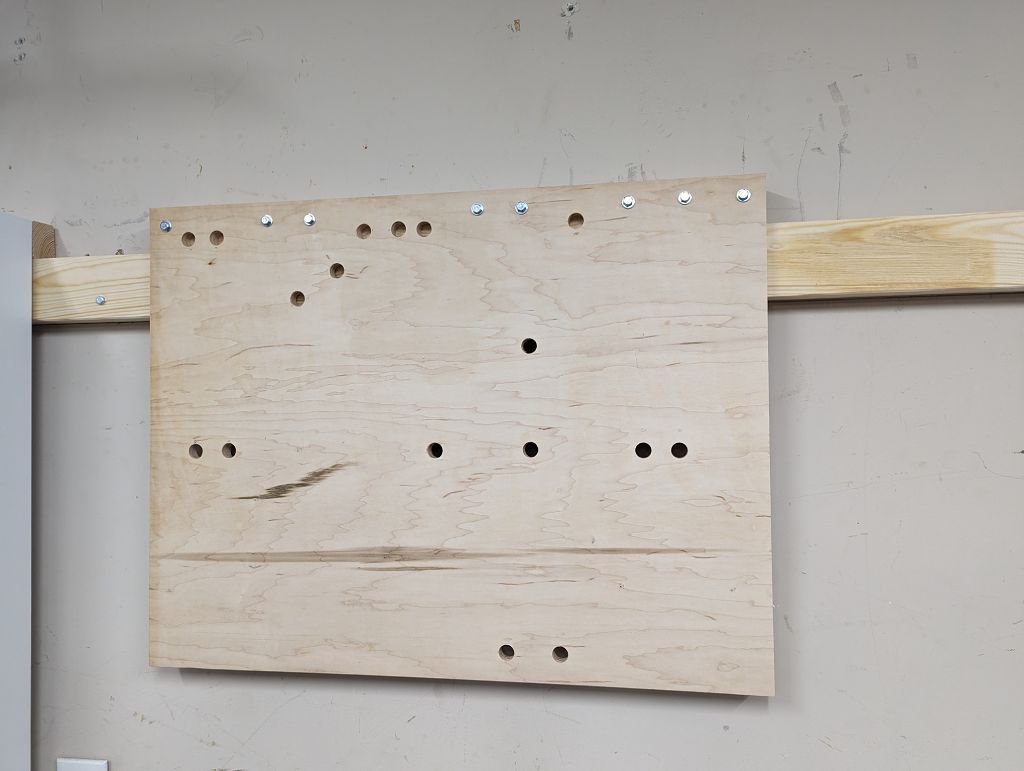 |
|---|
| The holes drilled and the French cleat attached to the back of the plywood, ready for the dowels to be glued in place |
 Gluing
I won’t be able to access the back of the plywood while it’s hung on the wall
during the glue-up, so I will use blue tape on the back of the plywood to make
sure that I don’t go too deep with the dowels, and so I don’t get glue all over
the back of the plywood. As I go, I’ll measure the angle of all the dowels and
try to manhandle them all to be perpendicular ![]()
But first, I dry fit all the dowels on my table, and discover a few holes with
some jagged edges preventing the dowel from going in all the way. I still don’t
have any files ![]() , so I use my drill bit to file away the jagged edges.
, so I use my drill bit to file away the jagged edges.
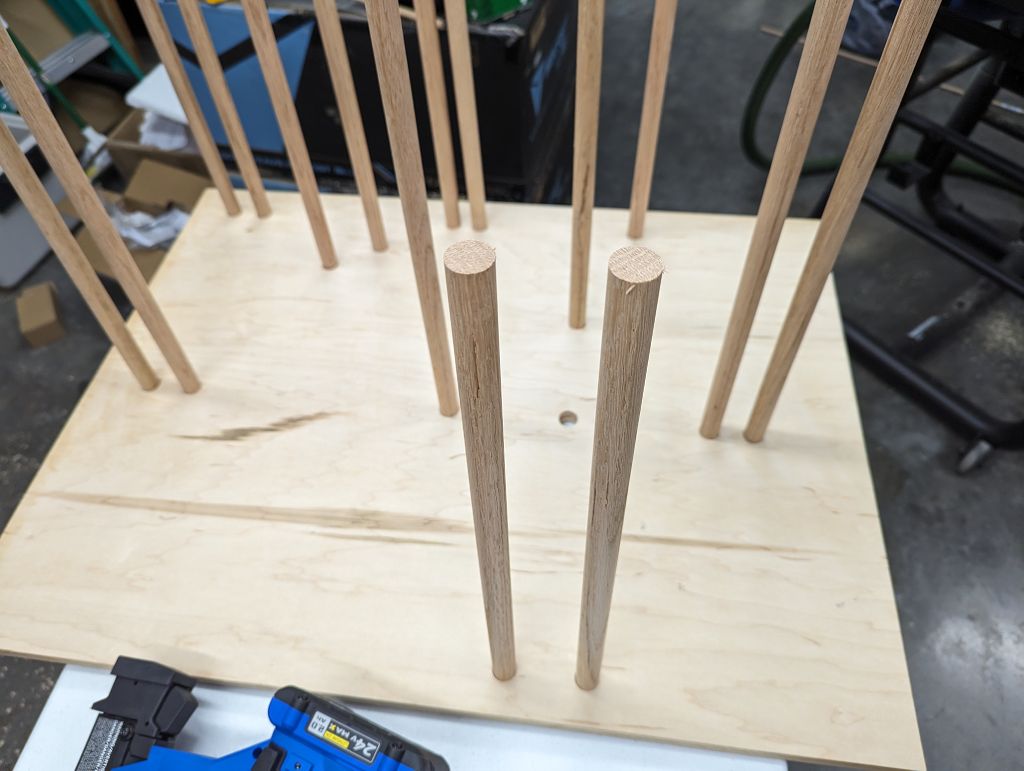 |
|---|
| Dry fitting the dowels on my table |
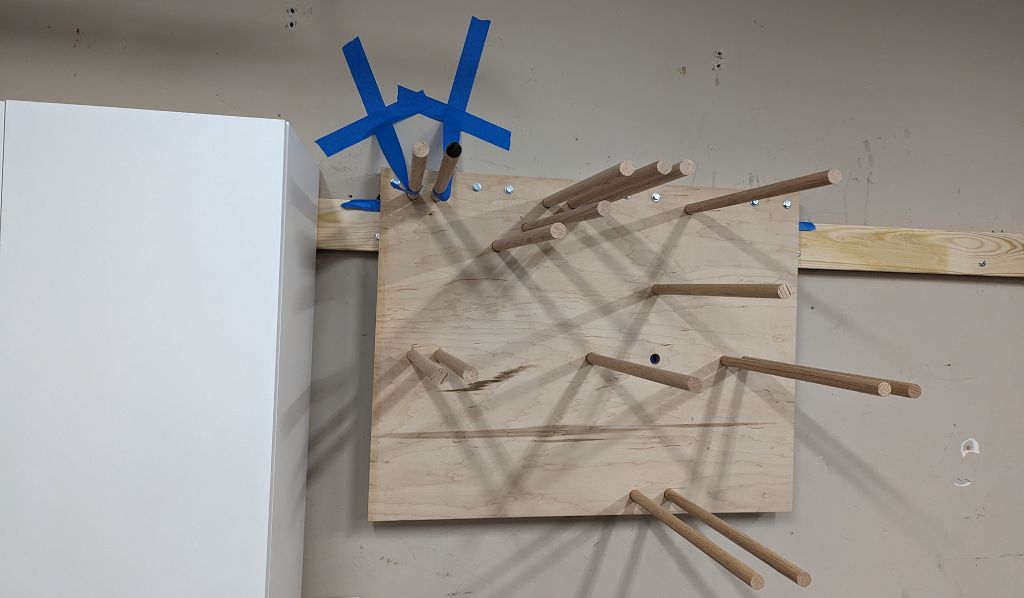
I remove all the dowels and rehang the plywood on the wall. I start at the top,
and one by one I glue in the dowels, check the angle, and force them to be
perpendicular by hand. Before I know it, I’m done! I only had to take some extra
measures to correct the angle of two of the dowels—see if you can figure out
which two! Hint: look for the blue tape ![]()
 |
|---|
| All the dowels glued in place, drying |
 Small Dowels
Now that the glue is dry, I hang up one of each clamp. I notice two things:
- Only one of the clamps is hanging at an angle, as opposed to the three I was expecting—glad I didn’t drill prematurely!
- I accidentally drilled a 0.75” (19 mm) hole instead of the needed 0.5” (13
mm) hole for a small dowel which will fit a small clamp

For the one clamp at an angle, I simply drill a 0.5” (13 mm) hole in the plywood where I want the clamp to be and glue in a small dowel. Easy.
But for my accident, it’s a bit more complicated. For this, I purchase a small nylon bushing and gently sand it inside and out to perfectly fit my hole and dowel. This works better than expected!
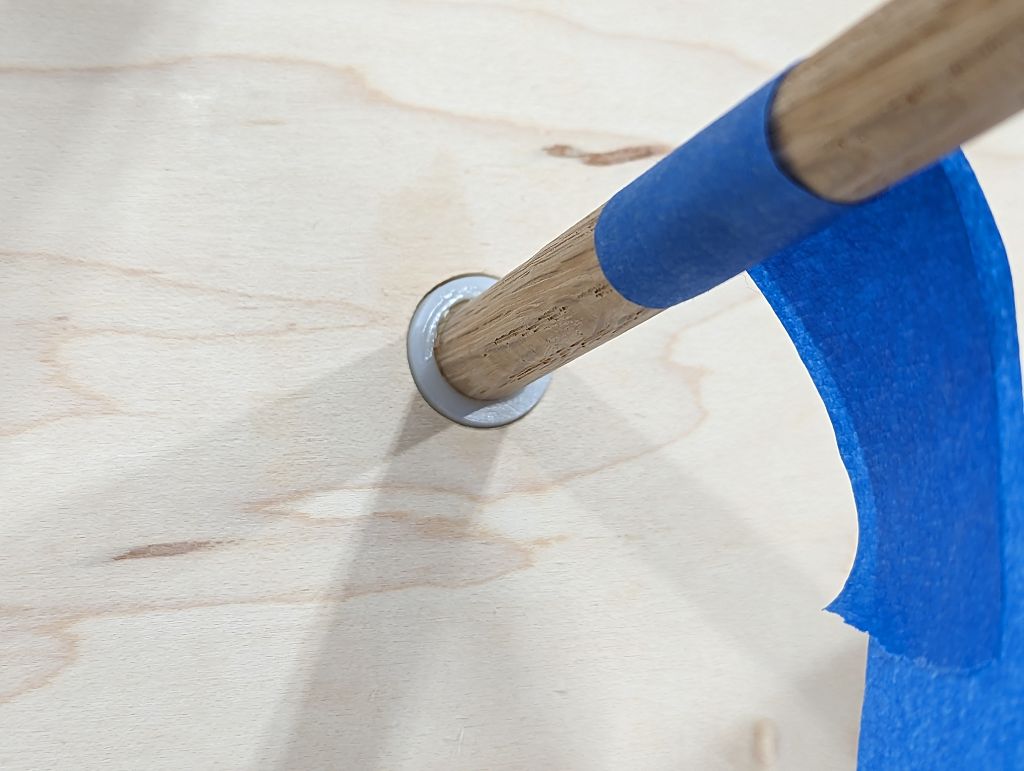 |
|---|
| The small dowel bushing, glued in place with CA glue |
I glue it in place with some CA glue, and it’s good to go. I don’t care too much about the strength of this joint since it’s just holding small clamps and the glue only needs to keep the bushing and dowel from falling out.
I’ll let all the glue fully cure, then I’ll hang it up and put all my clamps on
it! ![]()
 Final Reveal
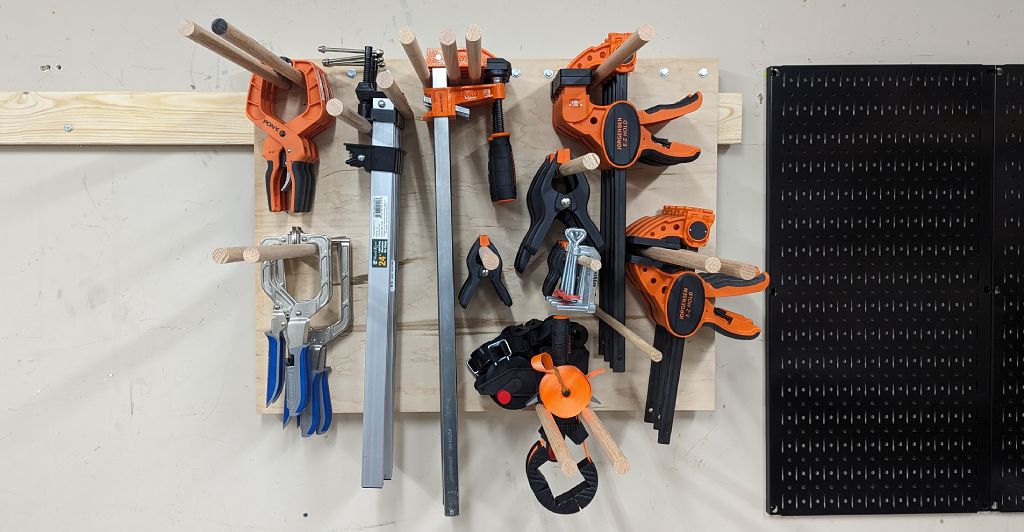 |
|---|
| The final reveal of my modular clamp wall, with all my clamps (so far |
I’m very satisfied with how this turned out! It was very satisfying to watch the
clamps go on the wall one at a time and see the fruits of my labor ![]() Plus, I left enough length on the dowels so that I can add more clamps in the
future!
Plus, I left enough length on the dowels so that I can add more clamps in the
future!
And this project was yet another lesson on how important it is to have the right
tools for the job—the lack of a drill press or robust drill guide really
made this project more difficult and take much longer than I wanted. But hey,
kitting out the shop is already something I’m working on! ![]()
I also learned about how dire the need is to have a real table to work on. Not
this collapsible plastic table I’ve been making do with. And it would be nice to
have one that can be used as an outfeed table to my table saw, too! ![]()
Hmm… now that would be a good next project…
![]() Pixel
Pixel