(The following took place on the week of November 05, 2023)
Time to finish this mobile work table!
In part 1, I did the
planning, bought the materials, then cut and finished the wood construction of
the table—I would say that was the hard part! All that’s left is I need to add
the wheels, then sand, paint, polyurethane, and wax it. This table will be done
in no time at all ![]()
 Starting Point
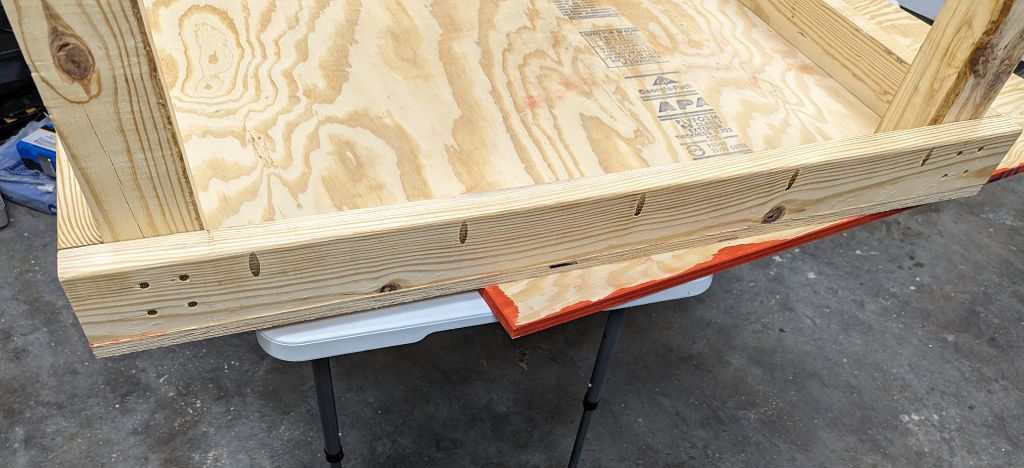
As a quick reminder, here is the table at the end of part 1. It’s just a table,
with no finish on it and no wheels. But it is technically a table that I could
use, if I needed to! That is, if I turned it right-side-up ![]()
 |
|---|
| The wooden structure of the table is assembled, still upside-down |
 Building
While the table is still upside-down, this is a perfect time to add the wheels!
 Wheels
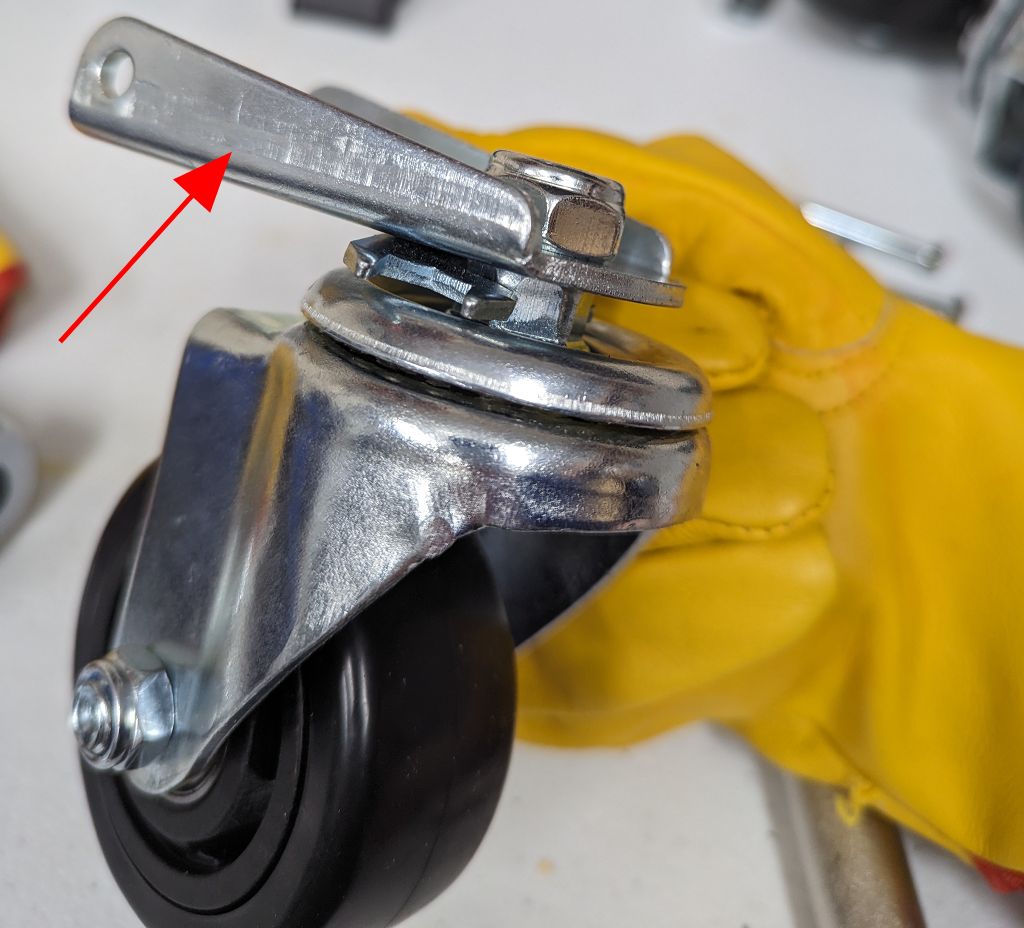
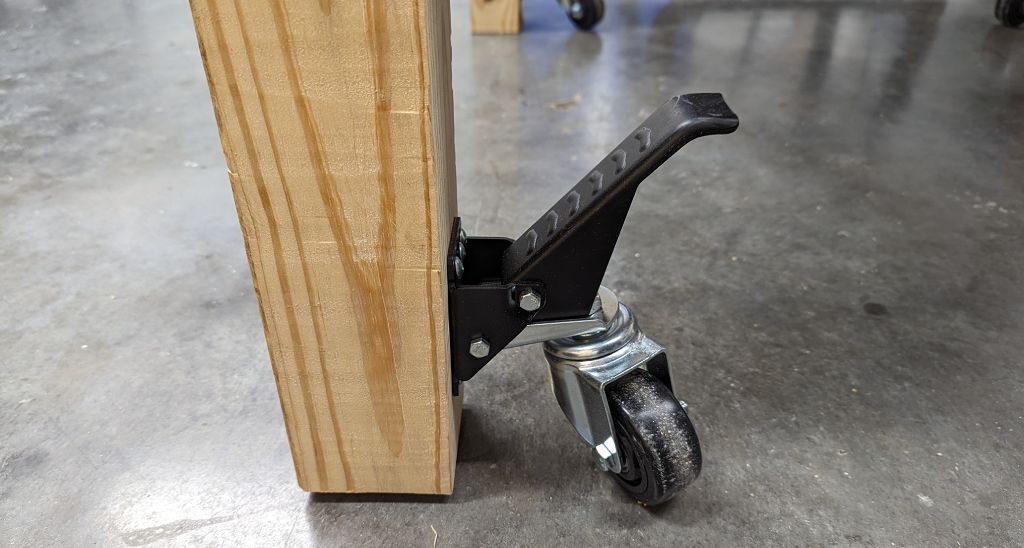
I bought some heavy-duty wheels from Amazon which should be able to take anything I throw at it. They also have this nice lever at the top that allows me to engage and disengage the wheels with my foot. This means I can have the table highly mobile when I want to move it around, or very stable when I want it to be stationary.
 |
|---|
| The wheels, with the lever (red arrow) to engage and disengage them |
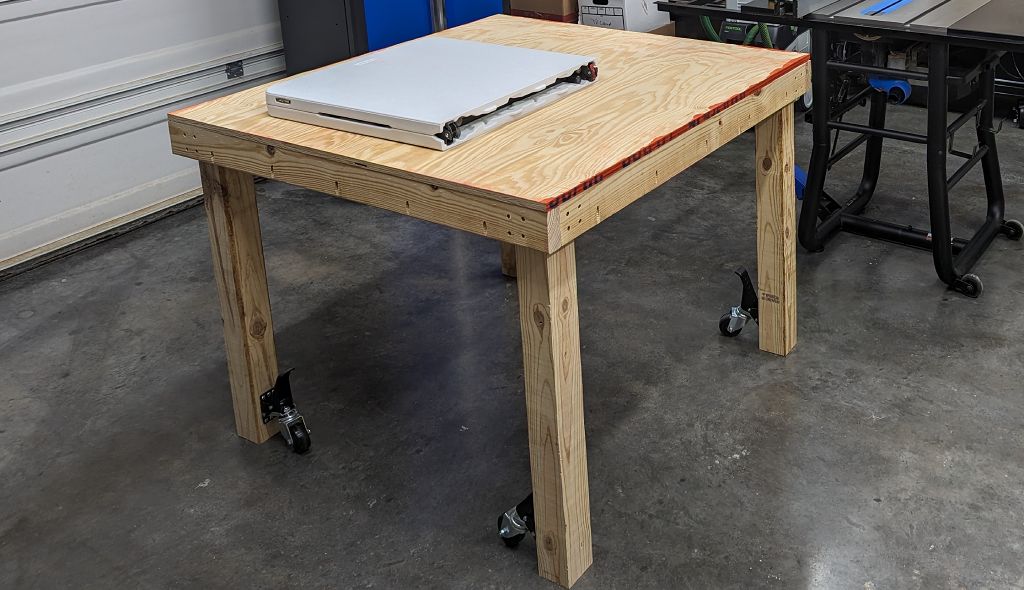
I drill some holes in the legs and screw the wheels in place. I place the wheels
on the inside of the legs so that they don’t stick out past the legs. This will
prevent the wheels from ever getting in the way, no matter where I put it! I am
always looking out for potential trip hazards in the workshop, and this
completely eliminates that possibility ![]()
 |
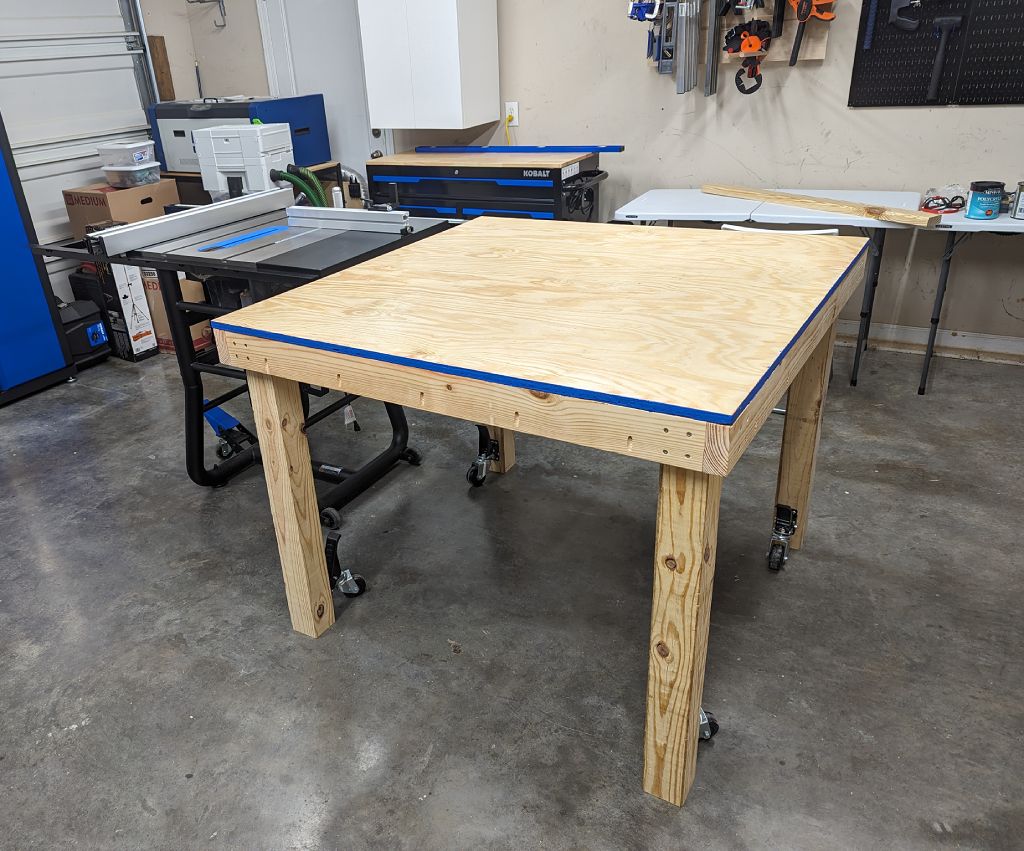
|---|
| The wheels installed on the legs, and the lever up disengaging the wheels, my plastic table on top for a size comparison |
 |
|---|
| The wheels installed on the legs, and the lever down engaging the wheels on the ground |
 Mistake
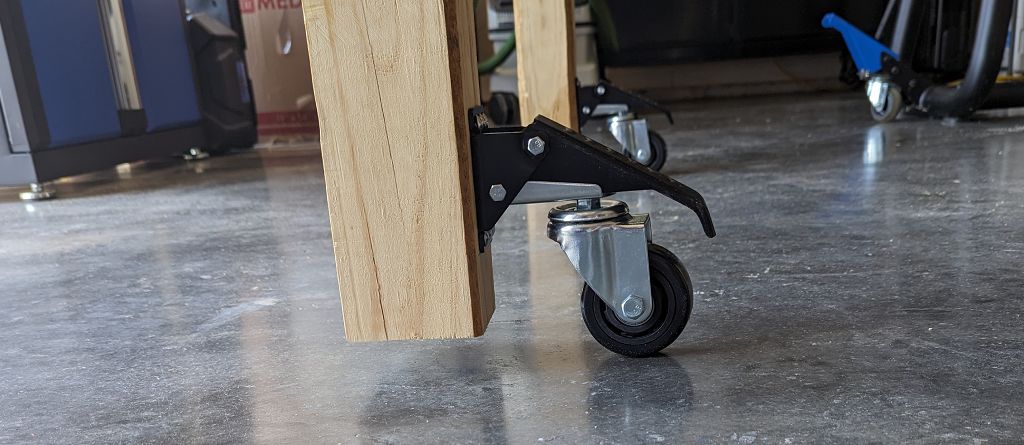
I have to guess at exactly where I should place the wheels relative to the bottom of the legs since there are no instructions in the box. I mistakenly think that I should place the wheels as close to the leg bottoms as possible to ensure that they’ll barely clear the ground when the lever is disengaged. This way, I’ll guarantee the wheels will be able to pick up the table high enough to miss any bumps on the ground while the table is rolling. Makes sense, right?
It works great when I engage the wheels: the table lifts off the ground nicely.
However, I didn’t realize that when I disengage the wheels, the wheels have
trouble getting fully out of the way, and the table wants to rest on these
wheels ![]()
 |
|---|
| The lever disengaged (up position), but wheels not fully out of the way, and the table resting on them |
It’s not a big deal, since I can just wiggle the table a bit and the wheels will fully turn to the side and get out of the way. But it’s annoying, and the extra side loading on my table legs when I do this forceful wiggling isn’t great for the long-term structure of the table. I’ll make this better on any future mobile table I build, but hopefully you won’t make the same mistake I did!
 Finishing
This should be straight-forward! Sand, paint, polyurethane, wax, done!
Bada-bing, bada-boom ![]() And doing the finishing on a large
surface like a table is easier in some ways than finishing a smaller surface
like the hair bow box project.
And doing the finishing on a large
surface like a table is easier in some ways than finishing a smaller surface
like the hair bow box project.
 Sanding
I sand the entire table outside surfaces except for the legs with 120 grit
sandpaper, then 220 grit sandpaper. I’m not going to go wild with the sanding
since this is a workshop table, not a fine piece of furniture. I just want to
make sure there are no splinters or rough edges, and that my eventual waxing
will give me a surface that wood will glide on top of ![]()
 |
|---|
| The table being sanded, taking advantage of the wheels to work outside |
 |
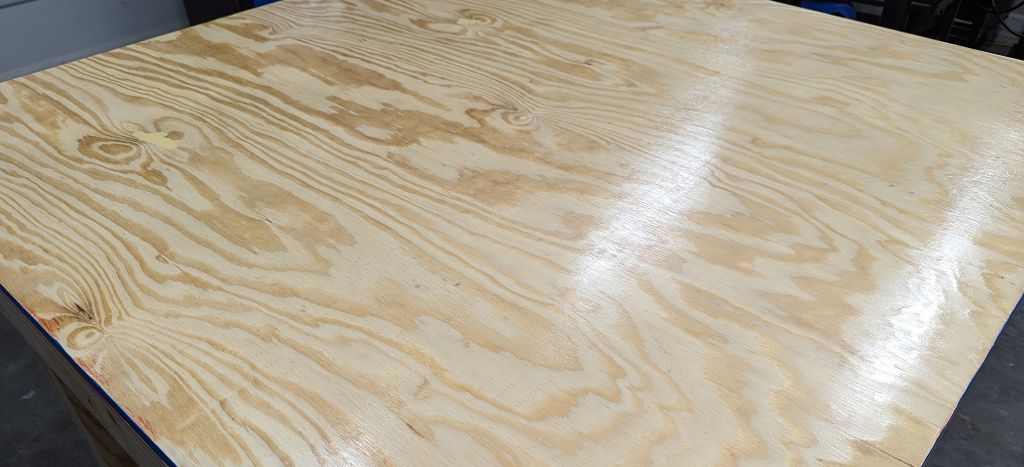
|---|
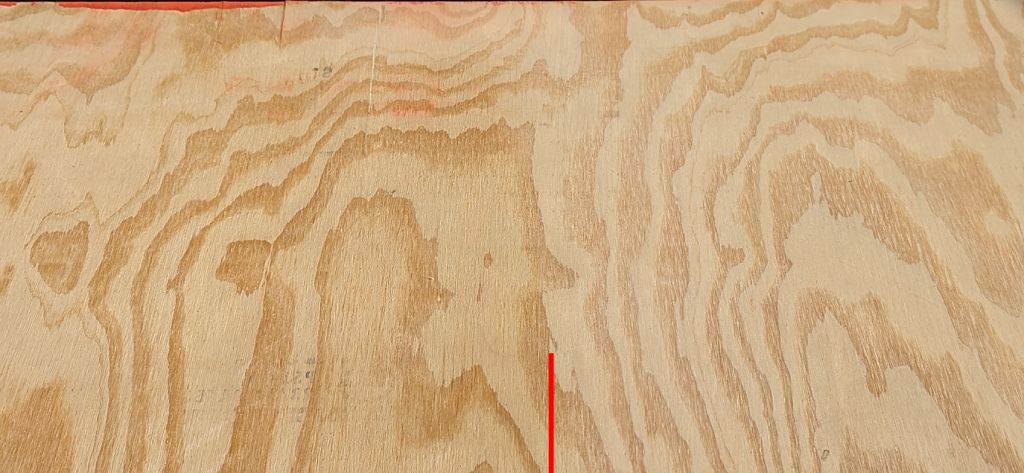
| The right half is sanded, with the left half not sanded yet, red line marking the boundary |
I attempt to sand off the orange/red paint on the border of the plywood, but
it’s not coming off easily. That confirms it: I’ll be using my blue paint, after
all! See, it’s not that there was paint on my table that I wanted to get off,
it’s that I wanted it to be blue ![]() #MyAesthetic
#MyAesthetic
 Painting
My wife ![]() is the MUCH better artist of the two of us. And even though it’s
just painting the edge of a table, I will still find a way to mess it up if I do
it
is the MUCH better artist of the two of us. And even though it’s
just painting the edge of a table, I will still find a way to mess it up if I do
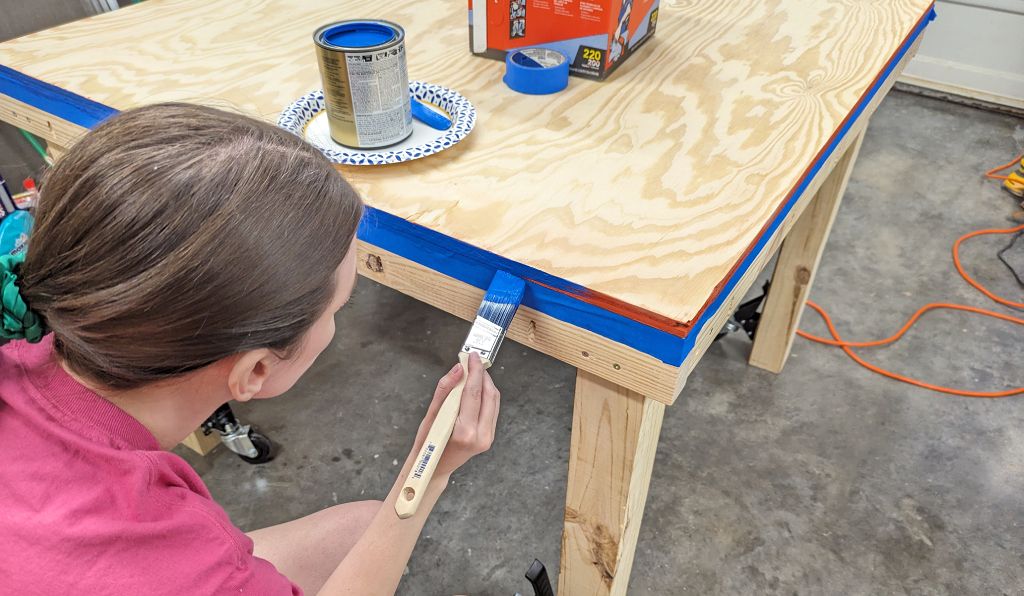
it ![]() So I ask her to do it for me, and she does a great job! We always
enjoy finding a way to get involved in what the other is doing, so this works
out nicely
So I ask her to do it for me, and she does a great job! We always
enjoy finding a way to get involved in what the other is doing, so this works
out nicely ![]()
 |
|---|
| The table edge being painted by my amazing partner-of-forever |
 |
|---|
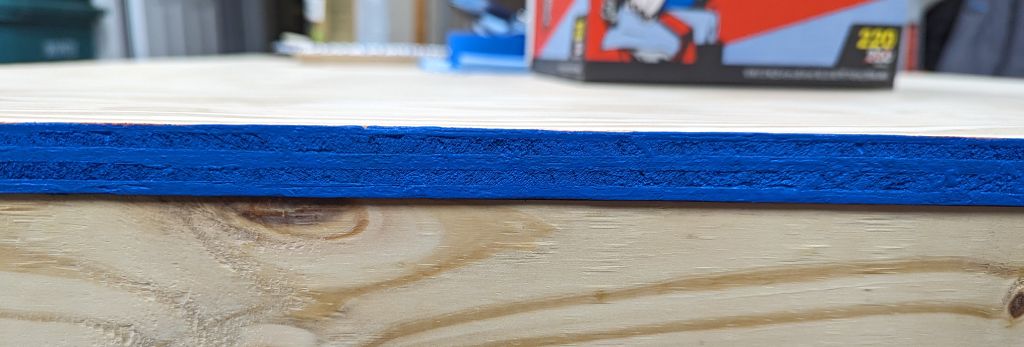
| The table edge painted and dried |
Look at those crisp edges on the top without even taping there! ![]() We only had to tape the bottom of the edge.
We only had to tape the bottom of the edge.
 Polyurethane
The paint dried very quickly! So since she was already out here with me, I was
able to get some extra bonus help ![]() to apply the water-based polyurethane!
I wanted a very durable surface, and one that would take my wax finish very
well. We applied 3 coats, lightly wet sanding in between.
to apply the water-based polyurethane!
I wanted a very durable surface, and one that would take my wax finish very
well. We applied 3 coats, lightly wet sanding in between.
AND!! I learned from the hair bow box project, and I
remember to spray some water on my wood and sand it before the first coat
![]() This helps the wood fibers stand up to be sanded off and make the
surface even smoother.
This helps the wood fibers stand up to be sanded off and make the
surface even smoother.
 |
|---|
| The table being prepped for polyurethane application outside, with a brush for each of us on the table |
 |
|---|
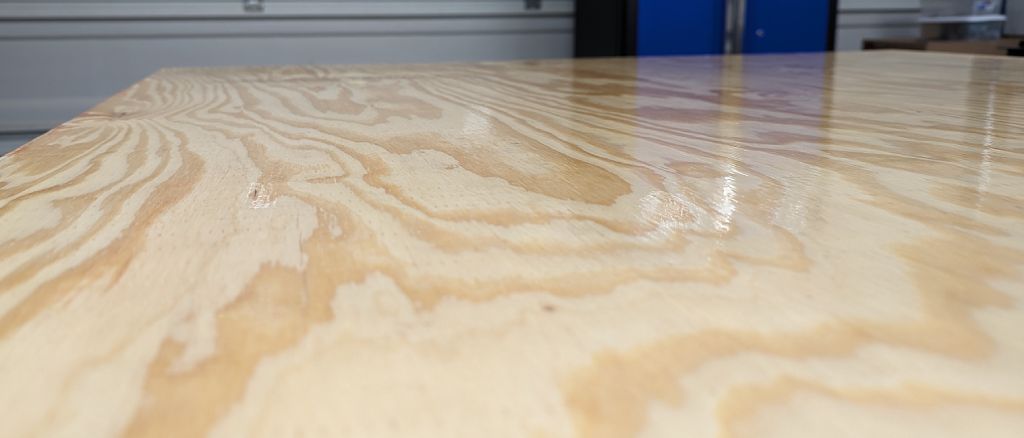
| The table with 3 coats of polyurethane applied, dried, and ready for waxing |
I now have a hard, durable surface, but not an especially slick surface. I’ve got just the thing for that…
 Waxing
I use paste wax on all the machines in the workshop… which is only the table saw right now. But I’ll be adding more machines in the future, and I’ll be waxing them all with this!
Paste wax in an amazing way to protect metal surfaces from rust, and to make
them slick so that wood glides across them easily. Plus, there is no silicone
in it, and this is very important since any silicone that gets on wood can react
horribly with any finish that is then applied to the wood—it practically ruins
the piece ![]()
Since the table is so big, I only wax a quarter of the table at a time, taking
my time to ensure I cover every spot. I just use a blue shop paper towel to
apply it, wait 10-15 minutes, then buff it with another towel. The sheen of the
polyurethane is reduced a bit due to the wax, but it is WAY slicker now, and
that is what is important. I can place a piece of wood on the tabletop, and
barely push it, and it practically flies off the other side! ![]()
 |
|---|
| The table fully waxed |
Now, time to put it in its final place in the workshop!
 Final Reveal
 |
|---|
| The final outfeed and work table, next to the table saw where it will stay most of the time |
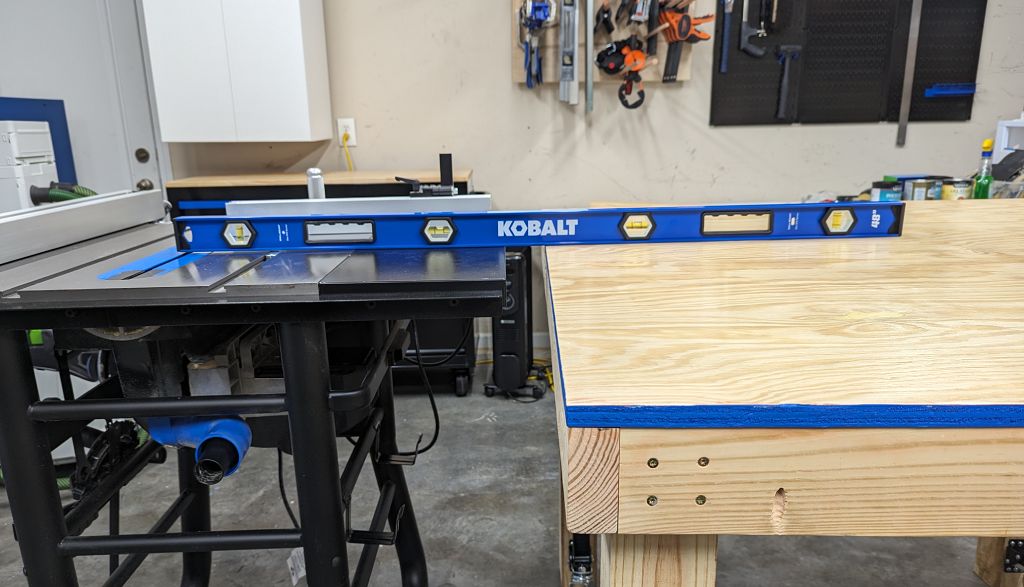 |
|---|
| The final outfeed and work table, at the perfect height for the table saw, as illustrated by the level simulating a piece of wood |
I’ve never built a table before! Which makes it even more surprising that I
didn’t do my typical amount of research before I started on this project—I
usually like to find what others have done and use that as a starting point. But
you know what? This was very freeing and enjoyable ![]() But only
because it all worked out in the end
But only
because it all worked out in the end ![]()
This was a very empowering project to build a large table from just some Lowe’s
wood and screws. And I have to say, I’m very proud of how it turned out!
Especially the consumable top that I can easily replace in the future by quickly
unscrewing all the pocket screws, putting a new piece of plywood on top, and
simply screwing it back in place through the same holes ![]() I’m sure others
have thought of this, too, but I haven’t seen it before and was excited to
figure out how to do it on my own!
I’m sure others
have thought of this, too, but I haven’t seen it before and was excited to
figure out how to do it on my own!
I’ll certainly be getting a lot of use out of this, and it feels good to be able
to build something to solve a problem that directly affected me, and will also
help keep my fingers safe from the table saw blade ![]()
![]() Pixel
Pixel