*Checks watch* ![]()
IT’S BEEN A MONTH SINCE MY LAST POST! ![]()
Finally time to start getting this bookshelf project off the ground! I’m going to redesign the bookshelves to be standalone, and also make a full-scale mockup of a bookshelf and place it in the room where the real thing will go. It will be very exciting to get a visual of how the real thing will transform the room!
 New Ideas, New Sketch
Previously, I had what I
thought was a pretty good plan for the console bookshelf. However, the more my
wife ![]() and I talked about it, the more we thought it would be better to
make two standalone bookcases to fit on either side of the already existing TV
console, instead of the originally intended wall-to-wall solution which would
act as a new TV console. This is mainly so that we can take my first semi-large
project with us when we eventually move one day. Yeah, we’re sentimental like
that!
and I talked about it, the more we thought it would be better to
make two standalone bookcases to fit on either side of the already existing TV
console, instead of the originally intended wall-to-wall solution which would
act as a new TV console. This is mainly so that we can take my first semi-large
project with us when we eventually move one day. Yeah, we’re sentimental like
that!
So to that end, we come up with a new sketch for each of the two standalone bookcases. We make sure to take into account using the wood that we just bought at the lumberyard, since we don’t want that to go to waste.
 |
|---|
| The new sketch for each of the two standalone console bookshelves, but decorative routed profiles not pictured |
 Mockup Time!
I’ve been pretty nervous as to how the actual size of the originally planned console or the newly planned standalone bookshelves will look in the room. We taped off the outer dimensions of the bookshelf on one of the walls with some blue painter’s tape, but it is still hard to visualize a 3D object with this 2D solution.
So, I decide to make a quick mockup out of some cheap construction lumber to see how it will look in the room. It will just be the outer frame dimensions, but should give us a very good indicator of how it will feel in the room!
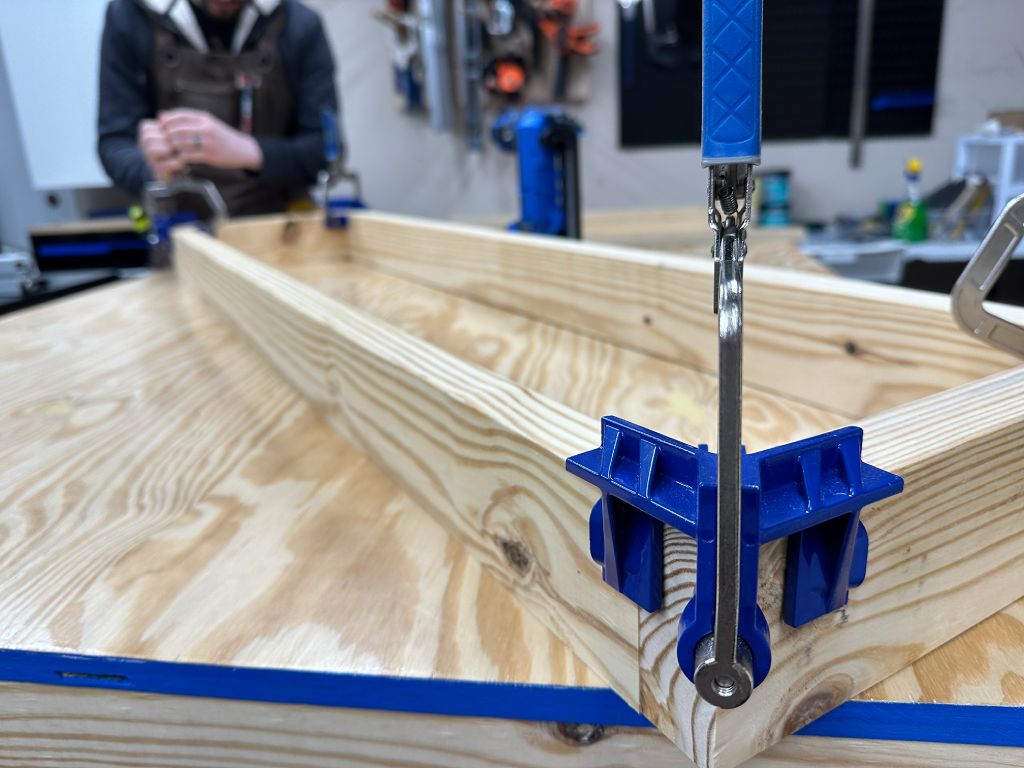 |
|---|
| Clamping the rectangular base of the mockup together to square up everything, then nailing it |
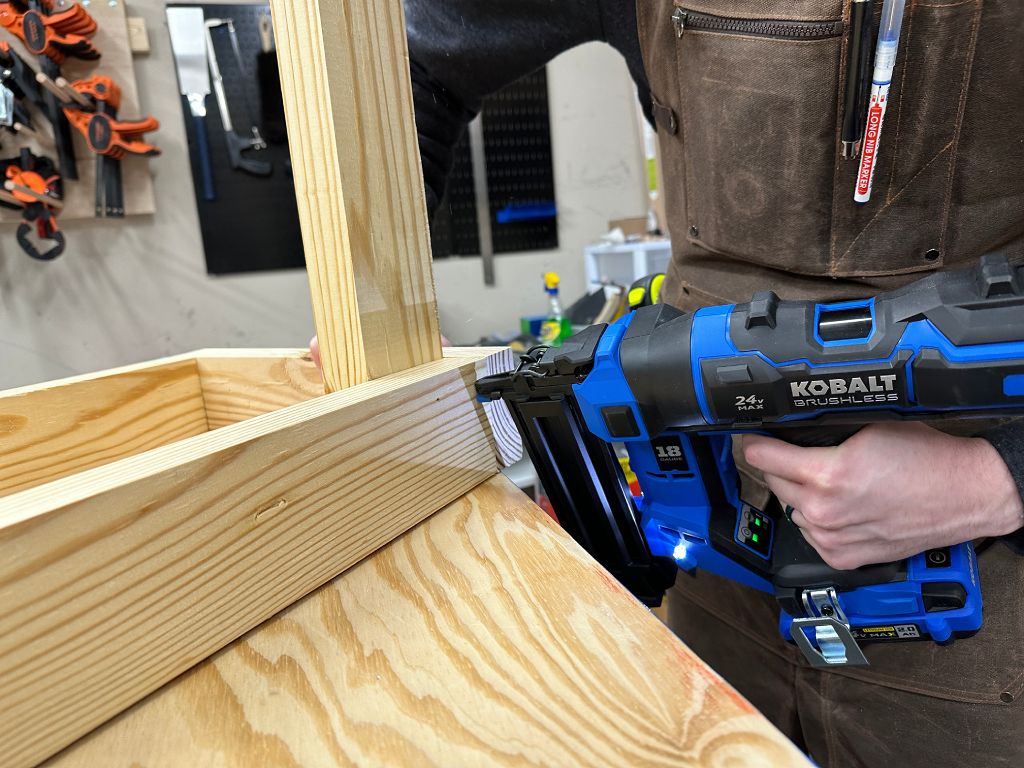 |
|---|
| Nailing the vertical supports to the base of the mockup, with a 2x2 nailing pattern for good strength |
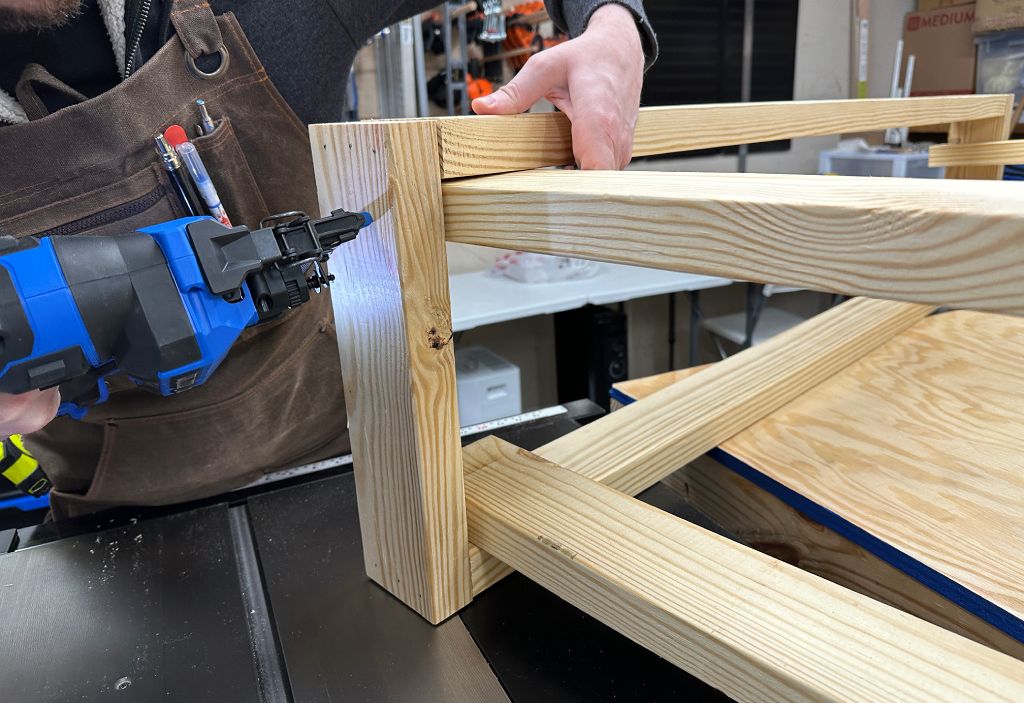 |
|---|
| Nailing the top of the mockup to the vertical supports, where the top rectangle of the mockup looks exactly like the bottom rectangle |
 Final Reveal
My wife ![]() and I lug this behemoth up the stairs and put it in the room
exactly where the real thing will go. We’ll live with it for a few days and see
how it feels in the room. But I think we’re going to like it!
and I lug this behemoth up the stairs and put it in the room
exactly where the real thing will go. We’ll live with it for a few days and see
how it feels in the room. But I think we’re going to like it!
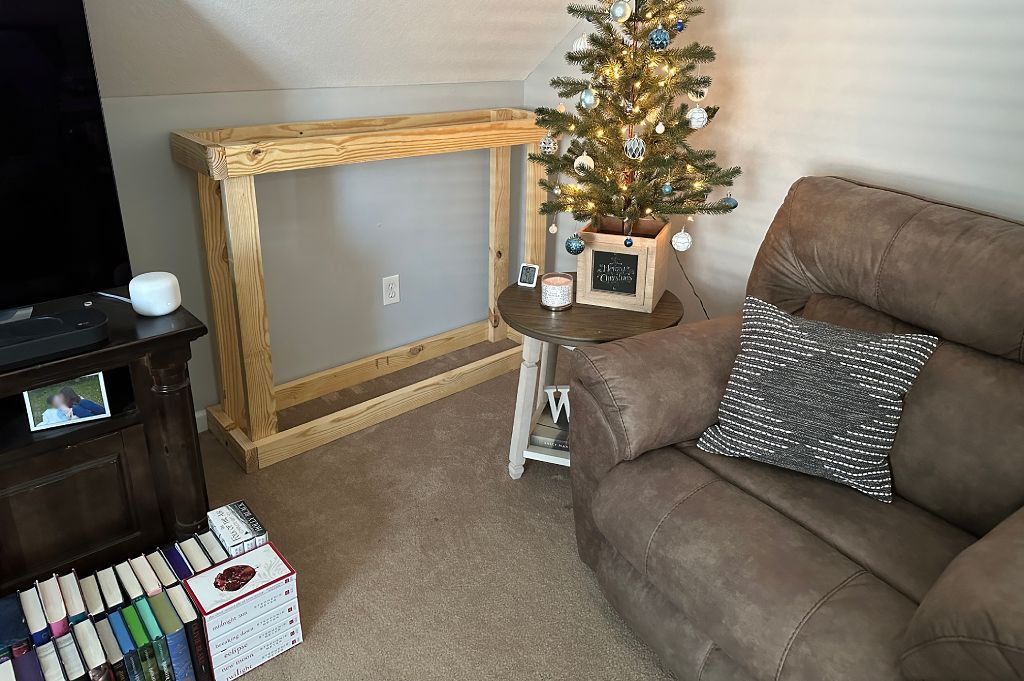 |
|---|
| The mockup in the room, where the real bookcase will eventually go |
I took the opportunity to make the top and bottom portions of the frame in such
a way that I’ll hopefully be able to reuse them as the bases in the final
bookcases—but I’ll replace the nails with screws, of course! Trying to be
efficient with my wood ![]()
Speaking of efficiency, I also made the vertical supports a little shorter than
pictured in my sketch above. This allowed me to use the entirety of each piece
of lumber I used, and reduced the amount of lumber I cut into by 4! The
resulting mockup height is only a few inches off, so I don’t think it will
affect our opinion of this mockup size by too much ![]()
 Next Time!
We’ll make the final design decisions on the bookshelves, and then get to jointing and planing some of the lumber we bought to make the final bookshelves. I’m excited to get started on the real thing! It’s going to be a lot of work, but will be very rewarding!
Until next time,
![]() Pixel
Pixel