(The following took place on the week of September 12, 2023)
Continuing from my last article
here,
I’m going to finish the handle for the lid and fix my mistake on it, and make
the smooth radius on all the box’s sides with a tool I haven’t used in over 15
years. We’ll know exactly what the box structure will look like by the end of
today! Assuming I don’t lose my fingers to my router ![]()
 Building
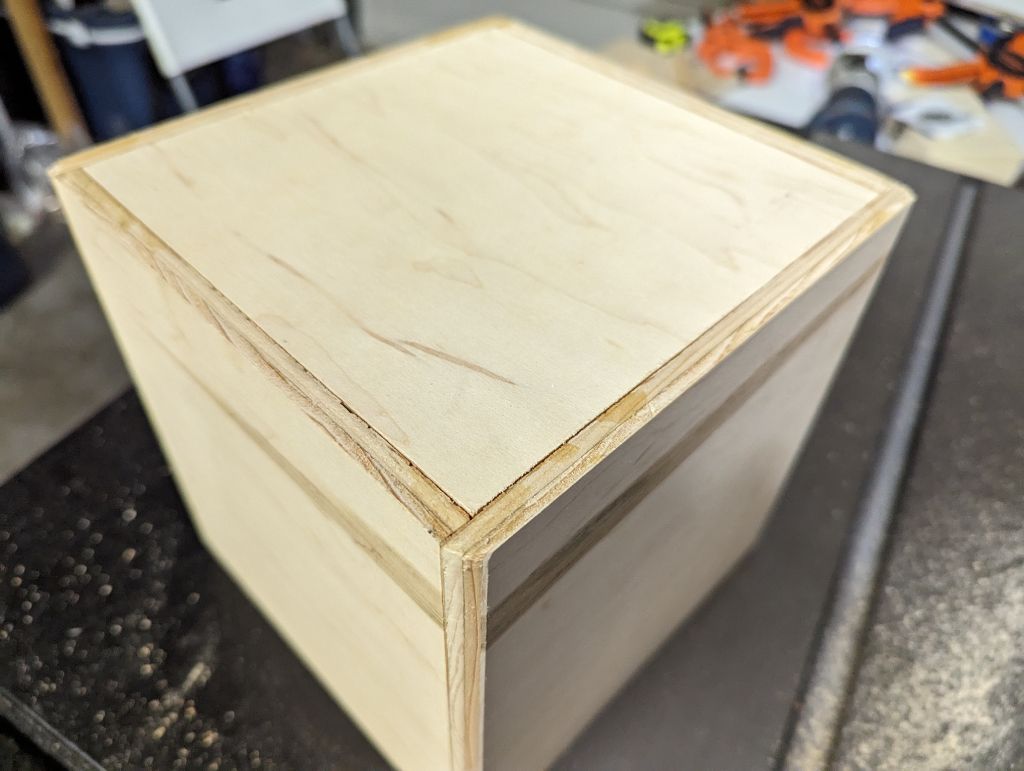
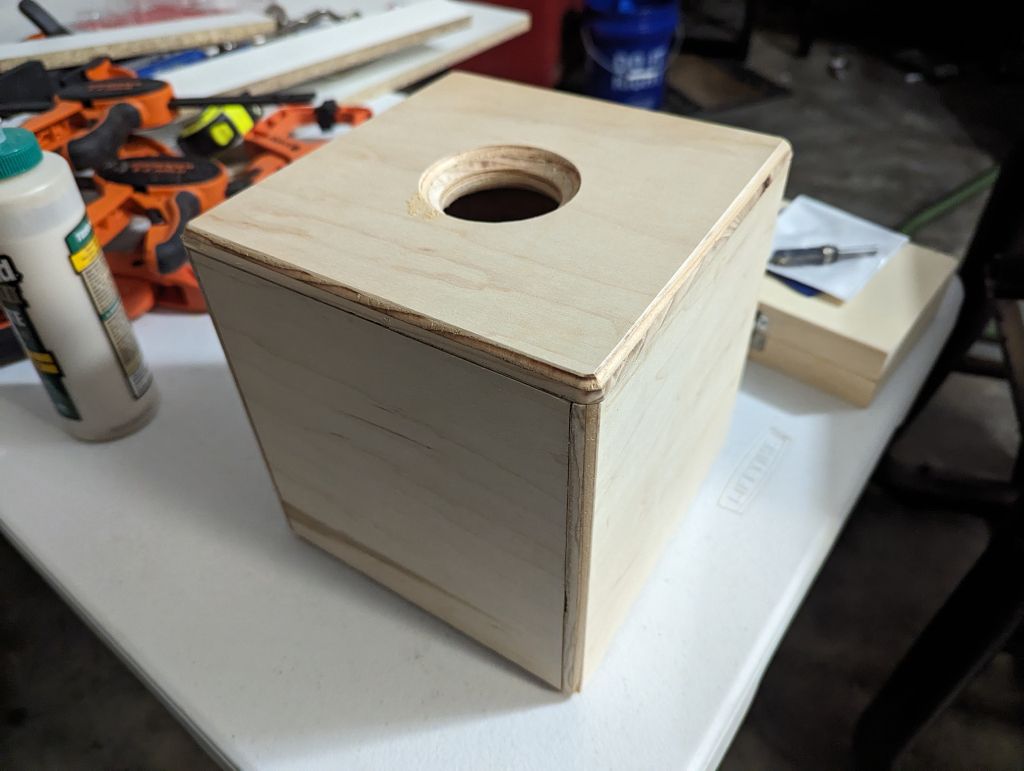
As a quick reminder, here is how the box looks at this point. And remember! We
all agreed to ignore the fact that I forgot to take a photo of this until after
I started routing some of the edges ![]()
 |
|---|
| Glued assembly of the box, bottom facing up, before routing the edges |
 Routing the Handle Hole
Last time, when I drilled the handle hole, I made a huge mistake and marred the face of the lid pretty badly with the Forstner bit. I’ve done some thinking and I have a plan on how to fix it. Well… “fix” it.
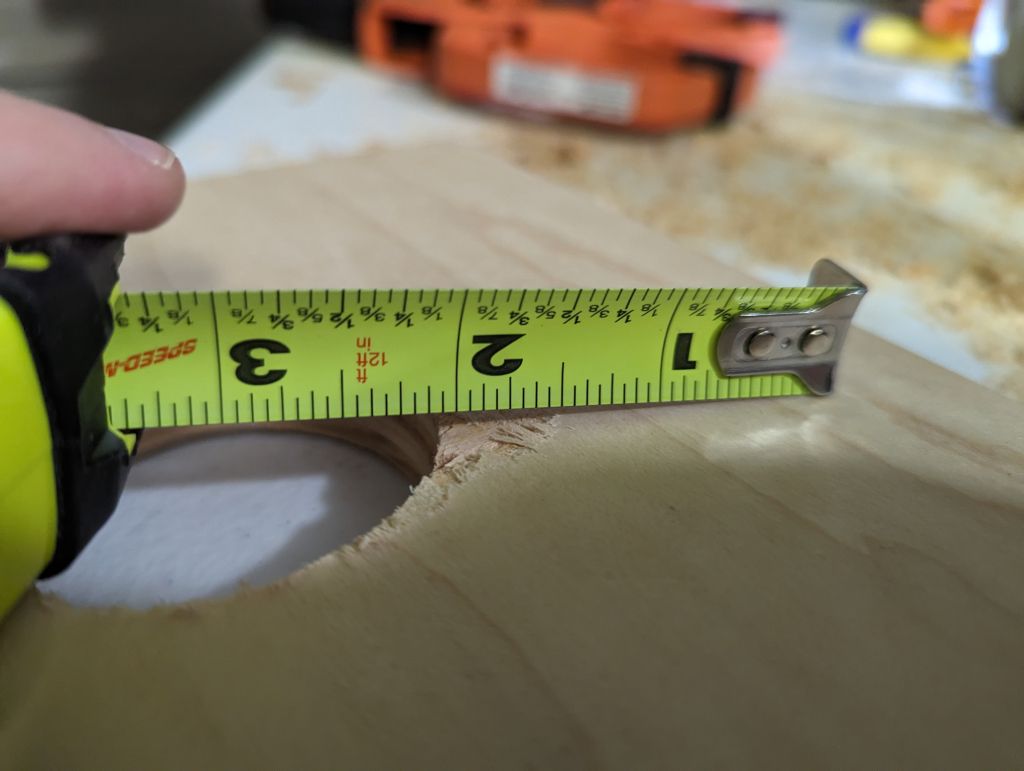
I was originally planning to router the edge of the hole by the same amount on
the top and bottom of the lid. However, with this new scar, I instead decide to
router the edge by much more on the top than on the bottom. After measuring
the size of the scar, I don’t think I’ll be able to router the edge enough to
hide it, but it will at least be less noticeable. I was so careful the whole
time! But that’s okay. I’ll persevere ![]()
 |
|---|
| Measuring the scar on the lid to determine how much to router the edge to hide it as much as possible |
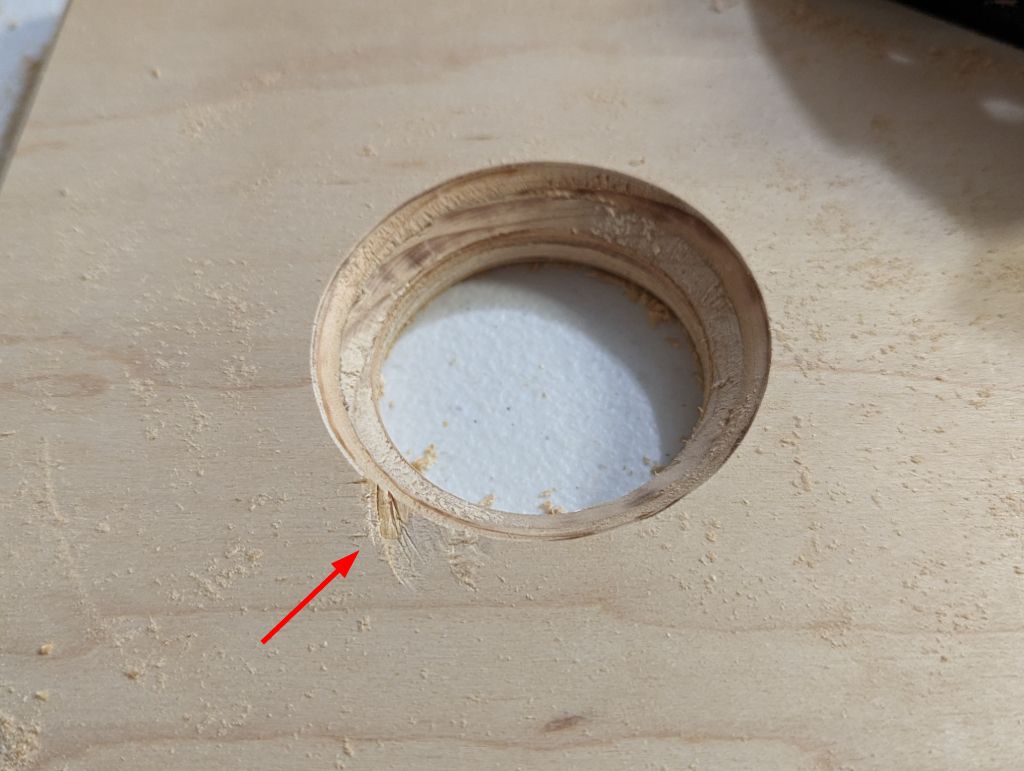
I get a chamfer bit in my router and set it to be pretty deep. A chamfer is just a straight line, but on an angle. By doing it this way, I’ll be able to hide as much of the scar as possible. And it works! Mostly. I then use a small roundover bit on the bottom of the lid to make it look and feel nice and smooth.
 |
|---|
| Routing the handle hole, with some of the scar still showing |
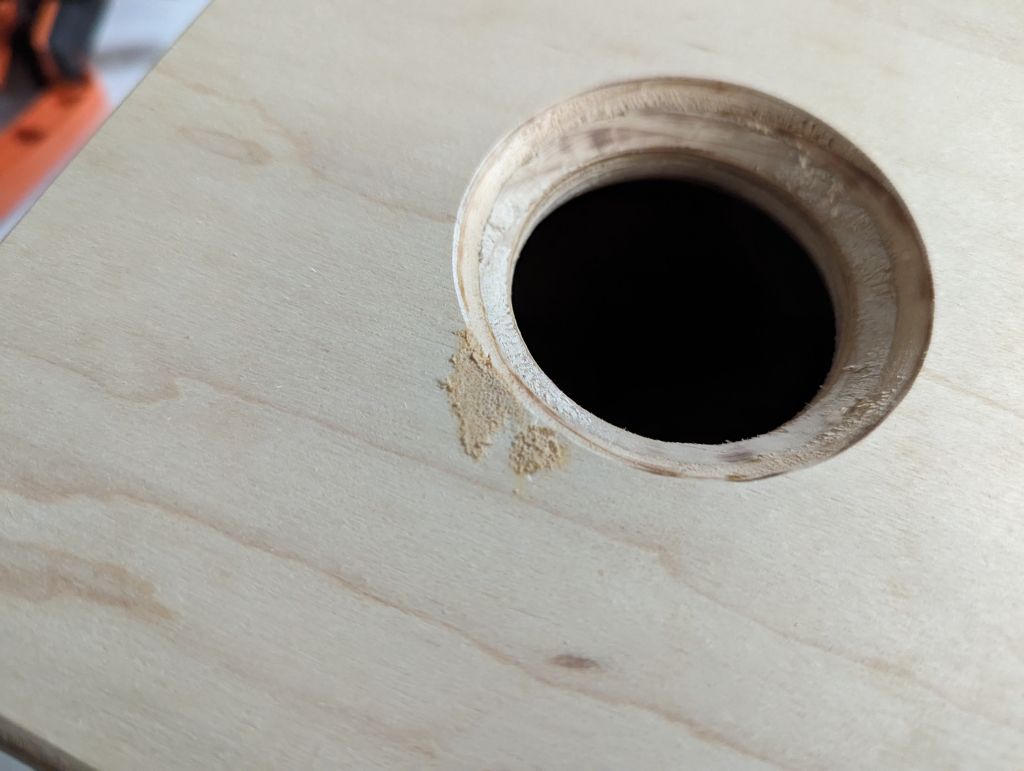
For the scarring that is still showing, I use some wood filler to fill in the
scar. I’ll sand it down before I apply finish to the box. The scar will forever
be a different color than the rest of the box, but I’m hoping it will look a bit
like some rogue grain. And I love rogue grain in wood ![]()
 |
|---|
| Filling in the scar with wood filler |
Rounding the Edges
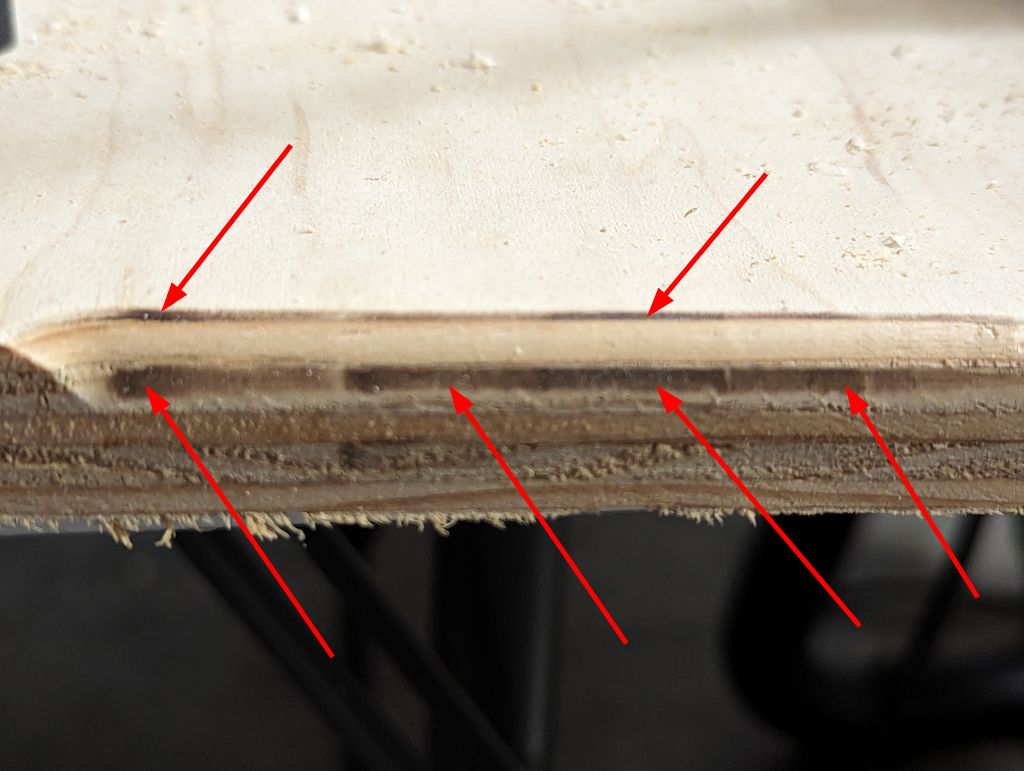
This is where I’ll finally be able to see if my vision is a good one. I planned the radius size of every roundover to be the same as the plywood thickness, and then the rabbets’ depth to be exactly half of that. Why? Because I decided early on in the design to embrace the edges of the plywood instead of trying to hide them. I will make the multiple plywood layers you’ll be able to see a feature of the box. And these layers should end at exactly where the edge lines on each side are, hiding these lines and making it look like the layers are supposed to be there.
At least, that’s the plan ![]()
I grasp my full-size router and turn it on to get a feel of it. After all, it has been over 15 years since I had even held one! I plan on testing it out on some scrap wood first, but I want to get a feel for it before I do that. I turn it on and…
WHOOOOOOSH! ![]()
I immediately flip off the switch.
Wow.
That is a lot of power.
You really need to have a good hold on this thing. It almost flew out of my hand from all the torque! And the amount of air being pushed out from the cutter onto my hands is incredible. After all, my hands are literally only a few inches away. Hmm… I don’t know how safe I feel free-handing this behemoth onto something so small like this box—it won’t be very stable, and I’m not very skilled with it yet. I think I’m going to break my rule and get a new tool for safety’s sake.
![]()
![]()
![]()
I’m back from Lowe’s with a new tool! I got a small handheld router that I can hold with one hand and will also be much more stable on this small box’s surface. My fingers are still very close to the spinning-death-part, but it is immensely more controllable now, so I feel much safer. I forgot to take a picture of it, but you’ll see it in the background of some photos below.
I test out the radius on a scrap piece, and I learn I need to have the router speed on the highest setting for my small bit and cutting softwood, and I need to also move the router MUCH faster along the wood to avoid scorching.
 |
|---|
| Testing the router on a scrap piece, with undesired scorching |
I’ll try again on another piece using what I’ve learned.
 |
|---|
| Testing the router on a scrap piece, with no scorching |
Alright, time to do the real thing ![]()
I clamp the box to my table and begin routing the edges. It’s hard to consistently apply what I’ve learned about the speed I should be moving the router, but I do my best and with minimal scorching. Each time I get to a clamp, I just go around it for now, then I remove the clamps, turn the box, re-clamp, and finish routing that side.
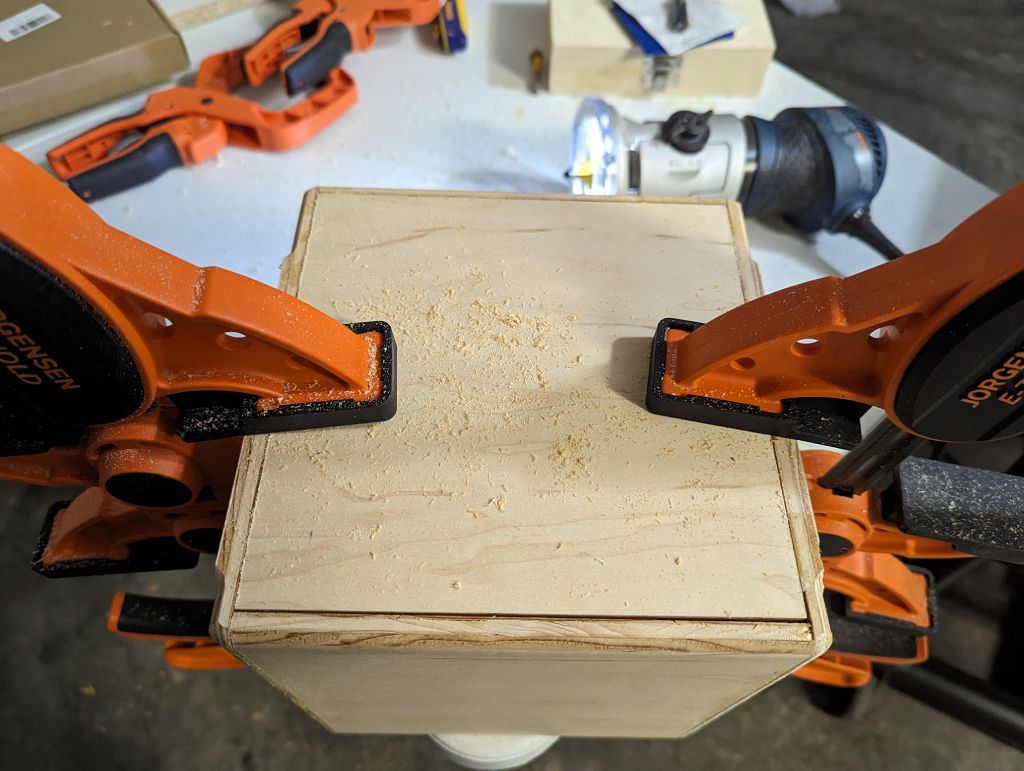 |
|---|
| Routing the edges of the box, with my new router visible in the background |
Doing the top is a bit tricky since it’s not glued to anything. So, I get it lined up and clamped to the table, then I route the edges. Before I release these clamps to turn the box and re-clamp, I tape the lid to the box so that there won’t be any misalignment. My goal is to have the radius on the lid match up perfectly on each side of the box, so I need to make sure the lid doesn’t move at all until I’m done routing.
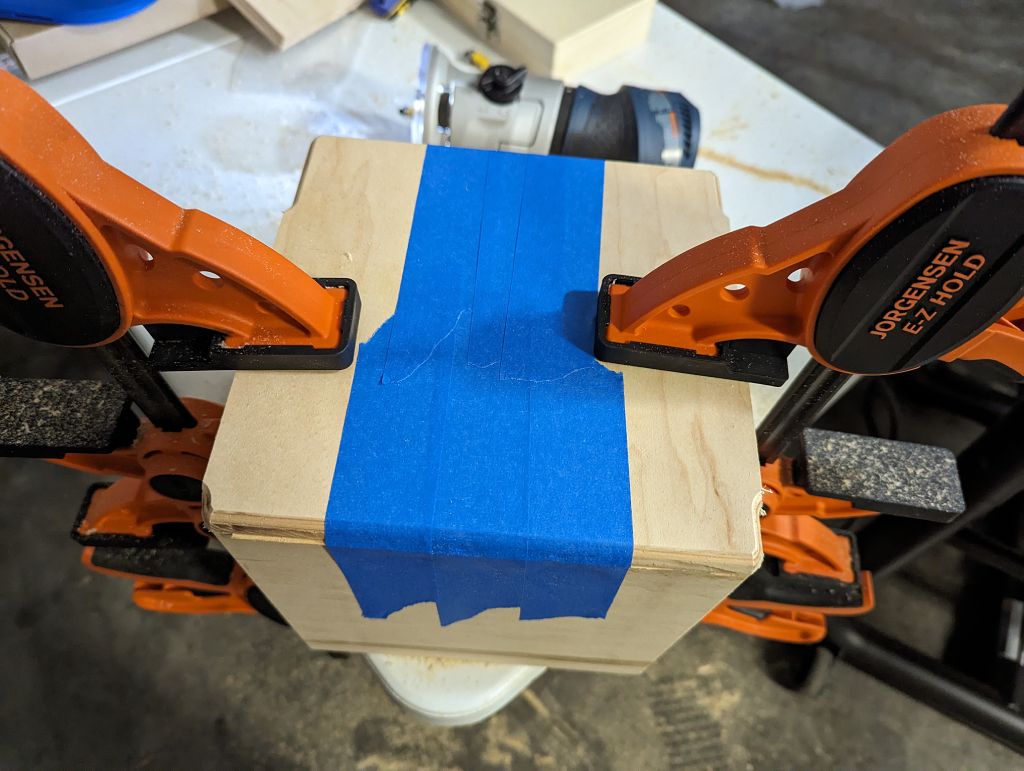 |
|---|
| Routing the edges of the lid, with the lid taped to the box to prevent misalignment |
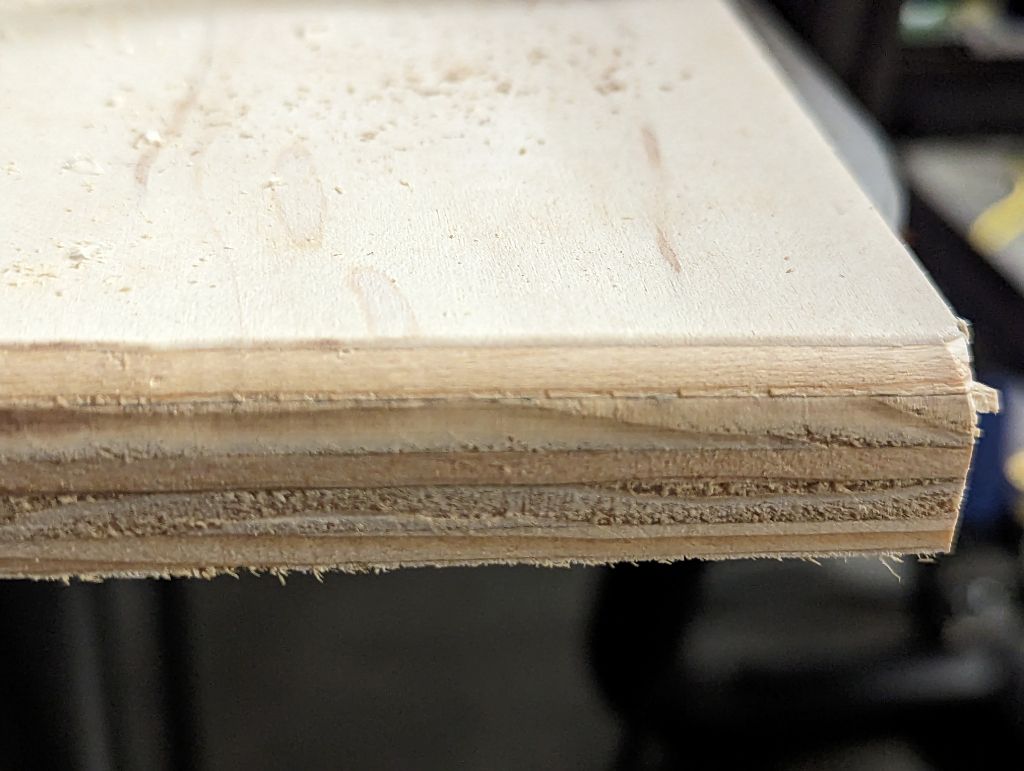
I’m done routing the edges! And with all my fingers intact ![]()
 Assembly
I’m very proud of how this project looks so far!
 |
|---|
| Dry assembly of the box with the lid, before applying finish to the outside and fabric to the inside |
It is my first woodworking project in a very long time, and despite there being
objective issues with the look of the box, it was never going to be perfect
anyway! But it’s mine. And I’m very happy with it and proud of what I’ve done so
far ![]()
I just keep sitting here, looking at it, holding it, feeling how solid it is,
how smooth it is, and smiling. I’m so happy to be back in the shop
![]()
 Next Time!
I’ll continue this build in the next article, where I’ll be applying the finish
to the outside. Only applying the fabric will be left in the article after that
![]()
![]() Pixel
Pixel