(The following took place on the week of September 12, 2023)
Continuing from my last article here, I’ll discuss the design I had settled on, then we’ll get to building!
 Design
 |
|---|
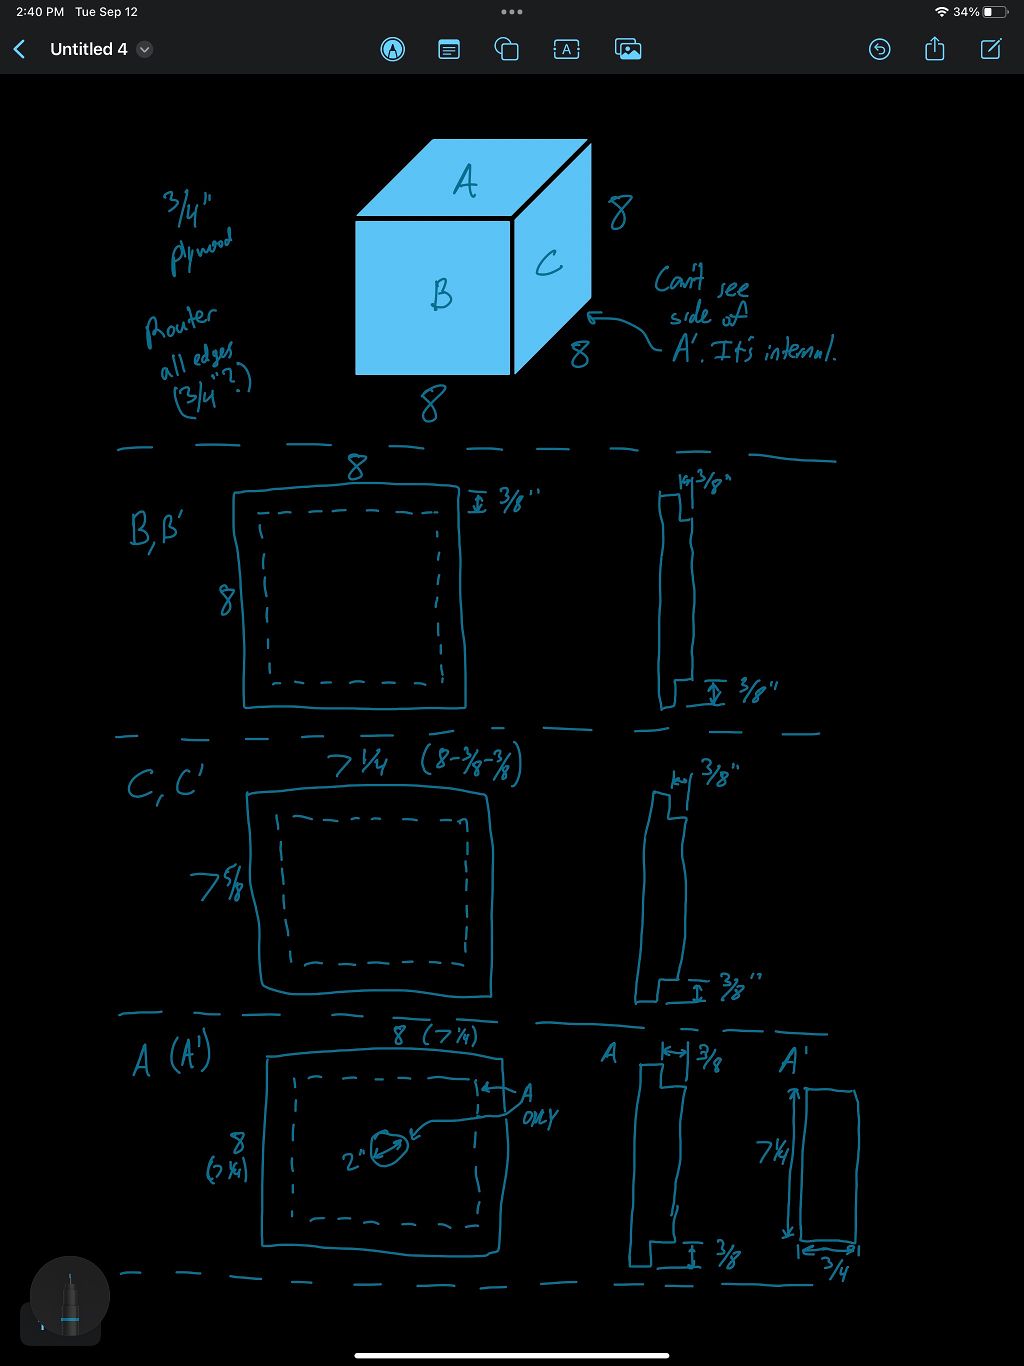
| Initial design for the hair bow box |
The first thing I want to call out is the hole in the lid, which will have its edges sloped into the opening of the box for two reasons:
- It will act as a comfortable two-finger handle to lift off the lid.
- It will allow hair bows to be placed into the box without needing to lift the lid.
Also, all the edges will have a 3/4” (19mm) radius. This will not only look nice
with the 3/4” plywood, but will also make the box more comfortable to handle and
not risk scratching my wife’s ![]() nightstand it will be going on.
nightstand it will be going on.
The height of the box will be twice as much as currently needed to account for:
- She’ll be able to fit more hair bows in the future.
- She’ll have room to dig into the pile with her hand when picking out a hair bow and none spill out.
While not pictured, I’ll also want to apply some sort of finish to the box, and
also some sort of fabric to the inside. The fabric will prevent the hair bows
from getting scratched by the plywood and make it look like a more finished
product such as a jewelry box. I’ll figure that out as I go so that I can go
ahead and get started ![]()
 Building
The time of putting pen to iPad is over. Time to do something!
I’ll begin by cutting out all the pieces to size, then I’ll cut the grooves in the ends of the pieces so that they’ll all fit together.
 Cutting
 |
|---|
| My first cuts in around 15 years! |
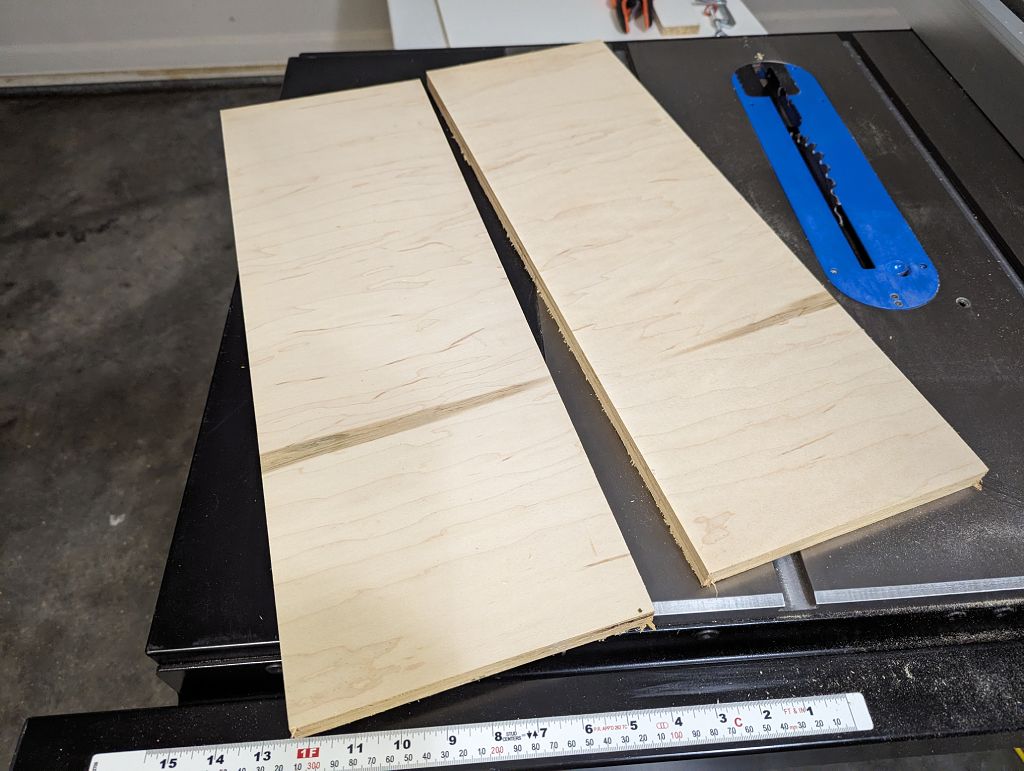
First of all, let me say that it is thrilling to finally be putting metal to
wood again! ![]() It is also a bit nerve-wracking as I am again
getting used to the feeling of air hitting my hand from a spinning blade that
can rapidly disassemble my hand
It is also a bit nerve-wracking as I am again
getting used to the feeling of air hitting my hand from a spinning blade that
can rapidly disassemble my hand ![]() But it is a very empowering thing
to be able to make something with your own hands, and I’m glad to be back at it.
But it is a very empowering thing
to be able to make something with your own hands, and I’m glad to be back at it.
Anyway, as I’m cutting all 6 sides of the box, I notice this really cool accent
of brown through the surface of the plywood, near the bottom of the picture
above. I realize this would make a nice flourish to the final product if I can
keep that accent on the outside of the box and make it look continuous around
two of the sides. It would also serve as a nice additional challenge for me to
figure out how to do that. Let’s see how that goes… possible foreshadowing??
I hope not. ![]()
Now, due to how some of the sides will have to fit into each other, each piece
is not exactly the same size. This means it is very important for me to keep
track of which piece is which. And I should definitely NOT mess that up, because
I would then have to recut the piece, and I would have to do that for every
piece that was cut after that one. ![]()
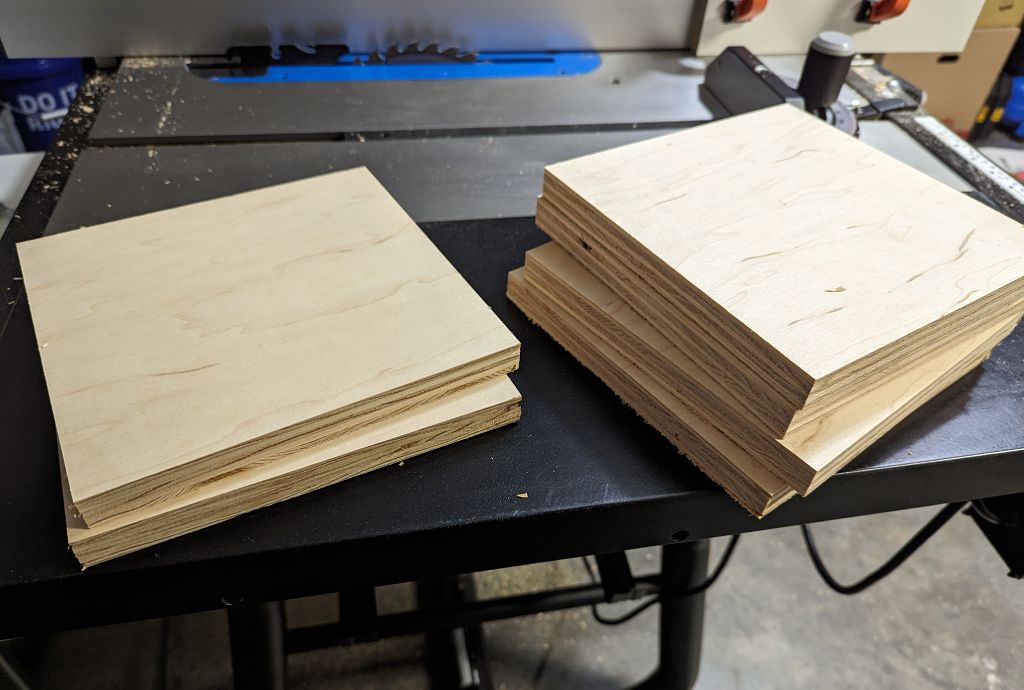
Well… it started off good! My 8-inch (20cm) cuts are exact:
 |
|---|
| Setup blocks for 8-inch (20cm) cuts |
 |
|---|
| Exact 8-inch (20cm) pieces |
However, while I am celebrating the success of making the shorter cuts…I
discover that I did those cuts on the wrong pieces. And then when I try to fix
it, I make it too much shorter AND on the wrong piece!! ![]() Someone is more
out of practice than initially assumed
Someone is more
out of practice than initially assumed ![]()
It’s fine! I can adapt, and the box will be a little smaller than originally planned. The box was going to be twice as tall as it needed to be anyway, so I have the margin. I cut the other pieces to match—doing it right this time—and I am very pleased to see everything cut to the right size and in a pile on my table saw.
 |
|---|
| Pieces cut to the “correct” size |
 Groovy
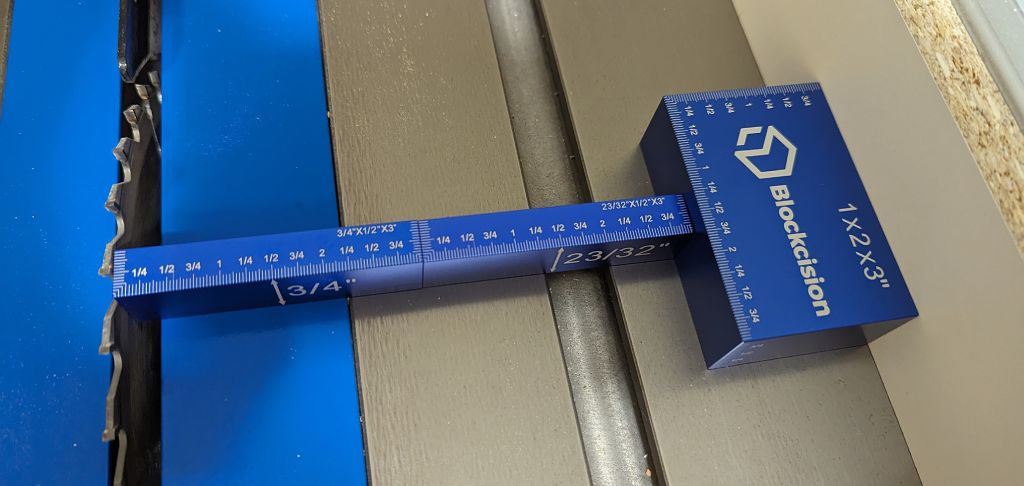
All the pieces need grooves on their ends, and these grooves are called “rabbets” (not rabbits), but not all pieces need the same rabbets. For this, I’m going to use what is called a “dado stack” on my table saw, which is a fancy way of saying I’m going to stack multiple blades on my table saw to make a wider cut. This will allow me to make the rabbets in one pass, instead of having to make multiple passes with a single thin blade. It will be roughly 3/8” (9.5mm) wide, and 3/8” deep. You can see the depth measured here:
 |
|---|
| Depth measurement for rabbets with full dado stack installed |
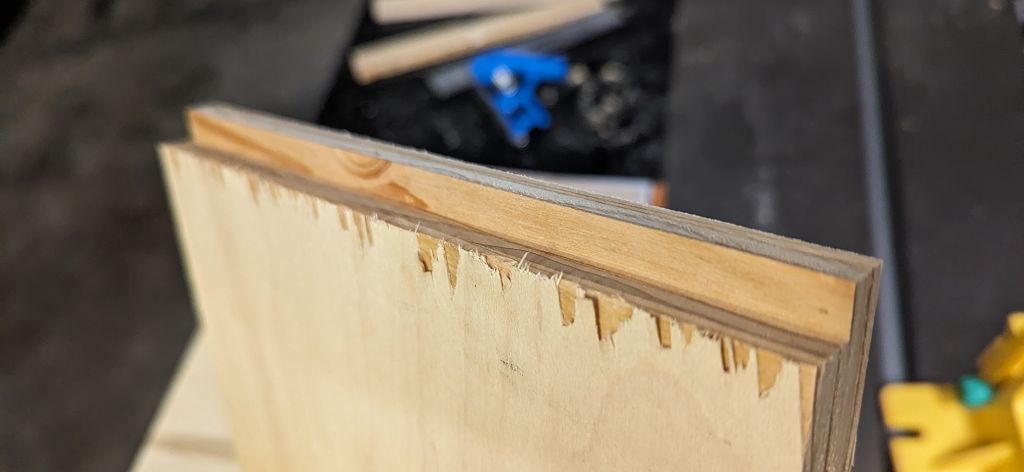
However, as I’m making my first cut, this happens: ![]()
 |
|---|
| Severe splintering on the side |
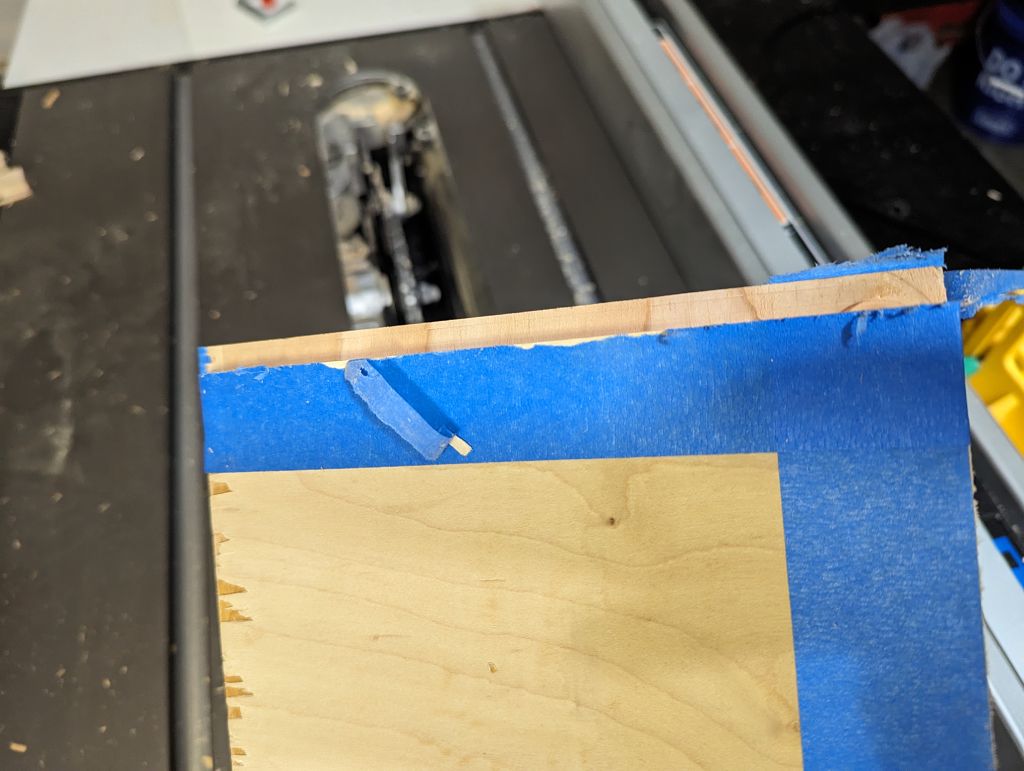
This is not good! Thankfully, I have noticed it after only the first piece, and this is on the inside of the box where I’m planning on putting some fabric anyway. I’ll apply blue tape to the rest before cutting, and that will prevent most of the splintering.
 |
|---|
| Blue tape applied to prevent most splintering on this cut |
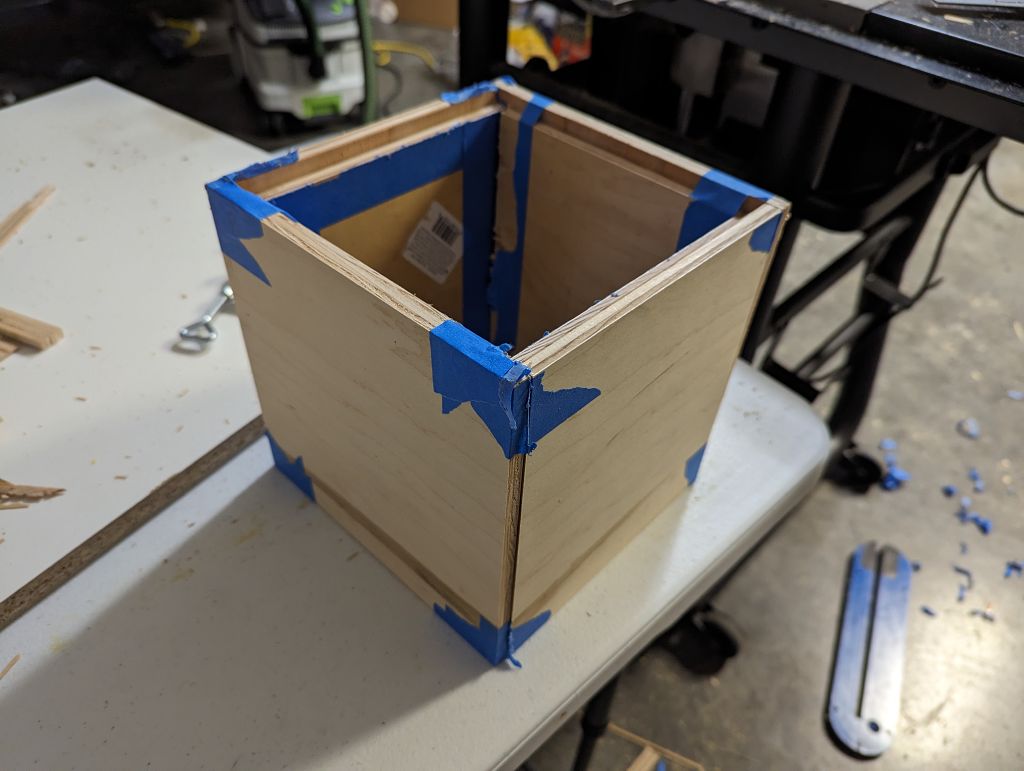
After cutting all the pieces and before removing the blue tape, I do a quick dry
fit to see if I need to make any adjustments to my rabbets. Not only do I see
that it all fits well together, but I am immediately reminded of the happiness I
get from seeing the progress of building something ![]() It’s
not much yet, but I can see the potential!
It’s
not much yet, but I can see the potential!
 |
|---|
| Successful dry fit of the box, with brown accent lined up |
 Quick Note on Safety
After I did my cutting, I noticed an interesting little notch on my push block:
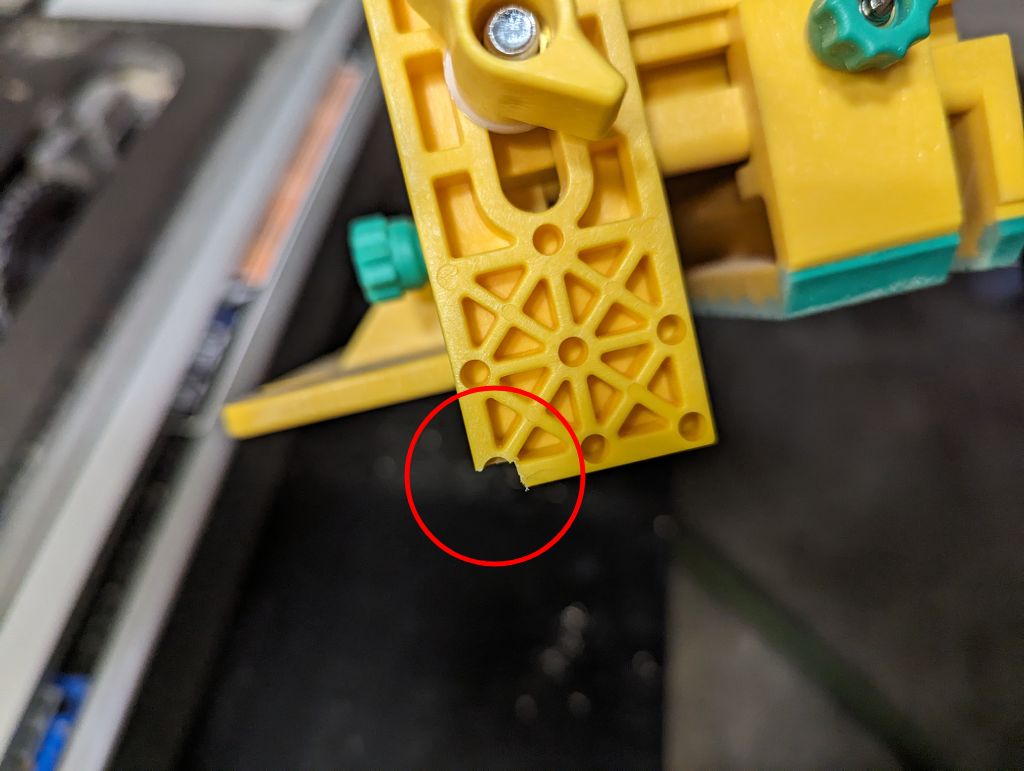 |
|---|
| Unexpected notch on push block from cutting the rabbets |
Now, this part of my push block is meant to be sacrificial, which means I expect
to destroy it over time by cutting through it. However, what is scary about this
is that I did not mean to hit this with my blade here! In fact, I’m unsure how I
even got close enough to my blade for this to happen. That means if I were NOT
using my push block, my hand would have no longer been completely intact during
one of my cuts! ![]()
But, this is a good thing! You always want to keep your hand as far away from
your blade as possible, and this is proof of why you should always use a push
block or push stick. That means my safety process is doing its job ![]() And
this is a good example of how quick these machines can make you have a very bad
day if you’re not following good safety practices. Never get complacent or lazy
and not use your safety equipment! If you’re starting to get lax, it’s time to
take a break or come back to it tomorrow.
And
this is a good example of how quick these machines can make you have a very bad
day if you’re not following good safety practices. Never get complacent or lazy
and not use your safety equipment! If you’re starting to get lax, it’s time to
take a break or come back to it tomorrow.
And I will, of course, continue to get better about knowing where my hands are
in relation to the blade, since the best safety is to not have to rely on your
safety equipment to save you from yourself ![]()
 Next Time!
I’ll continue this build in the next article, where I’ll be gluing together the box, using a router for the first time since high school, and figuring out the final fabric and finish on the box. See you then!
![]() Pixel
Pixel